DVD-quality lessons (including tabs/sheet music) available for immediate viewing on any device.
Take your playing to the next level with the help of a local or online banjo teacher.
Weekly newsletter includes free lessons, favorite member content, banjo news and more.
Premier Sponsors


|
Please note this is an archived topic, so it is locked and unable to be replied to. You may, however, start a new topic and refer to this topic with a link: http://www.banjohangout.org/archive/251124/63
Page: 1 2 3 4 5 6 7 8 9 10 11 12 13 14 15 16 17 18 19 20 21 22 23 24 25 26 27 28 29 30 31 32 33 34 35 36 37 38 39 40 41 42 43 44 45 46 47 48 49 50 51 52 53 54 55 56 57 58 59 60 61 62 63 64 65 66 67 68 69 70 71 72 73 74 75 76 77 78 79 80 81 82 83 84 85 86 87 88 89 90 91 92 93 94 95 96
Nels - Posted - 01/09/2015: 02:08:13
Wow...how many 'spurlatives are left for me to use!! ..... and to think there will be a banjo attached to that bracket band!!!
Dan Knowles - Posted - 01/09/2015: 06:03:19
Doug, David, John, Dave, Paul & Nels,
Thanks so much. It's not complete yet but I should finish this morning.
Bill,
Feel free to use this design if you'd like. The trick (if there is a trick) is to make a half pattern, lay out one side, flip the pattern and lay out the other. With all of your tooling and just a bit of practice you could quickly out do my feeble effort. I'll try and make you a quick video on this technique.
Tyler,
I'm glad that you approve. After all you are who I am creating this for. I really appreciate all the freedom you've given me in this project.
Dan Knowles - Posted - 01/09/2015: 06:37:32
ARTWORK VIDEO
For some time I have been encouraged by several BHO members to make some sort of presentation of my artwork (painting and sculpture). Well I have finally put together a little video of a few of my paintings and other work. It is called WINGS and I hope you enjoy it.
youtube.com/watch?v=a-RAtHMHAVI

Dave1climber - Posted - 01/09/2015: 07:21:43
Dan
Great video. As I was watching, I kept thinking that it would be better if the time on each image was just a bit longer. Then at the end I realized, showman that you are, that you were employing the technique of " always leave them wanting more". Well done! 

guitarman8491 - Posted - 01/09/2015: 07:36:18
Dan..your art work is amazing and shows the unlimited depth of your creativity. I really enjoyed the presentation and the soundtrack was wonderful...three cheers!
rubicon - Posted - 01/09/2015: 09:09:09
The video was great stuff . I know your busy Dan any chance you have a collaboration of the instruments you have created?
Dan Knowles - Posted - 01/09/2015: 19:20:38
Dave, Doug & Rubicon,
Thanks, I'm glad you enjoyed the video!
Rubicon,
Most all of my instruments are collaborations between whoever I'm building for and me. Sometimes like here with Tyler's I'm given a free hand. And it is fun for me to have this free hand when I really know the person I'm building for.
Dan Knowles - Posted - 01/10/2015: 17:31:02
SATURDAY
Saturday already. My goodness but how this week has flown by.
Today, of course, was instrument building teaching day ( was that little statement convoluted or what!) and a bit after 8:30 Zeb and Kevin came wondering in rearin' and ready to make some wood chips!
First though, I had to show off Tyler's engraved hardware...

Then Kevin showed off a Les Paul Junior electric guitar he and a friend are building at his home shop....

Then it was off to work.
Zeb's guitar will have laminated sides and back. This really increases sustain over conventional solid wood construction.
Here we are gluing cleats on the side gluing caul.

After his sides were all bent up the Paulownia and Douglas fir were glued and put into the gluing form. One more side set to go....

Here Kevin pilot drills for a screw to hold his guitar in the binding routing jig...

More Soon!
Dan Knowles - Posted - 01/12/2015: 05:21:22
SUNDAY
This afternoon Eddie Coffey (my bass playing partner in crime) came down with his upright bass. We had been long planning this visit. The adjustable bridge on his bass had started getting the ole base curl in its top part. So it was time for bridge replacement.
What this involves is first carving the feet until they are rather close, then sand fitting them to the top and then shaping the rest of the bridge.
Years ago I made this jig which holds the bridge in position as it is pushed back and forth across a piece of sandpaper taped to the bass top.
Today when I go into the shop I'll try and remember to shoot a photo of this tool, others might find it useful especially in fitting bridges to carved banjo tops....
As I was fitting the bass bridge Eddie strung up and entertained me on this great old Regal guitar. It is an interesting one in that the top is solid and the back and sides are Brazilian rosewood. All in all a tone monster for a slide player!

Eddie checking out the set up (after the stings were on, of course!). I measured and tried to set the bass up exactly as it had been before. Perhaps we'll get another eight years out of this bridge!

More soon!
Dan Knowles - Posted - 01/12/2015: 18:28:15
MONDAY
In yesterday's post I told you that I would try to make a photo of my jig which holds a bass bridge for shaping. Well this sort of led to a theme for tonights post. Favorite tools that is. Specifically in this post there will be three.
First though this one.
#1: This jig holds the bridge in a consistent position and angle. The wheel rolls forth and back allowing one to sand the feet of a bass bridge to match the top.
Here is another. #2: I had this little strip of foam insolation left from a insolation job (here in the shop). First I score it with a scalpel (#3, I guess this makes 4 tools total!), then snap off as perfect sanding block a luthier could ever ask for.


#4, my gravers vice. This tool allows me to clamp work into the vice and then spin it to almost any angle. This makes engraving so much easier!

Shoot fire! Here is #5 & 6...
#5 Magnifying light.
Normally I just use this light to brighten things on the bench bu today I used it for its intended purpose. Ishot this and the next photo so ou could see what I see when I'm engraving.
#6: graver.
I've a bunch of different sizes and shapes of these things. This particular one has a knife edge. It's great for establishing lines...

After a bit of engraving, tool #7: a black permanent marker comes into play filling in the scratches. The top mark is wiped off with a paper towel that is damp with alcohol leaving ink in the scratches...

By the way here is Tyler's shipwreck after a few hours of engraving...

More Soon!
Paul Meredith - Posted - 01/12/2015: 19:41:15
Fantastic inlay/engraving Dan. I especially like the reflections - marvelous!
guitarman8491 - Posted - 01/14/2015: 09:03:23
That ship wreck looks great..gonna be one heck of a FB! Nice work!!
60spicker - Posted - 01/14/2015: 09:16:53
Gotta ask. So are you engraving somebody's leopard-skin-themed bowling ball here?
Dan Knowles - Posted - 01/14/2015: 18:21:09
Paul, Nels, Canaan & Doug,
Thanks so much I'm glad that you like it.
Terry,
There is a long story that goes with that vice... Being that my fingers are tired I'll give you the short version.
Several years ago I went and visited William Moore (a master engraver) and I saw his engraving vice and wanted one. I couldn't justify the $600 or so cost. So I started thinking about how I could go about making one.
Well, I got to looking around the shop and figured that I had everything to make this work except a bowling ball and a leather coat.
So I went down to a local thrift store. I walked up to the lady behind the counter.
"Do you have any old bowling balls?" I asked.
"Ya, a bunch."
"Well I'd like the heaviest one you've got!"
So we went back to the bowling balls. She had 6, 8 or so. The heaviest one was in a beautiful leatherette case and was a magnificent leopard print. So far so good.
"Do you have any leather jackets?" I asked.
"Yes, over here".
"Good, I need one with cigarette burns and such."
You could tell she was beginning to think me odd.
We found a leather jacket (with cigarette burns) so I went to counter to pay. This was when I really made my reputation with this lady.
"I don't need this bowling ball case", I said.
"You don't need the case?"
"No mam, sell it with one of the other balls".
She just shook her head and checked me out.
That leather jacket became the rest to hold the vice in place. Once it was glued and stapled to an old banjo rim. The bowling ball got the drill press vice bolted to it and I was in business.
Expenditure? Maybe 20 bucks.
Well that's my story and I'm stickin' to it.
Dan Knowles - Posted - 01/14/2015: 18:46:18
WEDNESDAY
Do you notice the new avatar (how bout that! Am I gittin' smart about this enter-net stuff 'er what!)?
I figured it was a time for a bit of a change.
So there it is.
Hope ya like it!
I pretty well finished up the engraving of Tyler's fingerboard today...
Perhaps tomorrow I'll get the peghead done. Then it will be full speed ahead, sanding and slapping the thing together.
Oh ya, I did forget a little thing like fretting.
Perhaps Tyler won't miss 'um...

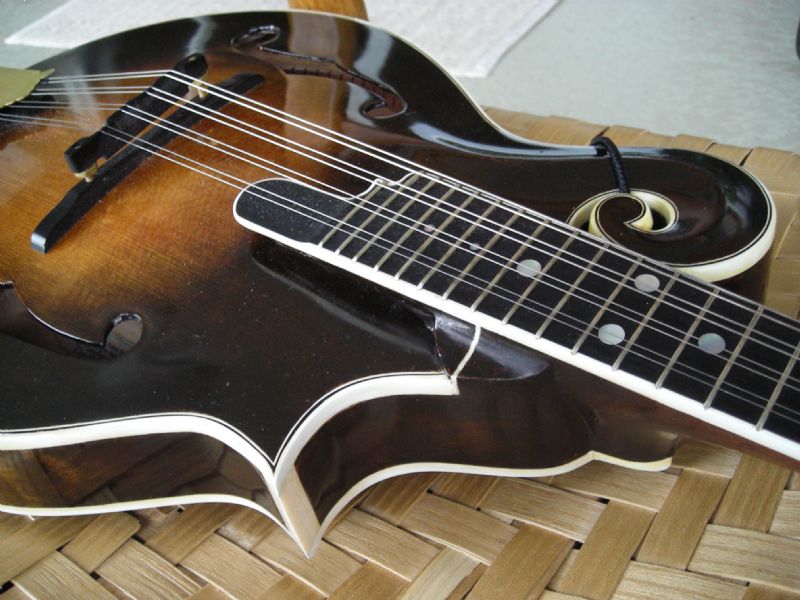
I've a mandolin which I've been on for a while. Today I started routing for binding. It will be a two step ledge. Purfling then binding.
I started out with my new cordless Dremel. I found out that this is not the tool for this job. It was way too heavy to balance correctly and the battery died shortly after starting the project...
So I went back to using my corded version. It cut great.
Each pass requires a great deal of hand work fitting the curls and points.
Here I use a scalpel to cut score an edge on the curl...

A chisel follows the knife opening up the cut. Unfortunately I didn't get any photos of the chisel so here again is the knife cuttin' some more...

Routing the second ledge...

The mandolin after working on it...


MORE VERI SOON!
60spicker - Posted - 01/15/2015: 09:40:39
Dan, thanks for the bowling ball story. It's utterly hilarious and of the ilk "You can't make this stuff up." I'm still smiling and wondering about the person with the leopard print bowling ball and what it must have been like when she (I'm making an assumption here, of course) emptied her case and that thing popped out. The whole bowling lane must've been in stitches. Lawd, lawd, that's funny. Here's some pins I found to go with it
. 
Dan Knowles - Posted - 01/16/2015: 05:00:09
Rubicon,
Thanks!
Terry,
I love it! That bowling pin is too much! Where in the world did you find this?
Dan Knowles - Posted - 01/16/2015: 05:16:44
THURSDAY'S ENGRAVING
Friday morning already. Tonight we drive over to Clarksville to pick up three of of our grandsons. That will be fun!
Meanwhile here is a quick photo update on Tyler's engraving.
Although you cant really see it here, I am marking in the locations of the engraving with a sharpie...

The first cuts...

More detail & shading...

Finished with ink filling the scratches. The marks will be clearer once the gravers crayon fills them...

More soon!
60spicker - Posted - 01/16/2015: 07:48:28
Dan, just search "leopard print bowling ball" (sans quotation marks) with Google Images. Ha!
rubicon - Posted - 01/17/2015: 00:54:46
The peghead came out really nice cant wait to see ot assembled curly maple cocobolo engraving sounds like a good nanjo recipe !
Dan Knowles - Posted - 01/17/2015: 04:34:27
Terry,
Thanks, I will!
Curt,
Can she engrave?
Rubicon,
I'm with you there. I'll probably do that on Monday.
jbalch - Posted - 01/17/2015: 18:49:52
Dan: I spoke with Tyler Andal last night about his new banjo build. He seems very excited about it (Duh...). I can't wait to hear it in his talented hands!
Dan Knowles - Posted - 01/18/2015: 14:54:28
John,
I am quite excited by his banjo build. But I am even more excited by his amazing musicianship and wonderful personality.
Dan Knowles - Posted - 01/18/2015: 15:32:23
SATURDAY
What a day yesterday was.
It started out much like Saturday's usually do. In to the shop around 8. At 8:30 Kevin showed up for the class and Zeb soon followed.
Zeb was quite productive. Bending sides and linings. Laminating sides and linings. Here he is using a box plane to true up one of his already laminated sides.

Kevin on the other hand was quite productive too... got ya didn't I. I bet you thought I'd say that he didn't get anything done. But he did. He routed a channel for his multi layered binding and then cleaned up all of the fuzz with knives, files and sandpaper.
This is going to be a very pretty instrument, zebrawood back and sides, with ebony binding and black-white-black purfling.
After class I went home and had lunch. After lunch I grabbed ahold of my brushes to start painting on the PUPPET MASTER.
Then I heard a scream from outside. My grandson Braden had had a bike wreak. He came limping up to the porch, the wounded warrior, sat down on the steps, pulled up his britches leg and the blood was poring down. I got a wet rag to staunch the flow and Keaton (Braden's twin brother) ran to get their mom. Amy is a nurse and one look and we were off to the hospital for stitches.
Now a small town like Paris is a great place to live. But need stitches Saturday afternoon when all the Doctors offices are closed, nobody around and...
So the emergency room was the only choice.
We arrived there at 2:15 PM.
Checked in.
The waiting room was full. The waiting room stayed full. Ambulances came. Heart attacks, strokes, bad colds...
8:30 PM in a room other than the waiting room.
The Doctor (and a good one run crazy this day) came in and said we'll get you sowed up and out of here real quick.
In came another ambulance...
I promised Braden a chocolate shake at Steak & Shake when we were finished.
10:15 (and five stitches later) we left the hospital. Stake and Shake was already closed. Burger King was open. Braden & his mom were both hungry.
We stopped, ate and went home.
11:30 in bed.
Today I painted some. Here is what the PUPPET MASTER looks like today...

More Soon!
guitarman8491 - Posted - 01/18/2015: 16:50:00
Well I am happy that your grandson was mended. Visits to the hospital are always stressful and especially when they are your grand kids. When they are still up for a shake and steak at 11pm ya know things are moving in the right direction. Hope the rest of your weekend goes smooth. Wife and I just got back from spending the weekend with our 3 grandsons, 1 month, 4 and 7. what a hoot..I came home with a list of things they want grandpa to make for there model trains.
Dave1climber - Posted - 01/18/2015: 21:04:24
Dan
Sounds like it was almost too much adventure for one person. Its all an adventure the good and not so good. I an happy to hear that it wasn't too serious.
Your PUPPET MASTER is looking good.
DEmery - Posted - 01/20/2015: 03:10:13
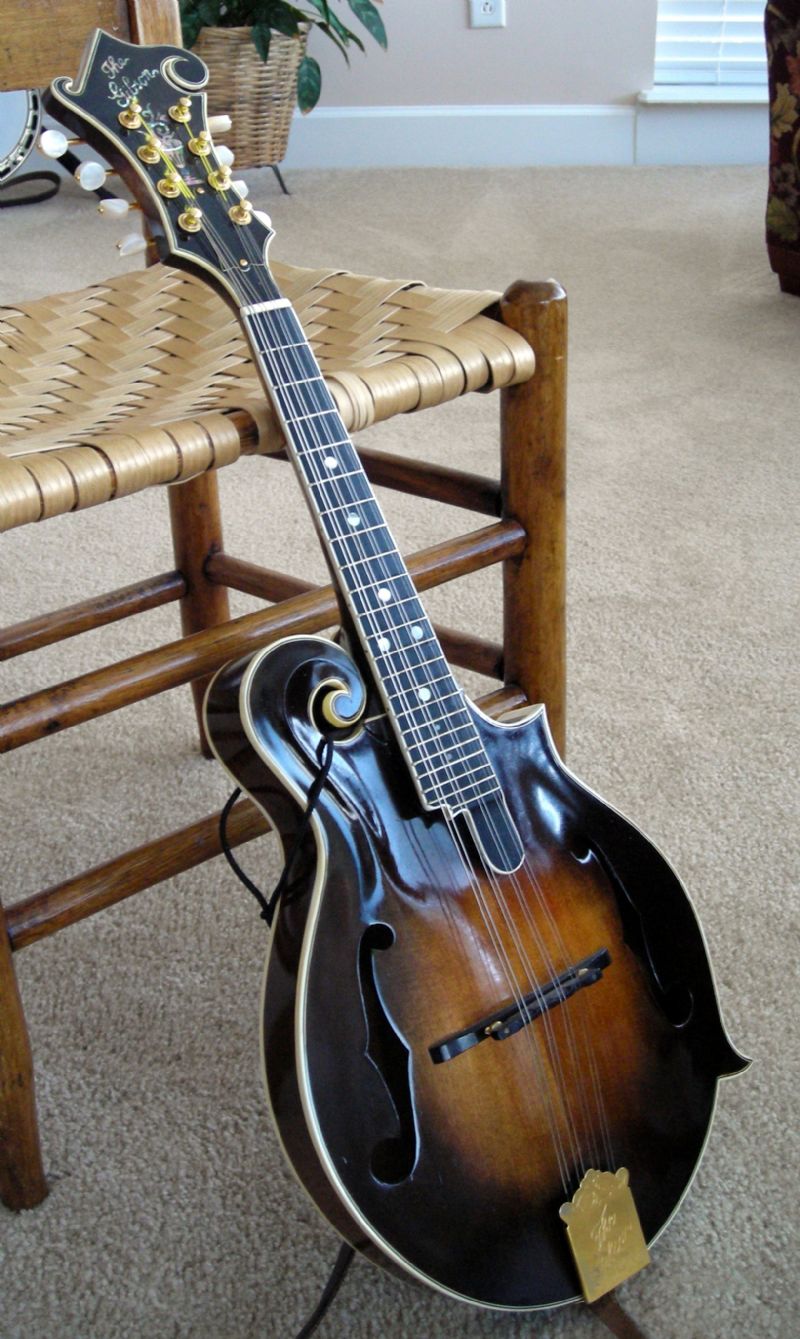
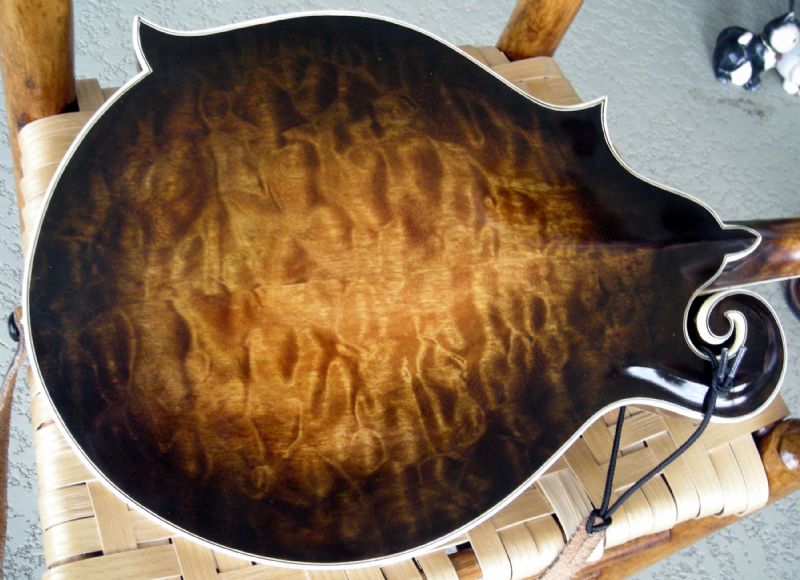
Dan we both recall you totally rebuilding the 1975 Master Model Gibson I picked up on a trade in New York a few years ago. It had been beaten up pretty good and those mandolins weren't very musical from that period with Gibson - but it turned out both beautiful and responsive after you were finished. I see you are building a mandolin. Looks really nice. The one you rebuilt for me is in the hands of a player up in Virginia these days. That was a fun project.
Dan Knowles - Posted - 01/21/2015: 06:10:43
Doug,
Yes grandkids are great! It's too bad that when we have our first crack at parenting it isn't grandkids first! We will be Skyping tonight with some of ours!
Dave,
Thanks! The PUPPET MASTER has become the master of most of my evenings. Layering n dots is slow going (as far a coverage) but therapeutic.
David,
Yep I remember that mandolin. It has some of the prettiest quilt figure maple I've ever seen. Many of those Gibson mandolins of that era used the quilt instead of the flame figure. I'm not sure why except the quilt is usually more difficult to find.
You probably have the largest Knowles instrument collection on the planet. We need to do another one for you sometime just so nobody else catches up! (how was that for a sales spiel?)
Edited by - Dan Knowles on 01/21/2015 06:12:07
Dan Knowles - Posted - 01/22/2015: 05:11:16
WEDNESDAY
What a busy first half of the week this has been!
I can hardly believe that this is Thursday morning already...
I've been teaching, working on instruments, tax's, orders, Skyping with grandkids and in general trying to keep our little ship of state in the correct channel.
I'm so glad that my wife Debbie is great with bookkeeping (especially this time of year).
I've several guitars to build (2-000 size and 1- 00 size) and so today I started preparing the spruce brace wood for the tops. Soon I'll mill the back and side wood. One will be Quartered white oak, one figured sapele and the next a mixture of maple, walnut with a top of cedar & spruce.
I have had this beautiful piece of engleman spruce for almost 10 years now so I guess it is time to chaw it up . This is a very straight tight grained, dead on quarter fine piece of wood.
Here I am sawing out pieces slightly over 1/4" thick. These will make up all f the x-braces and tone bars. The shoulder braces will made from some old growth Douglas fir. The extra weight and stiffness adds sustain and clarity to the sound.

Another interesting project today was turning a new wooden co-odernator rod for Tyler's banjo. The base piece is a nicely figured piece of Macassar ebony. After it was basically turned a piece of fossil ivory was glued to the face and turned...

Next a piece of black pearl was glued to this and turned. Turning pearl is hard on tool sharpness. My sharpening stone and I became quite close!

Next a hole was bored for the hardware...

And then parted free...

Next using a drop from the same plank as the neck the remainder of the rod was turned...

And stained with our shop made natural walnut and metal stains...
Here it is off the lathe with a small amount of shellac finish...
More Soon!!!
tylerandal - Posted - 01/22/2015: 07:01:17
Wow! That's super fancy!
I have tried to lathe some pearl before with very little luck. and yeah, so bad on tools! haha. I can't wait to see that bit in person
DEmery - Posted - 01/22/2015: 18:12:15
Dan those turned dowels are really pretty. You going to use any old spruce tops on those guitars? I see you are going to build one with cedar and spruce top. Two different woods on one top? David E.
Dan Knowles - Posted - 01/22/2015: 19:55:04
Tyler,
Glad you like it ... since it's gonna be yerz! More on this in tonights post...
I think (my disclaimer here) if all goes well, it will be ready for you to play at our R. E. Lee Academy for the arts concert in Paris , Saturday February 21! Hot news on that front we will be having a small chamber orchestra join us to perform WINGS that evening. Should be lots of fun.
David,
Thanks. Yes I'll be using these (and half on one) old tops which were milled for Martin around 1959. I will be doing a pick through on Saturday with my students. I've been thinking about attempting a video of this process. I know that it's not banjo but some folks might find it interesting.
rubicon - Posted - 01/22/2015: 20:06:13
Might find it interesting ?that would be an understatement I love this thread I come here at least 3times a day to c what your up to like now its 1100 and here I am waiting for the post and hopefully some pics. This thread is like the best newspaper ever Dan ..
Dan Knowles - Posted - 01/22/2015: 20:28:58
THURSDAY
First out here is one of the most interesting banjo arraignments of CUMBERLAND GAP that I've ever heard. Who's the banjo picker you ask? Tyler Andel all by hiz self! youtube.com/watch?v=U_6LGeTfry...=youtu.be
And while we're at it, a fine new pop/ rock video (with banjo) from my compadre's Anna & Jon Eaton called READY TO FLY. youtube.com/watch?v=Cy-QASlS1j...=youtu.be
What a nice thing to find in my email after coming in from band practice!
On to the part of the day that happened today at the shop.
It was quiet today. No one dropped in for a visit. So I got a lot done. I've been listening to a bunch of pod casts and audio books lately. Today I started listening to a book called THE KITE RUNNER by Afghan /American author Khaled Hosseini. What a moving story. I'm about half way through listening to it.
In the past I shown listening to banjo rims and guitar tops. I like to do this with every part of the instrument that I can get some sound from. Today I went through all of the brace wood that I cut out yesterday and listened. This wood has a nice marimba ring to it.

I fretted the Scarecrow banjo neck today (staining tomorrow). First thing was to remove al of the excess glue that has gathered up in the fret slots. I do this with a heated knife to melt the glue...


There were a couple of spots where the inlay chipped. I figured that a small amount of brass shavings would be just the ticket to fix this and set off the design...

After the glue hardened I trimmed it off...

Soon it is off to installing the frets. First the tang is notched, the fret cut to length, other end notched and set into the fret slot...

The frets over the heel are driven in...

While the others are just set in place and pressed in with the fret press...

Here it is. Tomorrow I'll file and shape the fret ends and start staining the neck.

More Tomorrow!!!
Edited by - Dan Knowles on 01/22/2015 20:30:48
rubicon - Posted - 01/22/2015: 20:51:38
First off you do a great job on the thread reading It Is one of the best parts of everyday for me. That said It is interesting why are the heel frets not put in with the press ??
Dave1climber - Posted - 01/22/2015: 21:03:22
One hundred twenty six pages, average of twenty posts per page, equals two thousand five hundred twenty posts. Still going strong!
Stay tuned, it just keeps getting better.
Kaelri - Posted - 01/22/2015: 21:27:50
All of us here at my house enjoy the daily visits to this thread. I know I always learn something new. And there's always that stuff you throw in that we call the "Wow Factor"! This is way better than boring TV!
Dan Knowles - Posted - 01/23/2015: 06:09:50
Rubicon, Dave & Ellem,
Thanks so much. It's because of folks lik you that I do this!
Rubicon,
The heel is too tall to fit under the press.
jeaton12 - Posted - 01/23/2015: 17:17:45
Dan, thanks for the shout out on the video. Thanks for introducing me to clawhammer banjo. :)
Page: 1 2 3 4 5 6 7 8 9 10 11 12 13 14 15 16 17 18 19 20 21 22 23 24 25 26 27 28 29 30 31 32 33 34 35 36 37 38 39 40 41 42 43 44 45 46 47 48 49 50 51 52 53 54 55 56 57 58 59 60 61 62 63 64 65 66 67 68 69 70 71 72 73 74 75 76 77 78 79 80 81 82 83 84 85 86 87 88 89 90 91 92 93 94 95 96
Terms of Use | Privacy Policy | Privacy Consent (EU/GDPR Only)
Copyright 2026 Banjo Hangout. All Rights Reserved.