
DVD-quality lessons (including tabs/sheet music) available for immediate viewing on any device.
Take your playing to the next level with the help of a local or online banjo teacher.
Weekly newsletter includes free lessons, favorite member content, banjo news and more.
Premier Sponsors


|
Please note this is an archived topic, so it is locked and unable to be replied to. You may, however, start a new topic and refer to this topic with a link: http://www.banjohangout.org/archive/251124/5
Page: 1 2 3 4 5 6 7 8 9 10 11 12 13 14 15 16 17 18 19 20 21 22 23 24 25 26 27 28 29 30 31 32 33 34 35 36 37 38 39 40 41 42 43 44 45 46 47 48 49 50 51 52 53 54 55 56 57 58 59 60 61 62 63 64 65 66 67 68 69 70 71 72 73 74 75 76 77 78 79 80 81 82 83 84 85 86 87 88 89 90 91 92 93 94 95 96
Dan Knowles - Posted - 01/15/2013: 05:32:51
David,
Mostly the differences were created by varying amounts of walnut stain or metal stain. I am personally quite pleased by the very dark to black stains that create an almost ebonizing effect.
Dave1climber - Posted - 01/15/2013: 09:55:48
Dan
As with all things taste will vary, If the only stains I had to use were the two in your photos, I would pick the top left sample in the first photo, and the middle left sample in the first photo. They both show the figuring and grain while providing good contrast. I would use the "warm brown" as the main stain, with the "ebonizing black" for accents such as the peg head, neck heel, body sides. Just my thoughts, the most important thoughts will be from the person that will own this when its done.
Dan Knowles - Posted - 01/15/2013: 17:50:47
Dave,
You are so correct. Because of the various properties of these stains I'm not sure that I can fade the black into other colors. Stay tuned I may try it yet!
Dan Knowles - Posted - 01/15/2013: 18:08:37
One-Fifteen- Two thousand thirteen
Another good day with lots of progress on various projects. The only difficult note was riding my bike to work in 23 degree weather. Still I made it and here is just a bit of my day.
I started out skuff sanding the samples (from yesterday) and applying another coat of Tung Oil.
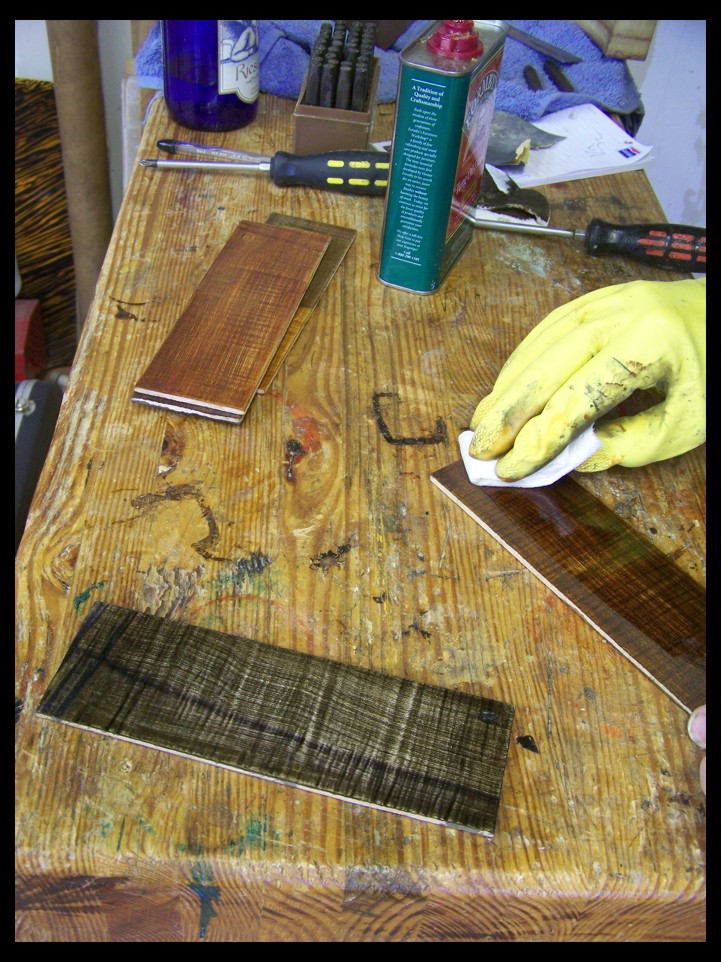
Drying after oiling...
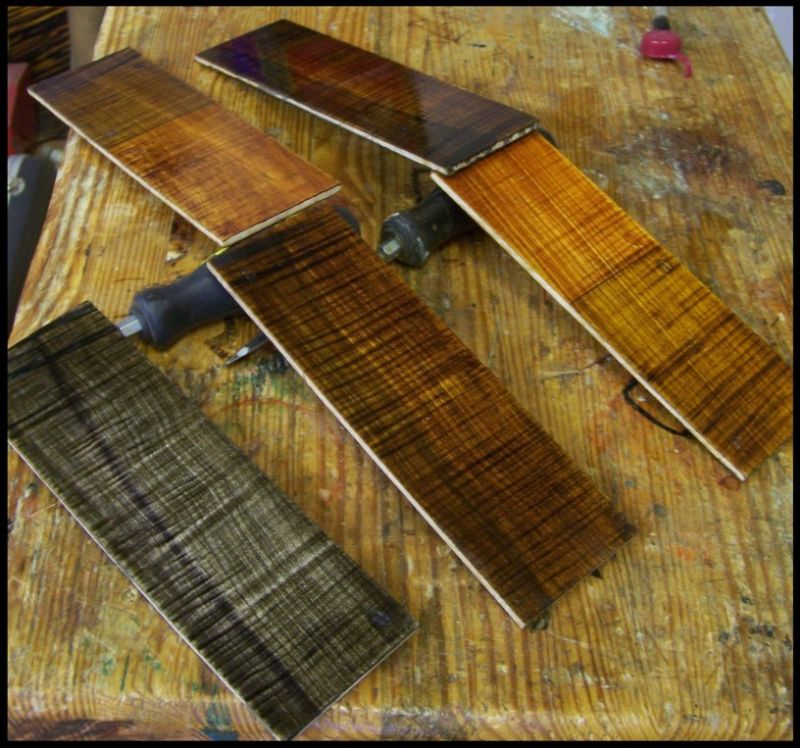
Another look... it really is amazing what these natural stains can do!
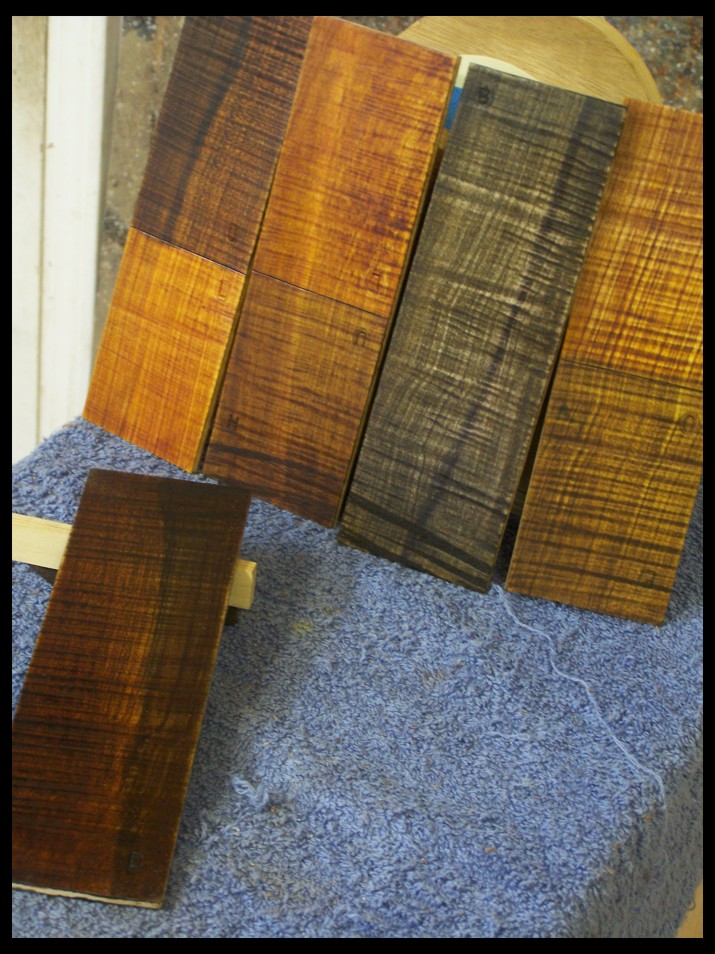
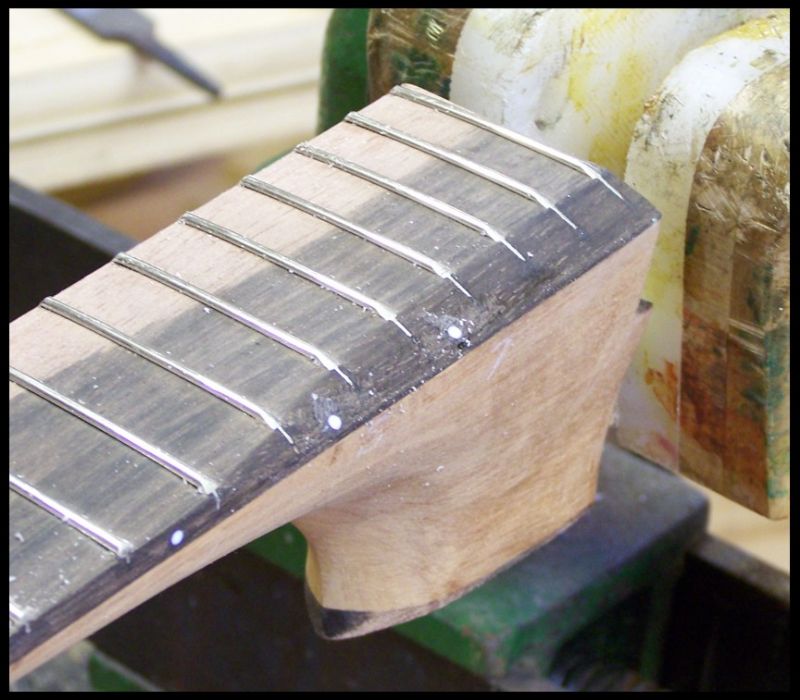
Next I fretted a couple of banjo necks, dotted and cut a scoop in one.
Here I'm truing a fingerboard. This one has a 12" radius.
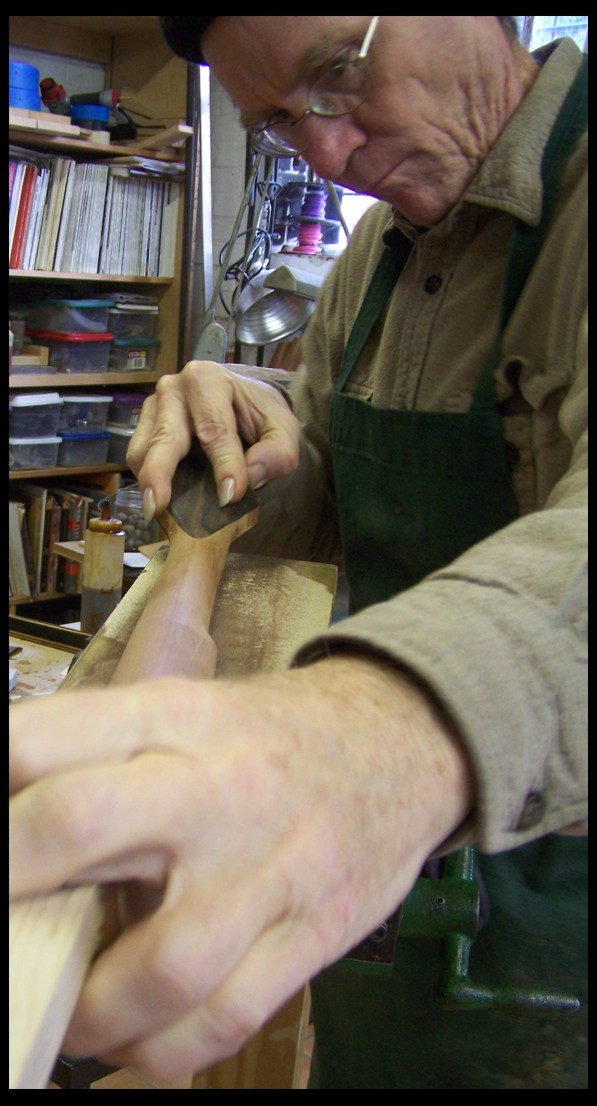
In with the frets...
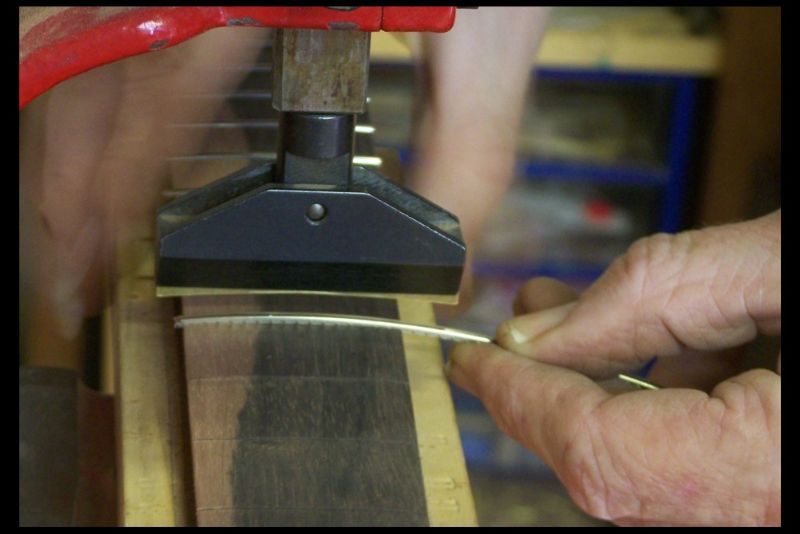
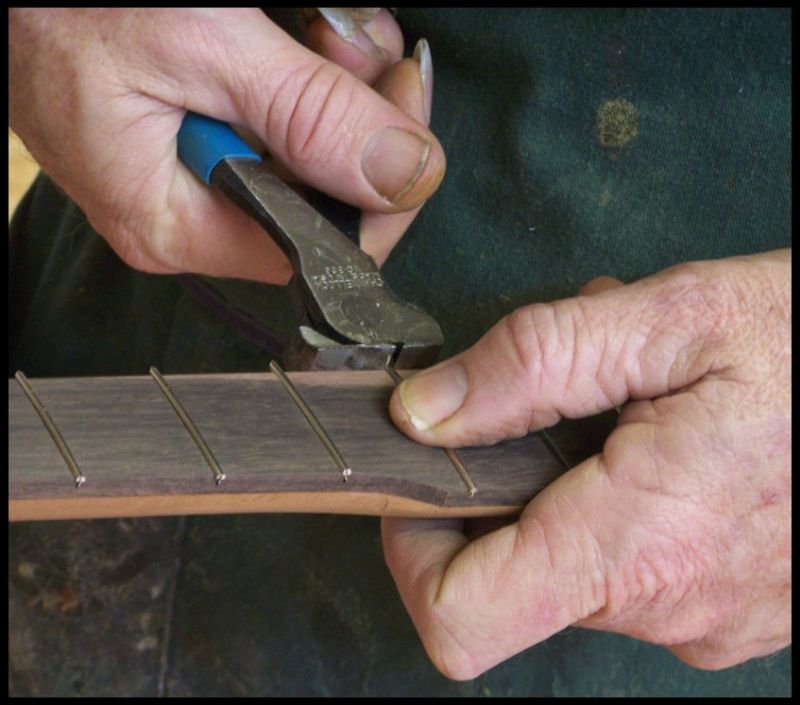
lipping the fret ends...
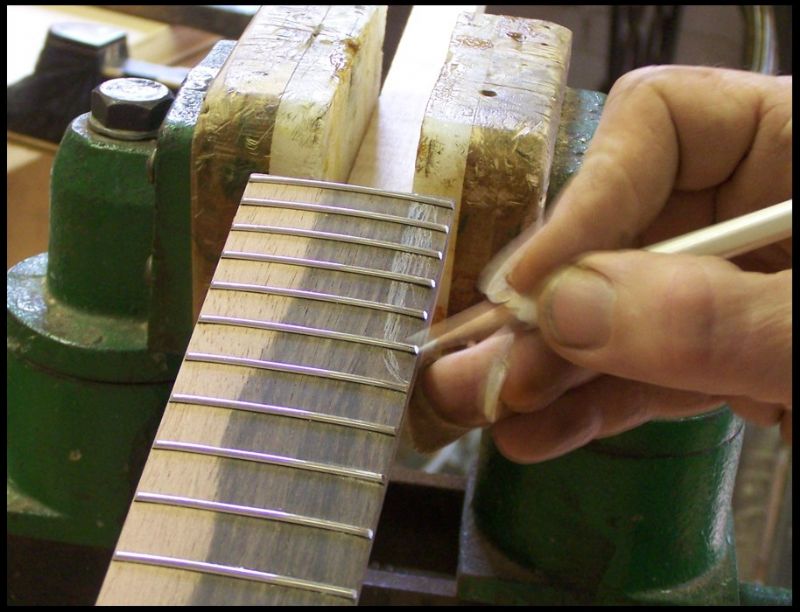
This neck won't receive a full scoop. instead it is eased for smoother thumb action. Here it is laid out...
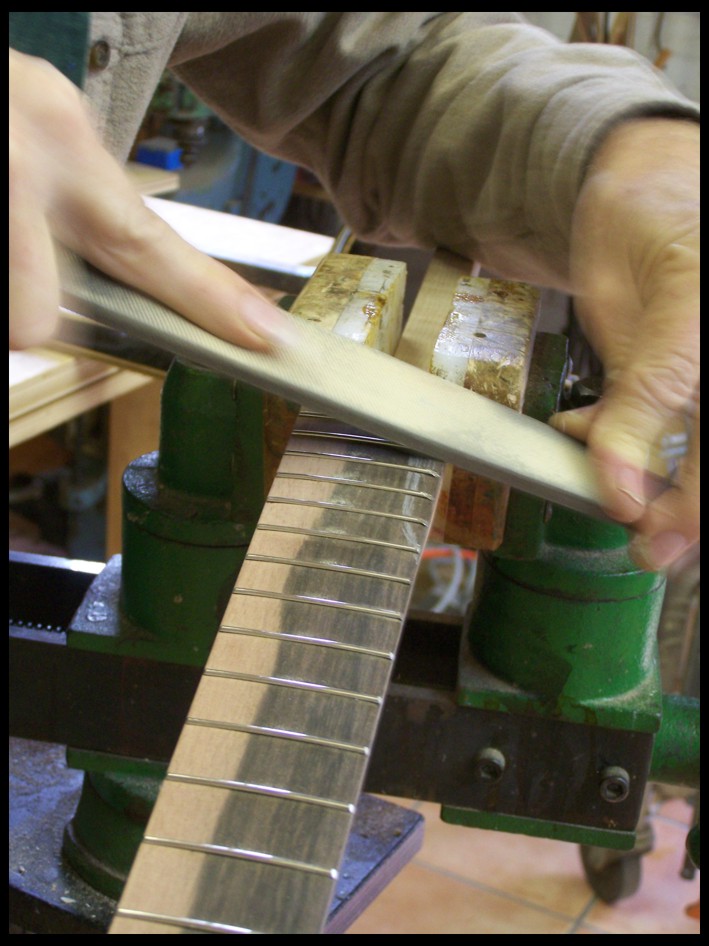
I'm going to town with a big file!!!
A couple buddies stopped in to say howdi. I told them that they'ed be in tonights post. Eagen Snow & Lloyd Bennett.
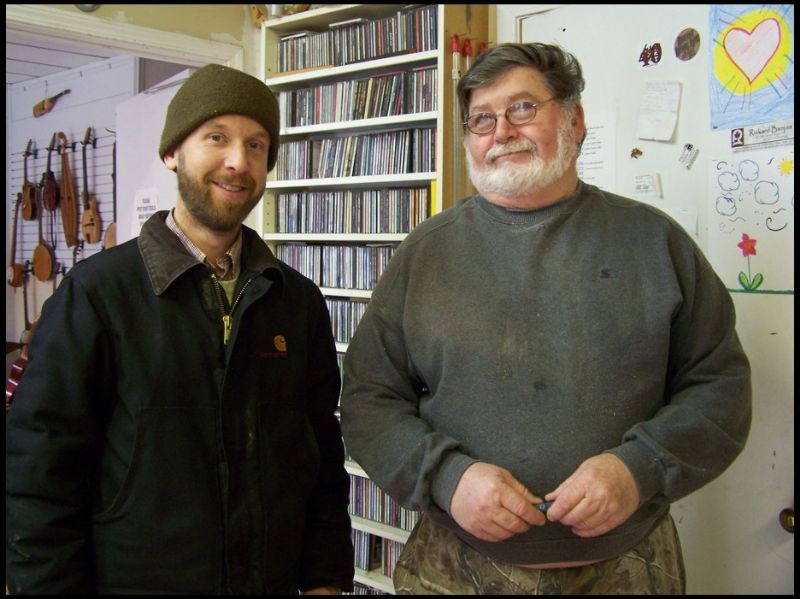
Here 'tiz, ready for slickin' up...
See ya again soon!
DEmery - Posted - 01/15/2013: 19:00:25
Dan I have seen a thumb notch but not a fingerboard eased that way for frailing. When it is all finished and oiled; it will look nice and subtle. David E,
Dan Drabek - Posted - 01/15/2013: 19:10:42
I like that dark stained sample. You've got maple doing a pretty good impersonation of Brazilian rosewood. :->
DD
kwl - Posted - 01/15/2013: 20:04:14
I'm voting for the dark brown stain on the sample which is laying down in the picture where the other four samples are standing up. I really appreciate your posting your luthier's life in this way. It is interesting and informative. Thanks for this.
Dave1climber - Posted - 01/15/2013: 21:19:49
Dan
I would try the "ebonizing Black" first, let it dry very well, then go over all with the "warm brown". Let me know how it turns out.
DEmery - Posted - 01/19/2013: 14:41:40
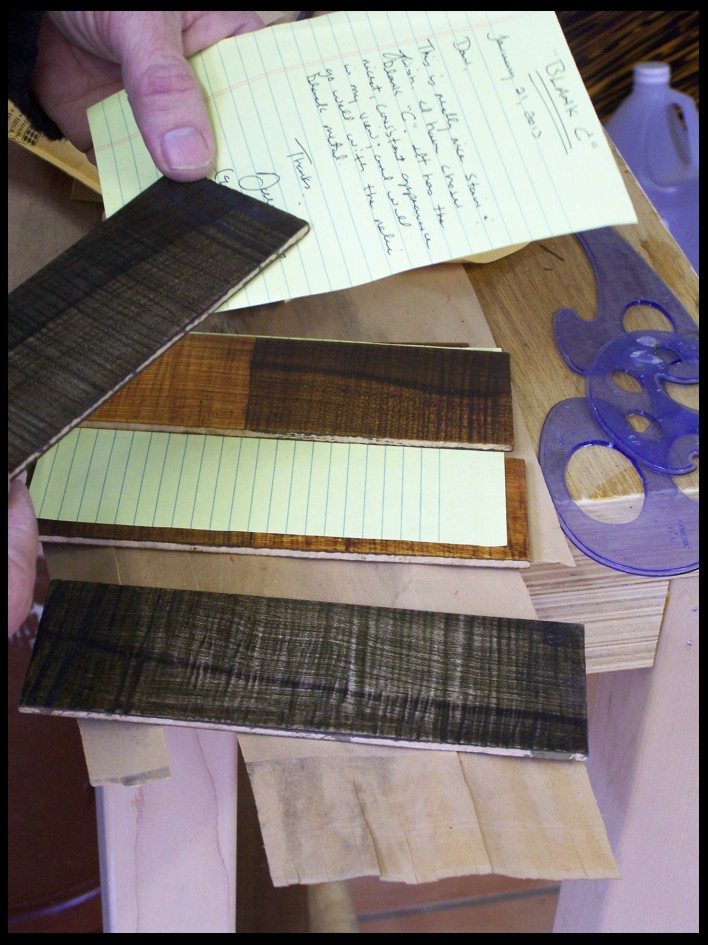
Dan thanks for sending the blanks to look at closely for our slot head project. I am really drawn to the ebonized finish. The oil finish with this stin is perfect and I know when the neck is prepped for the stain and finish...it will be attractive and feel perfect. Photos don't capture how subtle and natural the ebonized effect appears under natural light. Taking this stain/finish and matching it to the black relic finished spun over rim will make the banjo special. The other brown tone choices are very nice and fall in color ranges more traditional. Any would make beautiful options. You said this is the first time you have gotten "true black" rather than red or puple blacks. I see what you mean when holding the finished blank. I think this is why the finish looks so natural. With the extremely curly maply neck shown earlier in this thread; we are going to end up with a beautiful and unique slot head. David E.
Dan Knowles - Posted - 01/19/2013: 18:47:39
have you ever spilled coffee on a laptop computer? If not I'd like to give you a bit of a secret... don't. Just a bit of espresso coffee (and not much at all, just a small splash) has got my Apple laid up in the computer hospital with the flu!!! Anyway I've got a borrowed laptop where I can now try to play catch up.
David,
I don't have any photos tonight of it , but yes that scoop/ notch has turned out real pretty now that it's sanded and has been oiled.
Dan & KWL,
Thanks... I think I'll like them all for various projects...
Dave,
There is only one problem which I must surmount first. The "ebonizing" stain is not really a stain at all but only a chemical that reacts with the tannin in the wood. I'm not sure yet how I could fade them together, perhaps with a bit of practice.
David,
I couldn't agree more! It seams as though you have chosen my favorite one from the batch. I guess I'll know for sure when it arrives back here.
Dan Knowles - Posted - 01/19/2013: 19:13:29
1-19-2013 or BACK AGAIN!
Oh boy... What a feller misses when his computer is on the blink! Well lets us see what I was doing a couple of days ago before I waved a cup of espresso to excitedly tell my wife about a Piano Guys video (Rocobelles Cannon) that was tickling my funny bone on Youtube. Mr. Davajon (my senior year, high school English teacher) now was that a run on sentence? Anyway I'll try and see if I can tell you about what I was doing a couple of days ago...
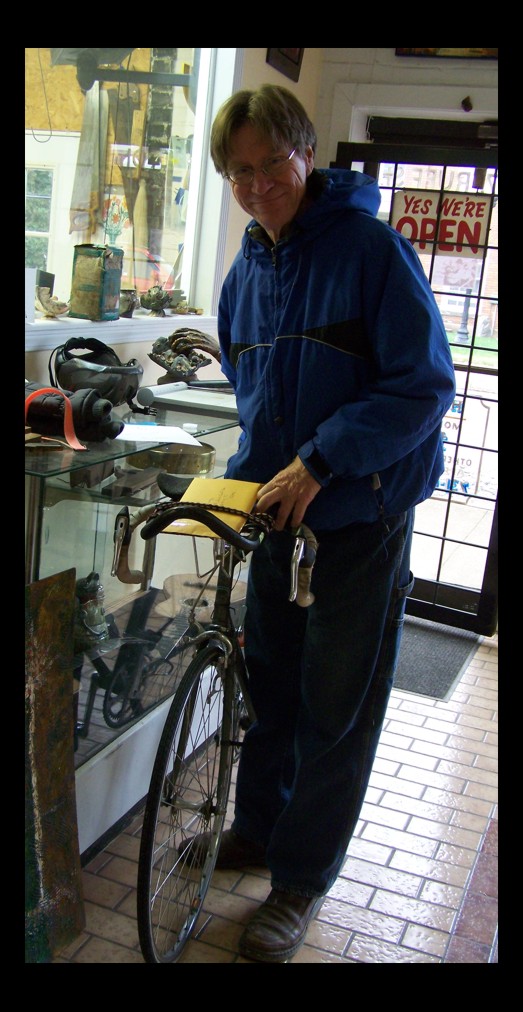
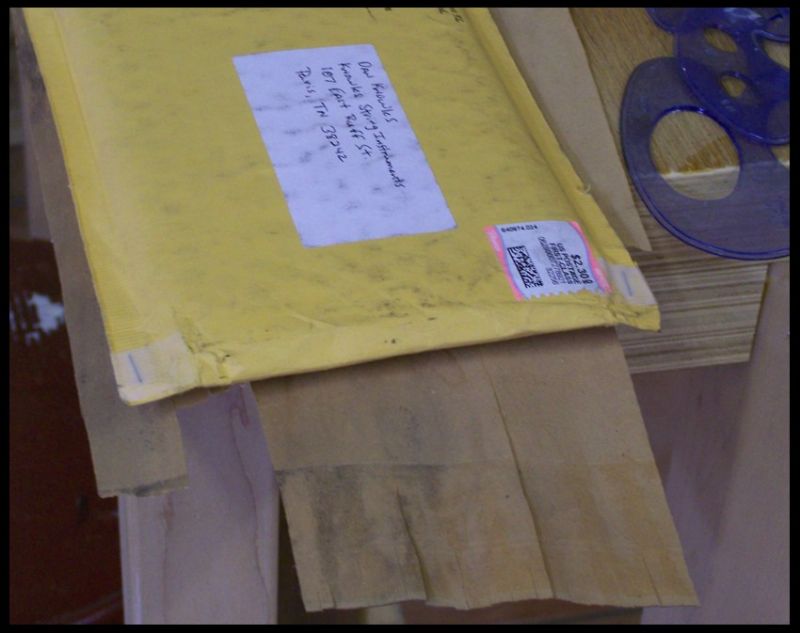
First thing I did was pack up the stain samples and rid over to the P. O. (Post Office) on my bike to mail them off. Dogone but it was cold, 23 degrees as I recall.
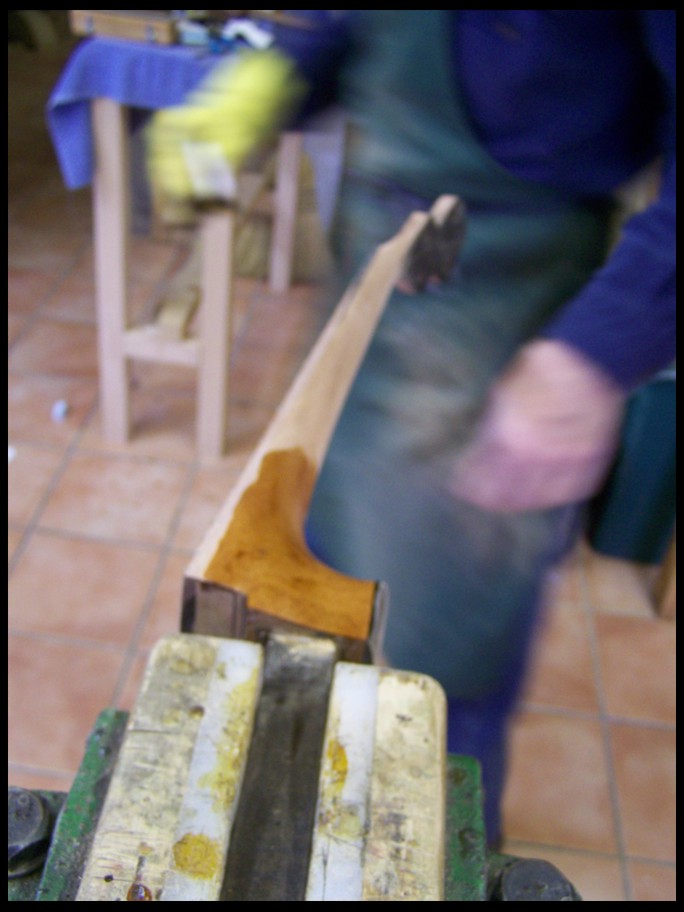
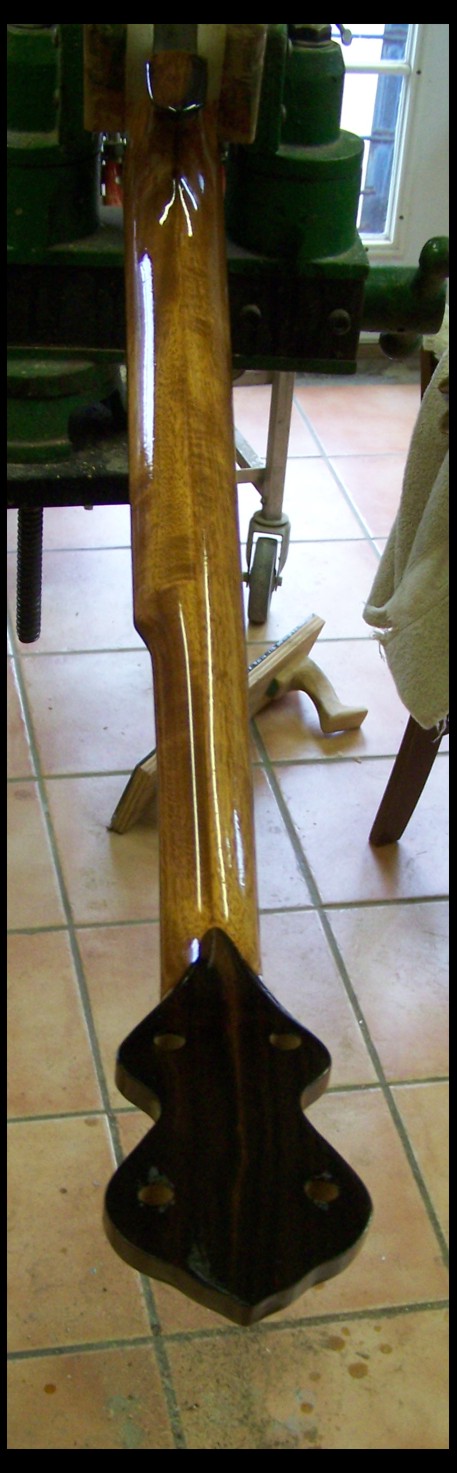
When I got back I gave that mahogany neck a coat of French polish.
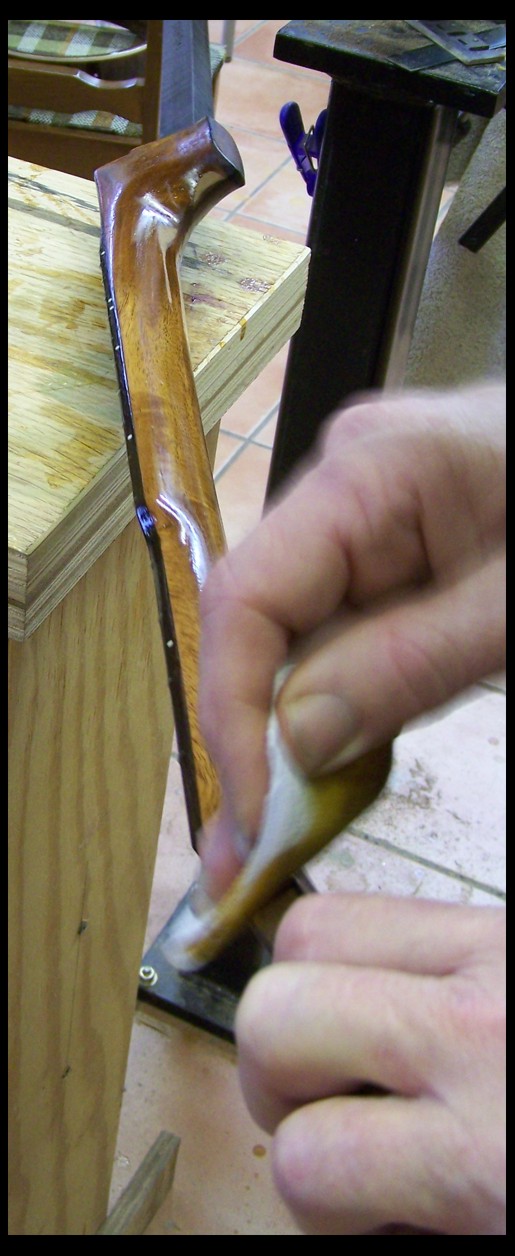
After it dried I could do my final sanding. It's amazing how a little shellac will cause incomplete sanding to show up.
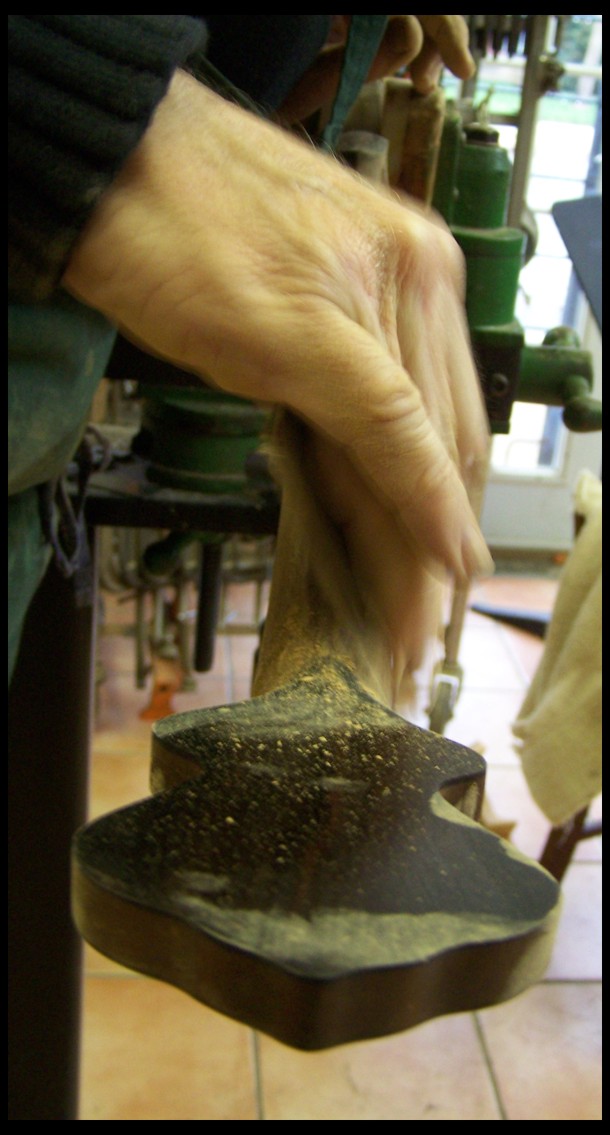
Here is on of my favorite sanding tools. A little chunk of blue foam insolation board. It's the bast sanding block I've ever used... and the cheapest.
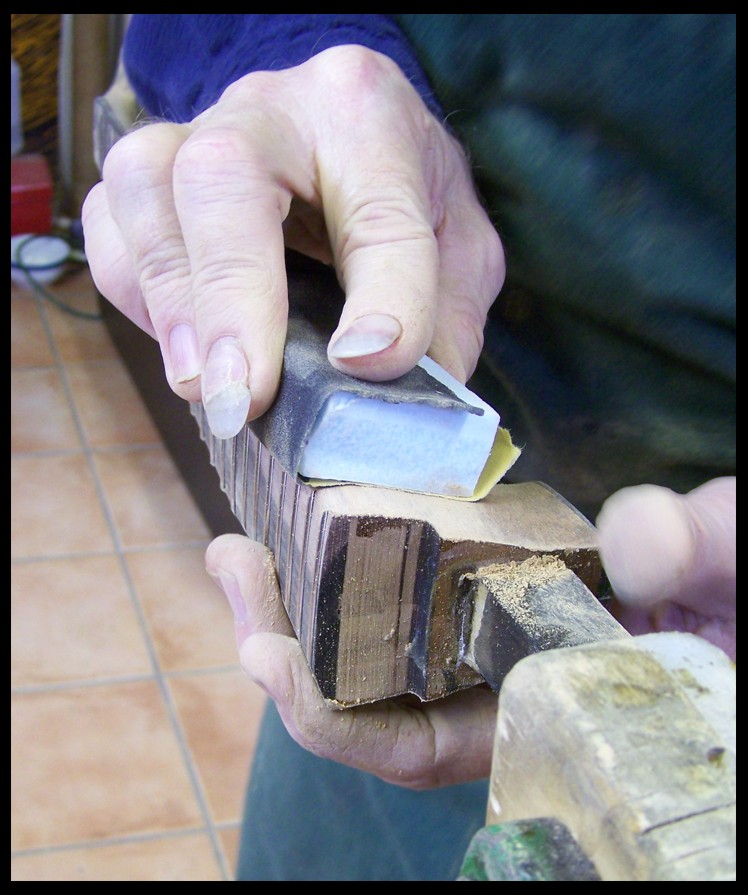
On with the Tung oil...
I also went next door and had Sandy fix my nails. My middle one was falling off and my first one needed fill in. Sandy is by far the best nail tech that I have ever worked with. She has been patiently put up with me for the last four or five years. SHE'S THE BEST!!!
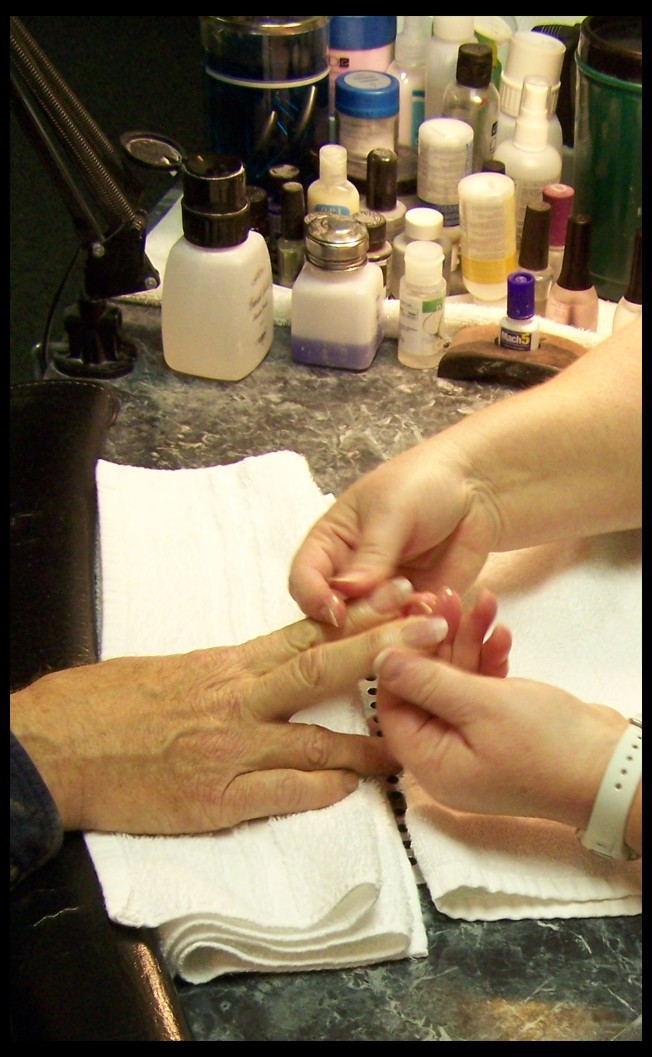
The rest of my day was spent doing several setups and preparing to feed my Apple espresso!
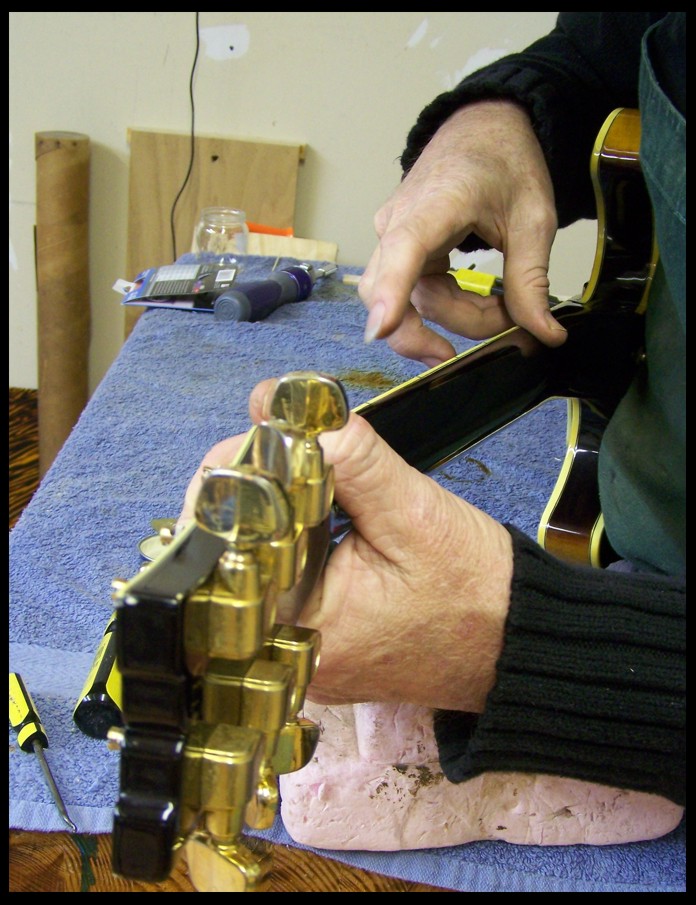
More Soon!!!
I hope...
Dave1climber - Posted - 01/19/2013: 21:18:22
Dan
Sorry to hear about the coffee in the apple.
It doesn't look as though the cold has slowed you down any.
That is a good looking neck, how many coats of tung oil will it get?
Dave
Ho C Ying - Posted - 01/20/2013: 05:56:13
Dan,
I spilled a few drops water on my old laptop computer once. And then I used a hair dryer to dry the keyboard. Very bad idea. Some keys melted because the wind was too hot. Here is what my laptop looks like now.
BNJOMAKR - Posted - 01/20/2013: 06:40:43
Our daughter damaged some keys on her Dell laptop. We bought her a new one before she started college. Someone told me that you could find the whole keyboard on eBay, so I looked and there it was. I bought for less than $12 shipping included. There is a youtube video on how to change it. It took about 5 minutes to replace it. She put up with those bad keys a long time... it made me feel bad that it could have been fixed that easily.
Edited by - BNJOMAKR on 01/20/2013 06:41:36
Dan Knowles - Posted - 01/20/2013: 18:21:18
Thank y'all for your comments about my Granny Smith... ahh I mean my Apple. I just received a call from Will letting me know that he has a keyboard ordered up. We are hoping that will make it snap happy. I have sworn off fresh roast and Apples!
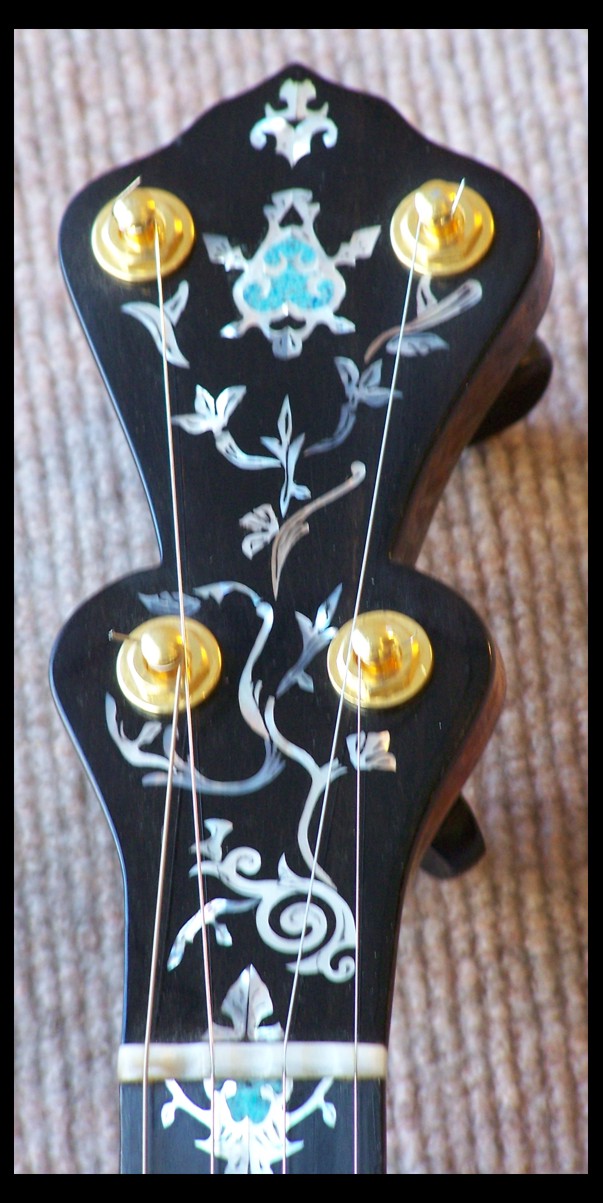
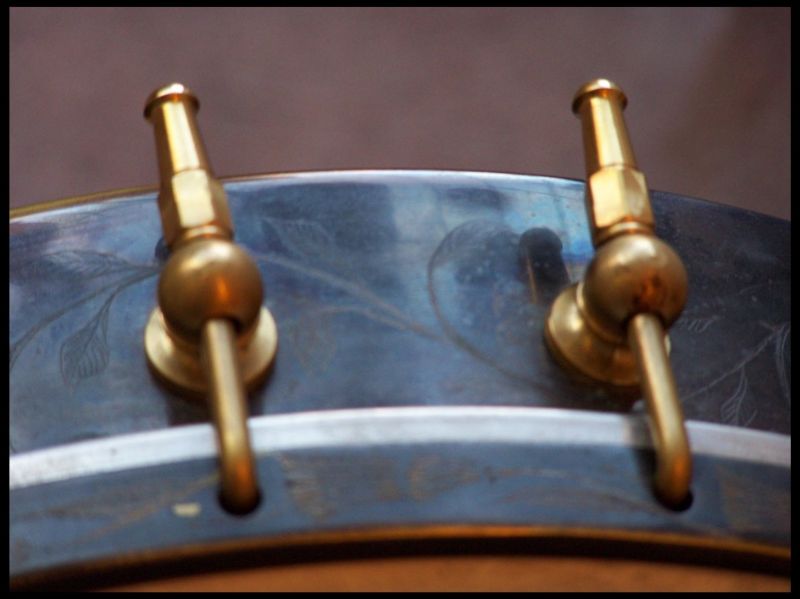
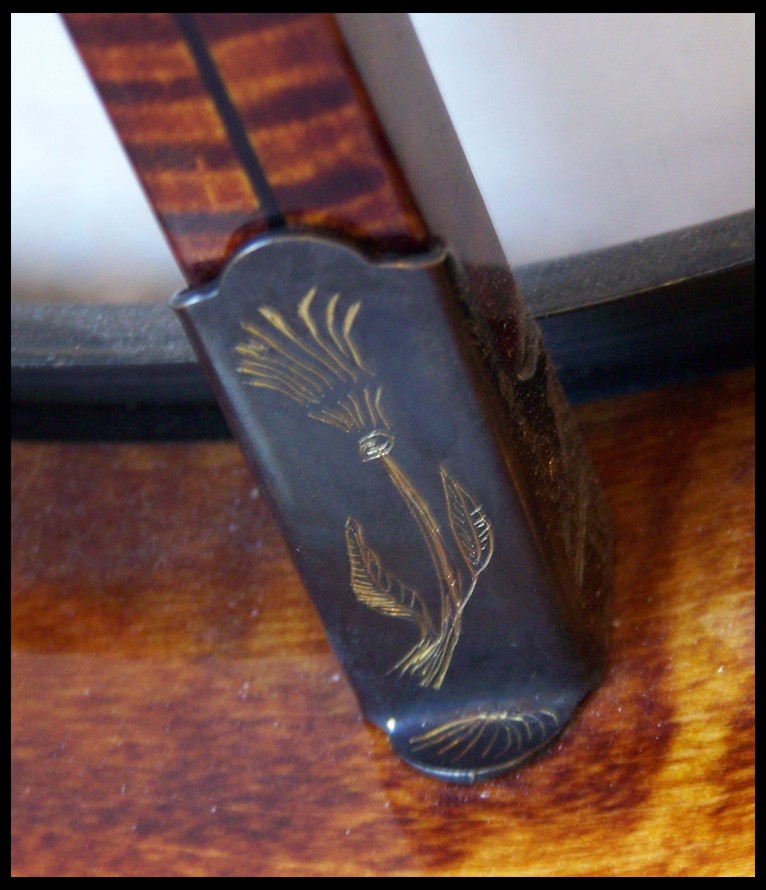
For those of you who have followed my posts over the last few years, you might remember the banjo project that Bill Rickard and I did called The Angel of Mercy. Well I have just listed the first Angel for sell in the classifieds. Here are a few photos from memory lane.
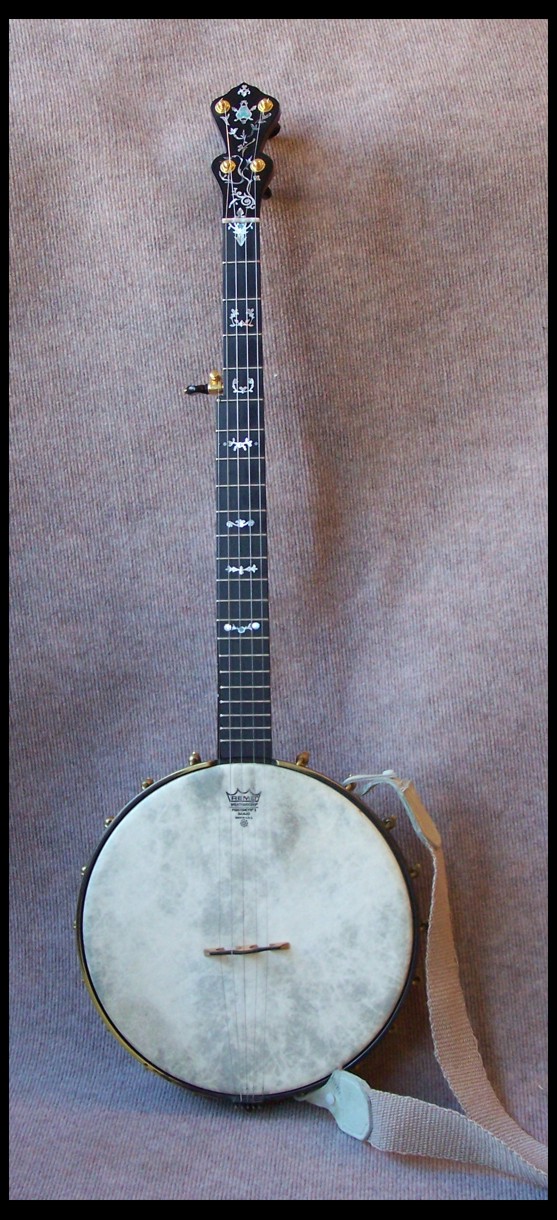
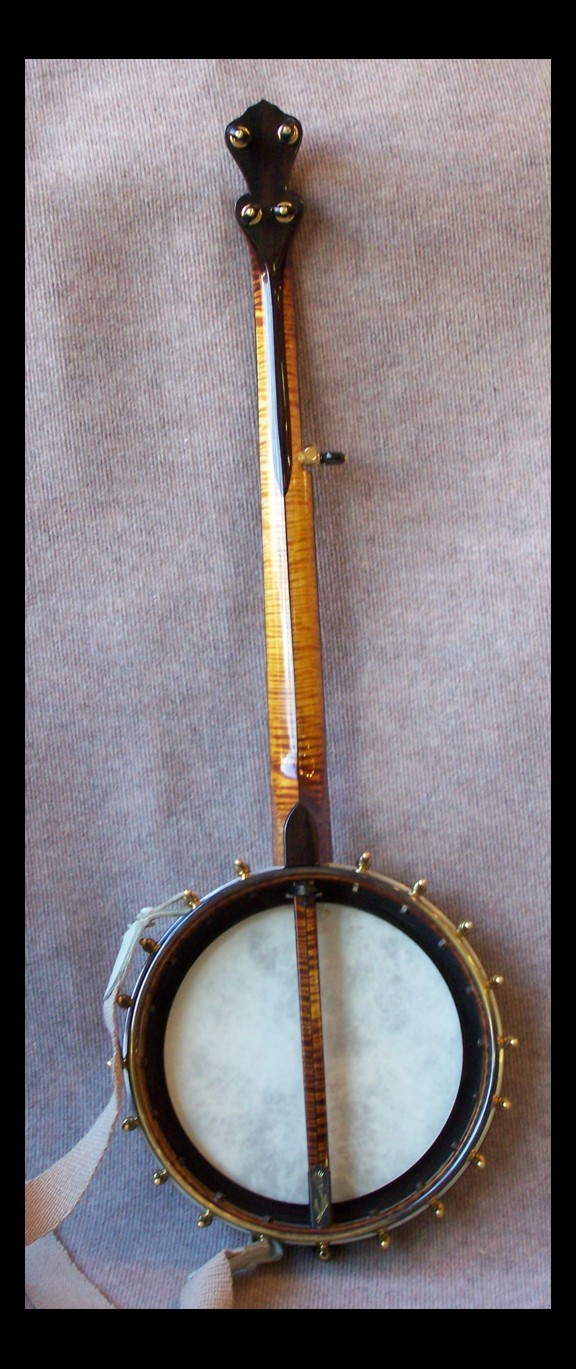
More soon!
Dan Drabek - Posted - 01/21/2013: 13:51:22
Very very nice. I love that Vega inspired overlay on the back of the neck/peghead. Fitting it must be tricky.
DD
Dan Knowles - Posted - 01/21/2013: 17:56:03
Rich, Steven & Dan,
Thank you a lot! Yes it does take a bunch of work to do it right.
Dan Knowles - Posted - 01/21/2013: 18:36:18
Twenty first day of 2013,
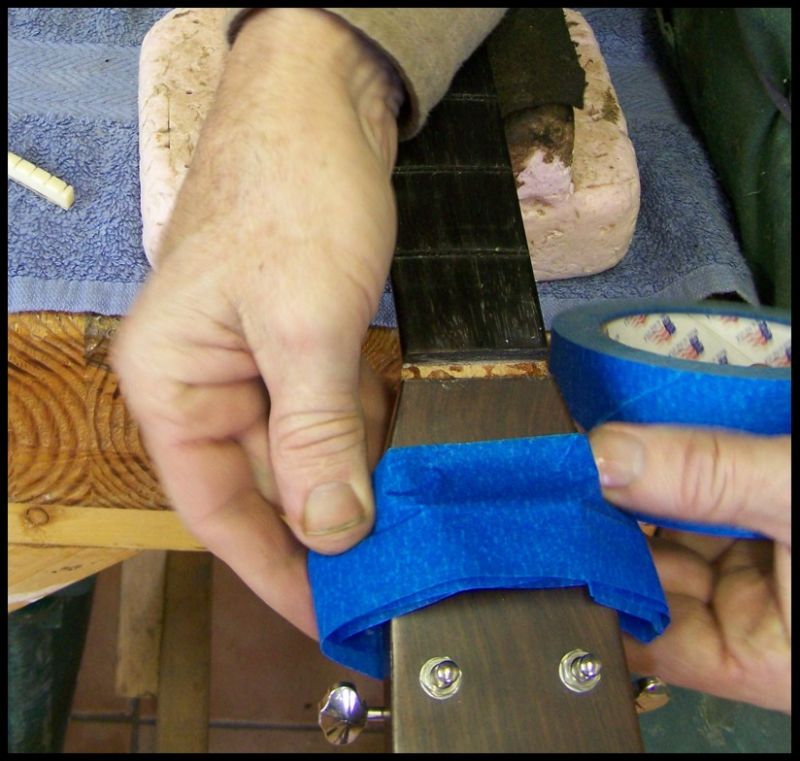
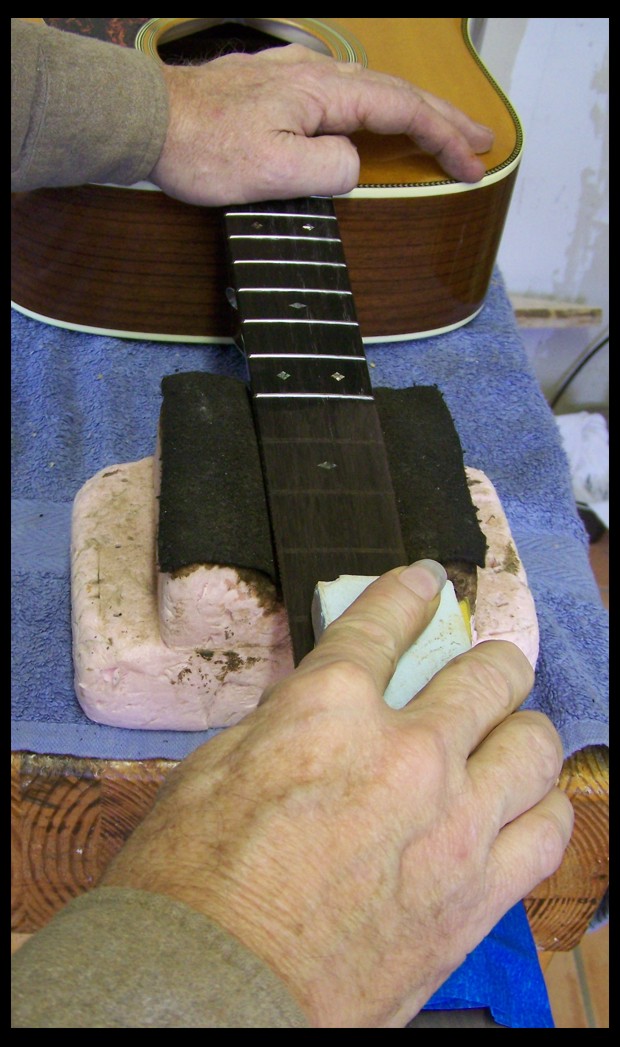
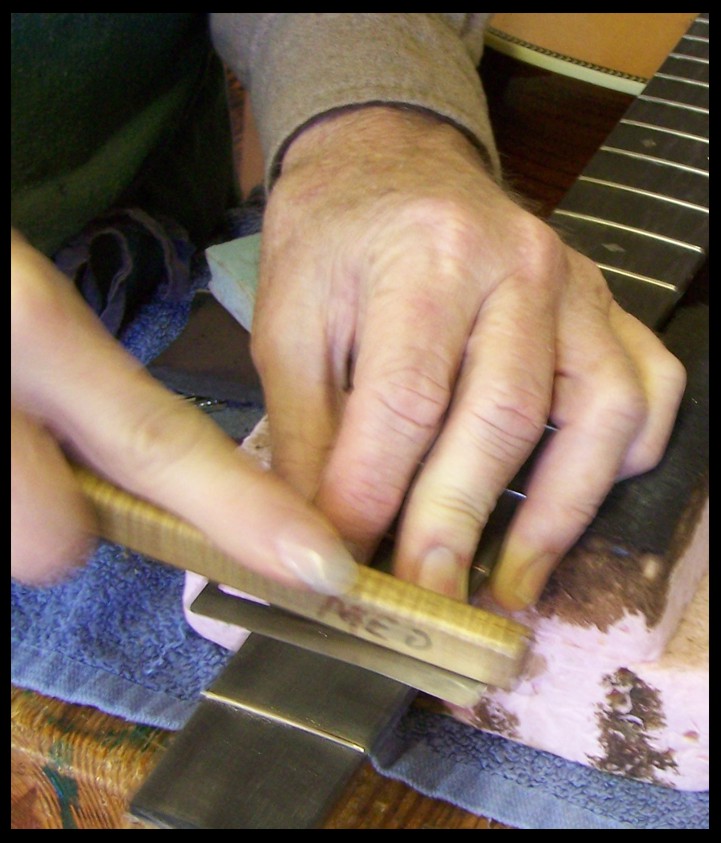
Today (as are most Mondays) was a teaching day, but a good lick or two was hit in the re-fretting dept. I had this Martin HD-28 which had suffered in some untrained persons hands. The first five frets had been badly filed creating a mess of buzzes. The nut had been pulled out (for some undetermined reason) leaving a mess on each end, where some tool was used in a nearly futile removal attempt. So here is how the problem was resolved...
The nut and the first 5 frets were removed.
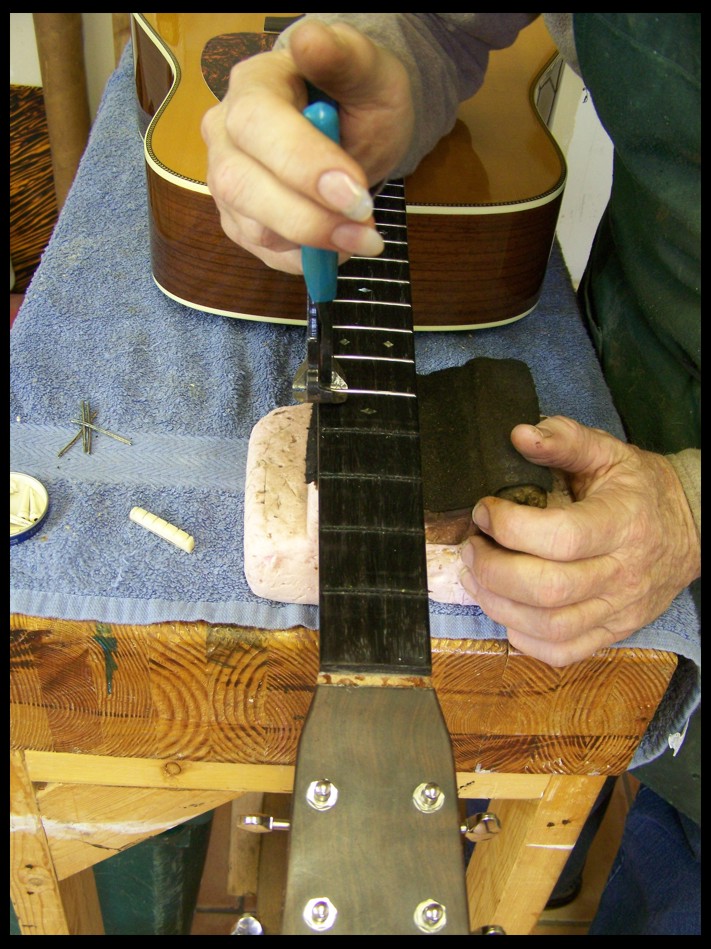
Tuning machines were covered for protection during sanding...
The fingerboard was trued...
There was a small amount of chip out around the first fret. The chip out wouldn't show but the damaged wood would not hold the fret as well without this step.
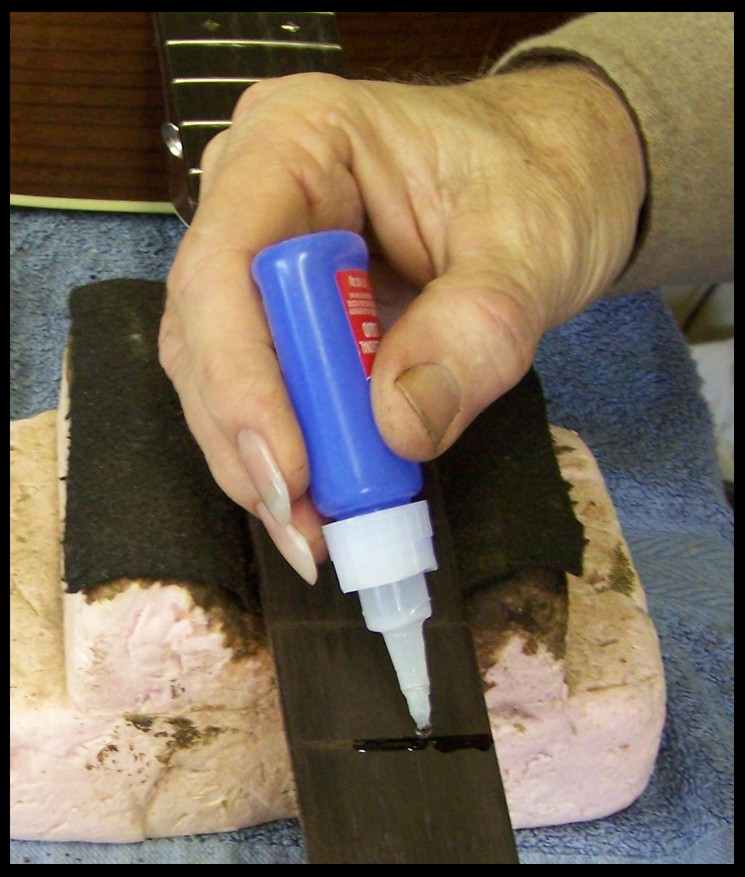
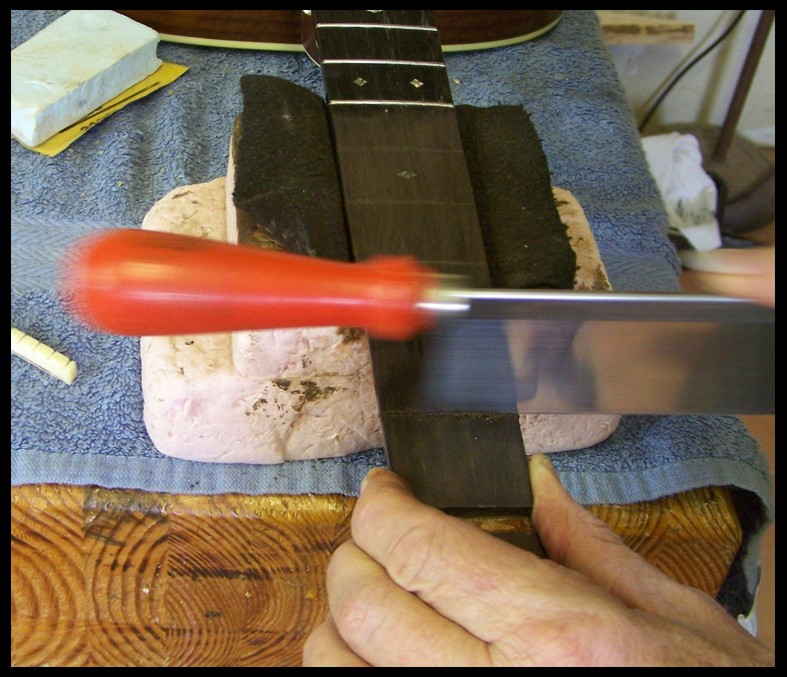
The top of the fret slot is filed to allow the fret to seat more fully...
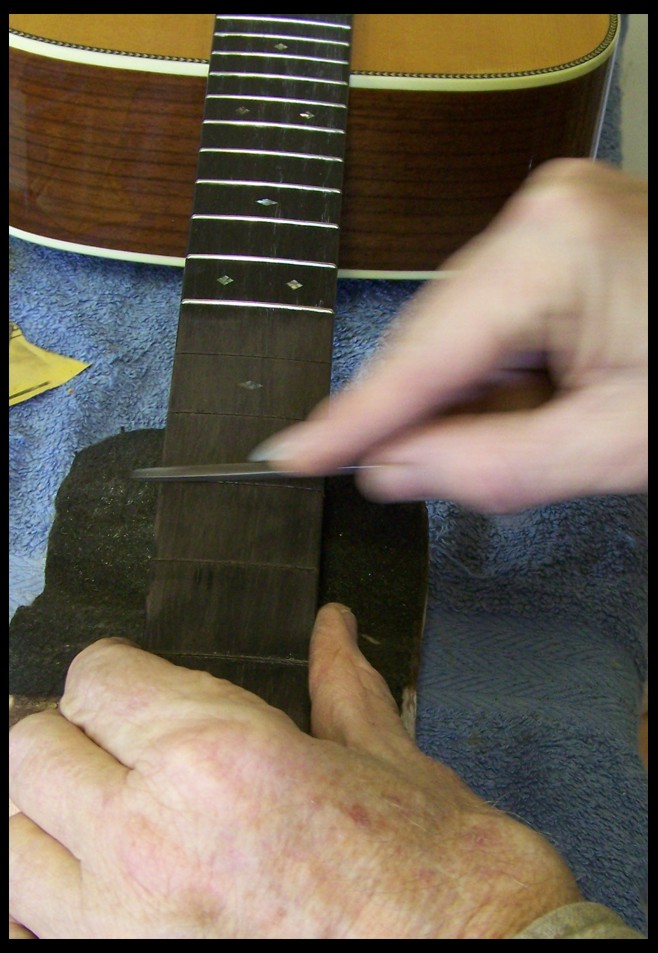
The frets are driven in.
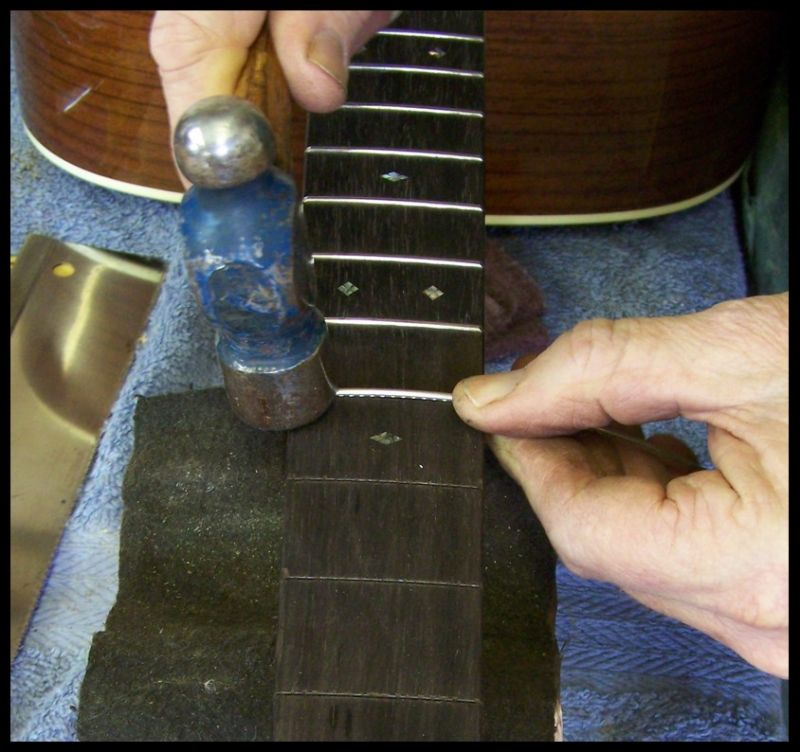
Then leveled and crowned.
This is what the nut slot damage looked like. The nut was slightly damaged too. Amazing the damage a screwdriver can make!
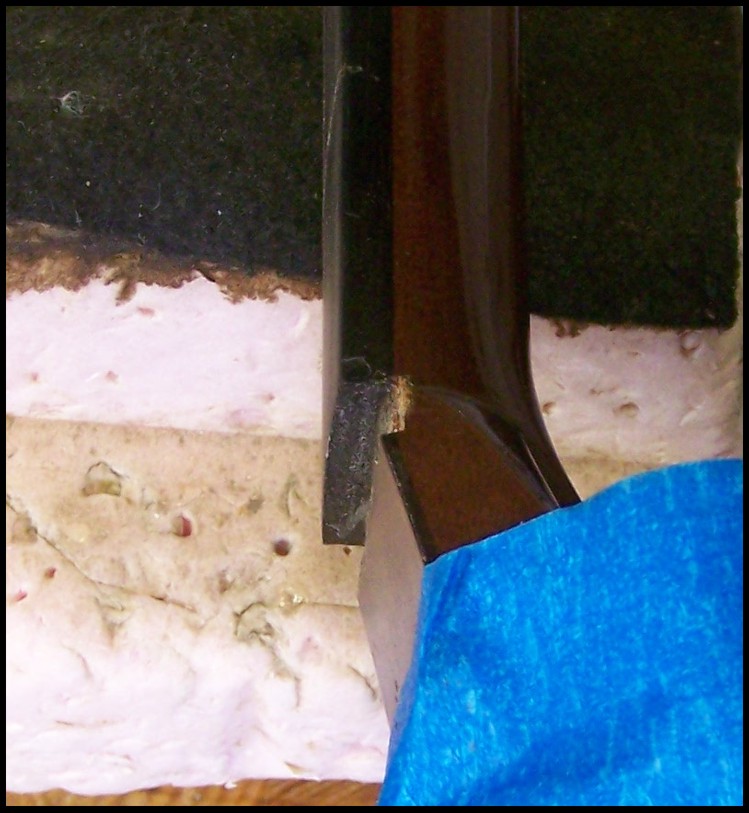
Some one had tried to fill the gap with epoxy... not a good idea.
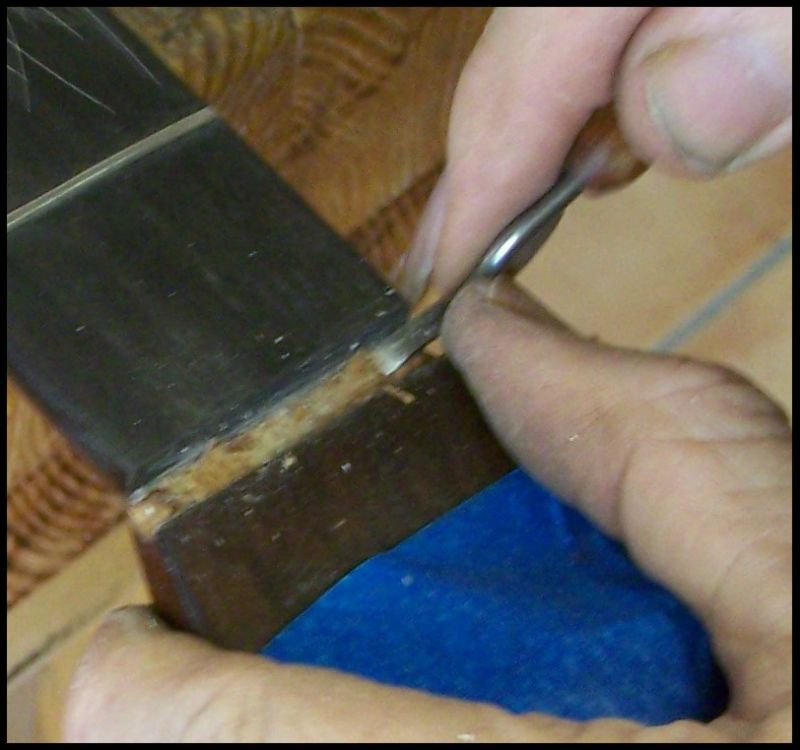
So the holes were filled then leveled and French polished over.
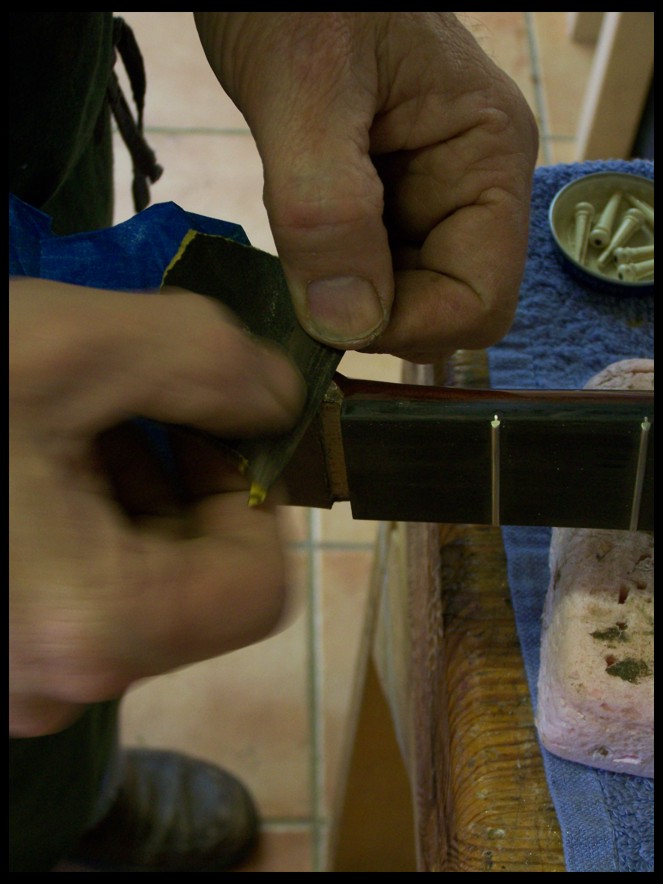
More real soon....
Dave1climber - Posted - 01/21/2013: 19:12:29
Dan
Undoing the damage caused by thoughtless, untrained "repair tech" has to be the most difficult and challenging part of the job. Also the most rewarding when completed successfully.
I am wondering why you are holding the fret saw by the back and not the handle?
Dave
Edited by - Dave1climber on 01/21/2013 19:15:28
Dave1climber - Posted - 01/21/2013: 19:23:16
quote:
Originally posted by DanKnowles
Well...
Well? A secret process? 
Edited by - Dave1climber on 01/21/2013 19:26:15
Dan Knowles - Posted - 01/21/2013: 19:41:38
Well...
I just like to use the saw on the pull instead of the push for more control. Until the new Stu Mac Japanese fret saw there were none that did that so I just learned to do it this way. Been doin' it like this for years.
rudy - Posted - 01/21/2013: 20:02:41
quote:
Originally posted by DanKnowles
Well...
I just like to use the saw on the pull instead of the push for more control. Until the new Stu Mac Japanese fret saw there were none that did that so I just learned to do it this way. Been doin' it like this for years.
I had the same saw (from the looks of the photo) I purchased something like 15 or 20 years back. After my first attempt at use I pried the blade out of the back bolster and reversed it so it would cut on the pull stroke. It was so much better!!!
Will1717 - Posted - 01/21/2013: 21:49:52
Dan:
Looking for some advice! I've just refretted an F style mandolin and have come to the conclusion that the nut needs to be replaced as the grooves have worn so deep that the strings buzz when the instrument is strummed without any fretting. I tried to fill the slots with super glue mixed with bone dust but I'm just not happy with the results as the slots were real deep and the filled slot is visible if you look close. My thinking is it would be best to make a new nut to replace the original. The problem is that the nut is glued in real tight as you can see the glue squeeze out along the peghead veneer and ebony fingerboard. I was going to give it the old persuader and crack the nut at the fingerboard, with a hammer and chisel, hoping it will pop out. After reading about your repair job to the guitar I'm concerned that the peghead veneer just may split or chip out. I've always had good success with this procedure before, but I've never come across a nut that appeared to be glued in as this one is.
Looks like a disaster in the waiting to me! Can you offer any expert advice? Would it help to heat the nut with a hot iron?
What does the doctor recommend?? Should I give you a call and book an appointment???
Bill Rickard
Dan Knowles - Posted - 01/22/2013: 19:40:47
Rudy
Ya know I thought about doin' that , but I never got around to it and I got used to doin' it backwards.
Bill,
I think an appointment would be in order, let me look at my schedule... ah.. how about Thursday at 3:15. I'll have the coffee pot on and the tools ready.
I'll even fix up a bed for you so you don't have to drive back (about 20 hrs. of travel) the same day!
Just teasing.
This isn't usually too difficult... notice how I used the modifier 'usually'.
Take a Dremel with a cut off disk installed. Score a mark on the center top of the nut lengthwise. Using a back saw, pull saw, razor saw or whatever saw you choose, saw through the nut down to the slot where the nut sits. Don't saw the wood below or the 'usually' clause will be invoked and a bigger repair will ensue. Using a pair of pliers or some other compression tool squeeze the saw kirf shut which should break and free most of the nut. Chip out the remainder with a dull chisel (did I say dull?), I mean sharp chisel. Finish slicking it up with a small 3 corner file.
Good Luck, let me know how it turns out.
Dan Knowles - Posted - 01/22/2013: 20:07:26
22-1-2013
Tonight I went over to our friend Tommy Ogle's home and played banjo and talked till way to late for this old guy. So I'm afraid that tonights post may be a bit short.
Well that's my excuse anyway.
As my dear departed Dad used to say, " Son, excuses are the nails in the coffin of success."
Well That's my story and I'm stickin' to it!
I did a whole bunch of stuff today, but I got a few shots of real banjo interest so here goes.
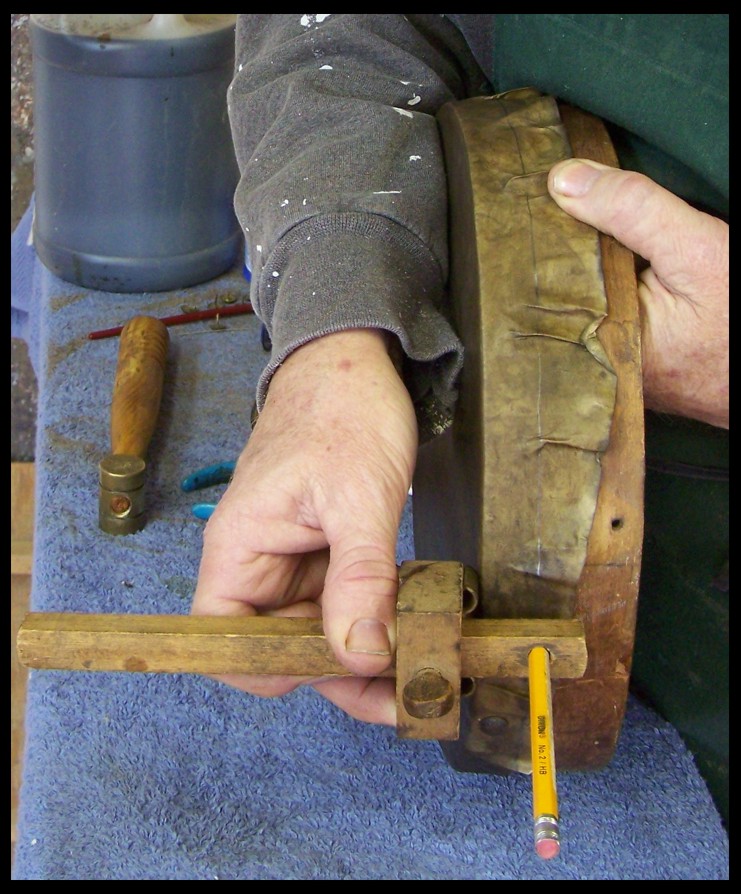
Yesterday I clamped this ol'e head to this rim to dry. Today I need to trim it up. Soon I'll (like tomorrow) I'll put the tacks to it, because it is a tackhead. But for now I'm just trimming. This is one of the old banjos I have shown in an earlier post.
Here I'm marking the depth of cut.
Trimming the head...
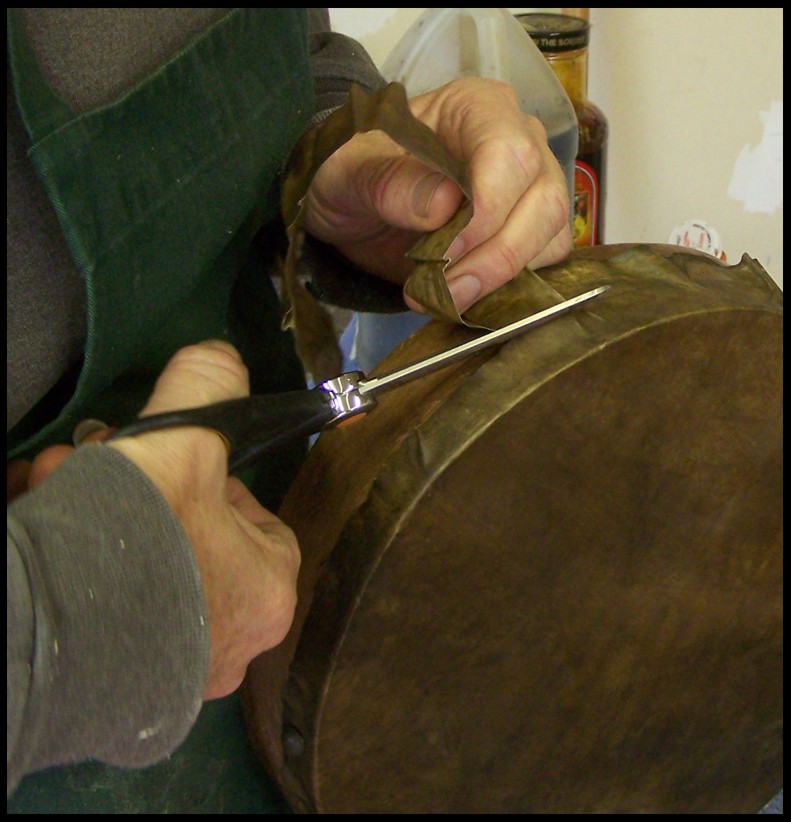
Here the head is ready for the next step...
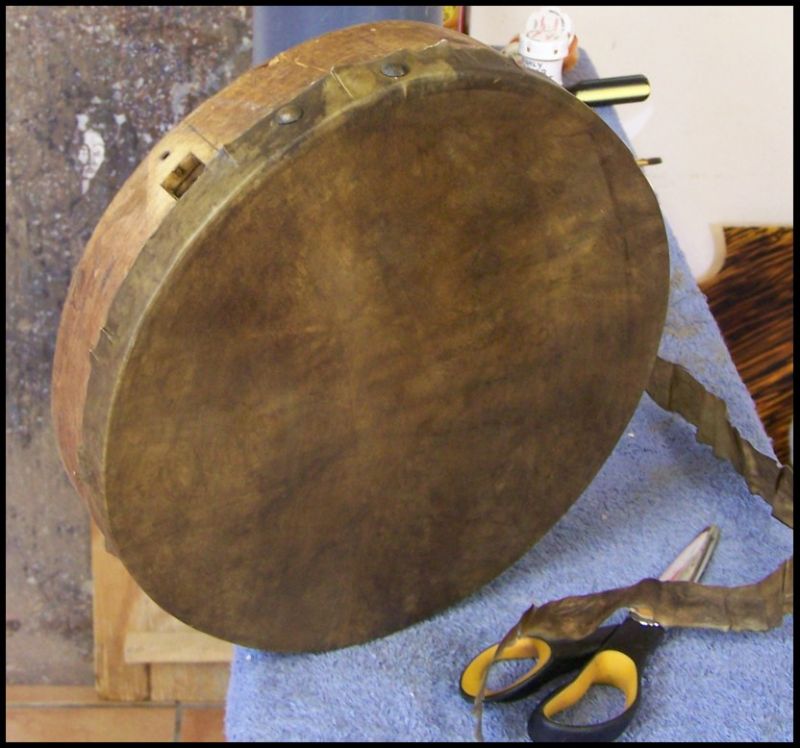
More tomorrow....
or soon ...
or something like it.
Kirk Jacobs - Posted - 01/22/2013: 20:20:10
You either don't have a lot of "nails" hammered in or your coffin is huge because as I read (with interest) your thread you have success. Making a living doing what you love is the best example of success I could think of.
DEmery - Posted - 01/23/2013: 02:22:30
Dan I hope Tommy is getting along well and am glad you spent the evening talking. That is strong medicine. Hey...nice looking wood rim and ole' hide you mounted. David E.
Dan Knowles - Posted - 01/23/2013: 17:06:45
Well here we go completing the old Tackhead banjo...
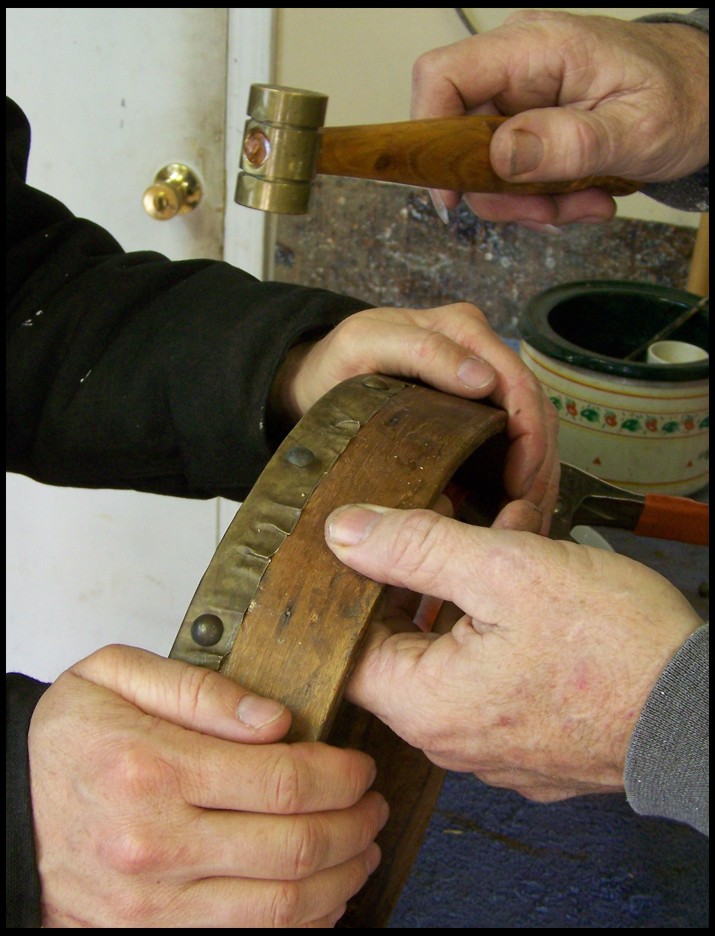
Here my friend Egan Snow dropped in at the perfect time to hold the rim while I whack! These are the most beautiful tacks. They are antique ones sent to me by my client. I guess they came from an old trunk somewhere. I am hide gluing the head down as I work around the rim. The rim shows evidence of an earlier gluing.
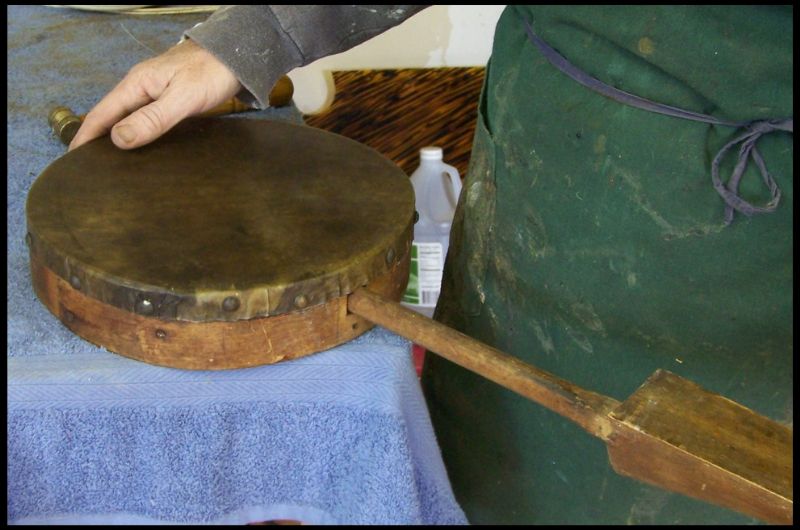
Checking to see if the dowel stick still fits...
Nope... shucks... a little filing is just what the Doctor ordered!
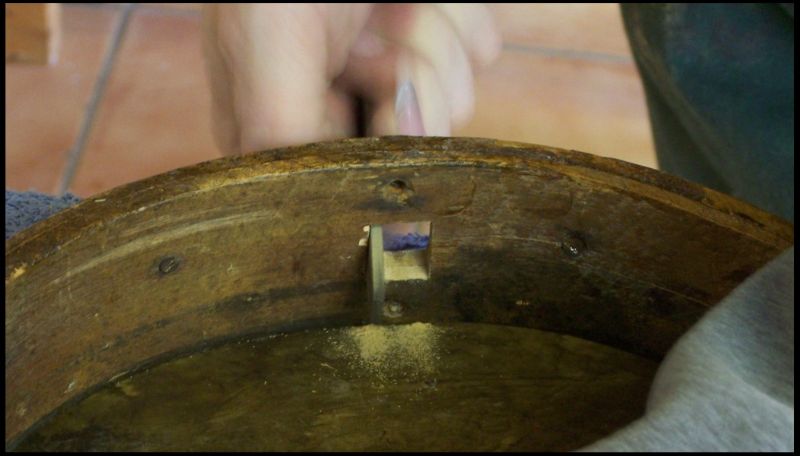
Good, now it fits.
A little magic water make the wood look right.
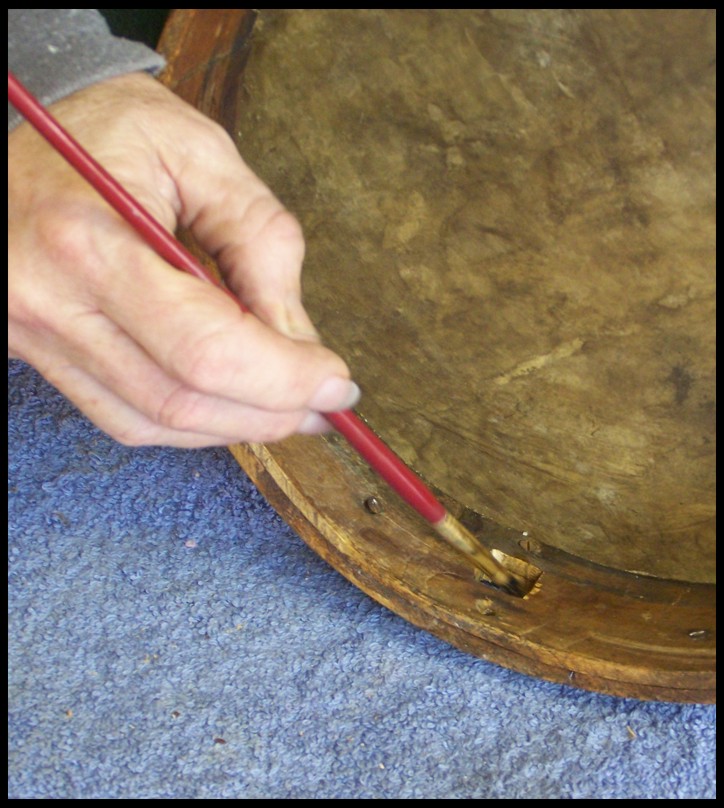
In goes the screw holding the neck (and the one holding the tailpiece too). These are the original screws from each place.
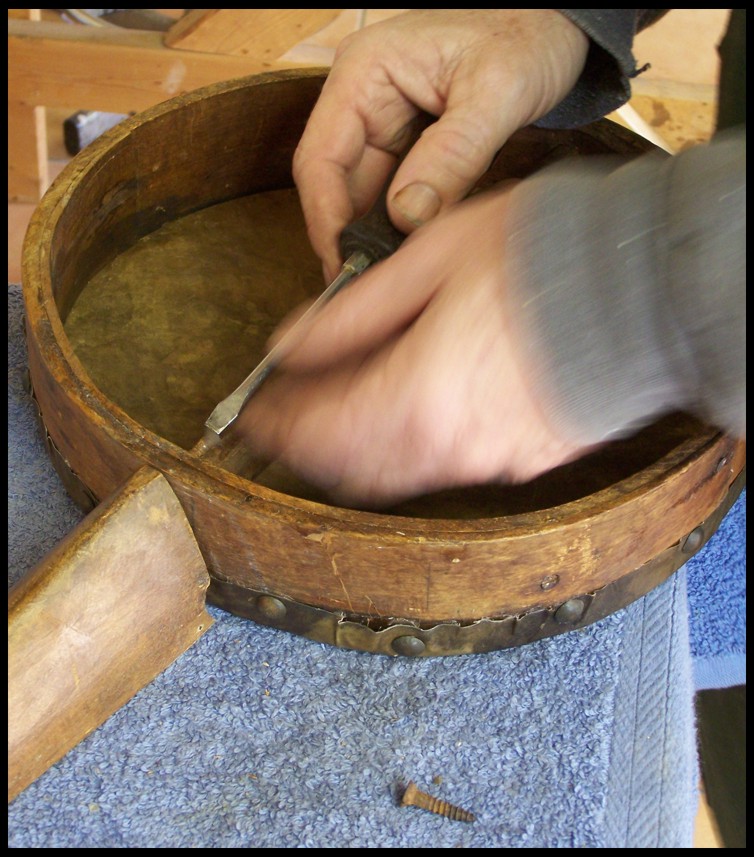
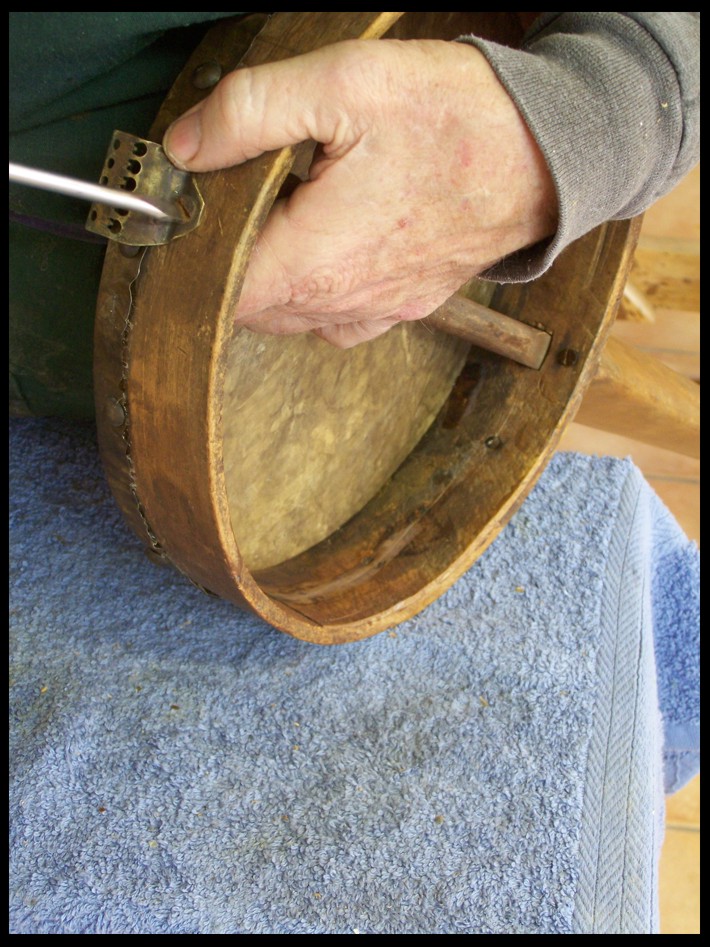
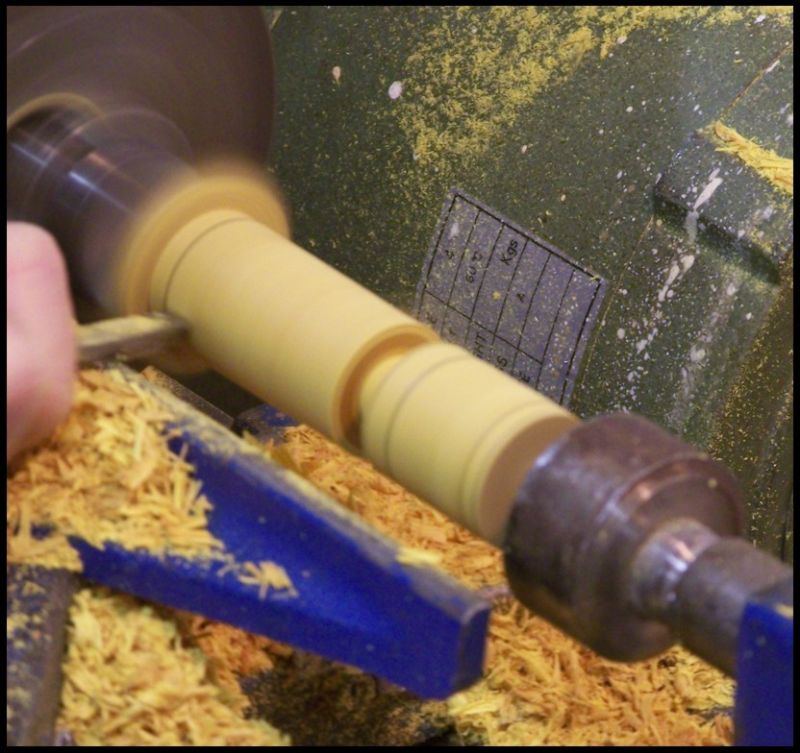
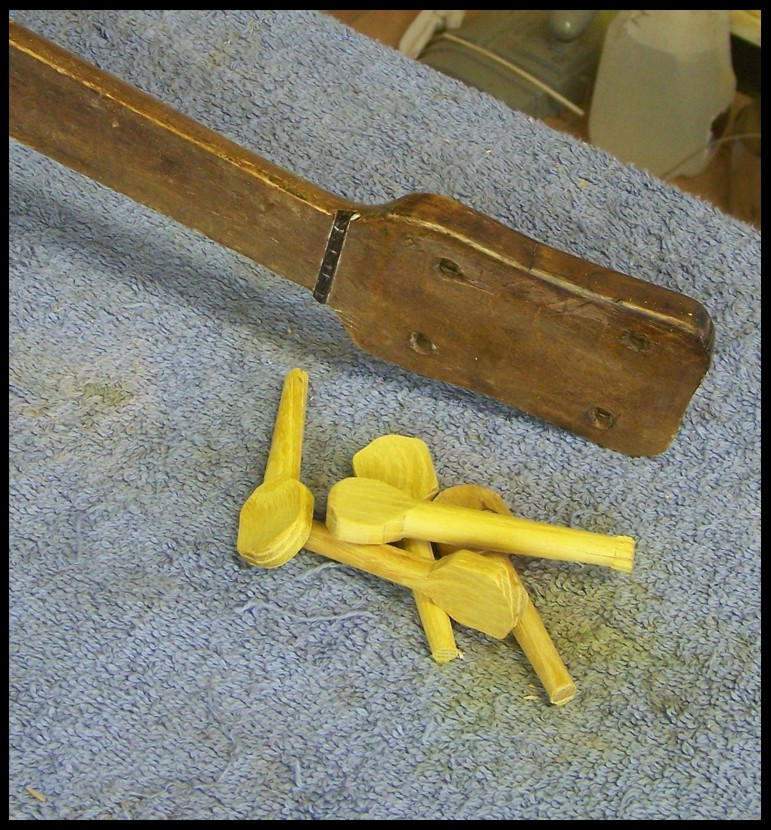
I need to make a few pegs for this one so I milled a few blanks of Osage Orange for turning. I really like this wood.
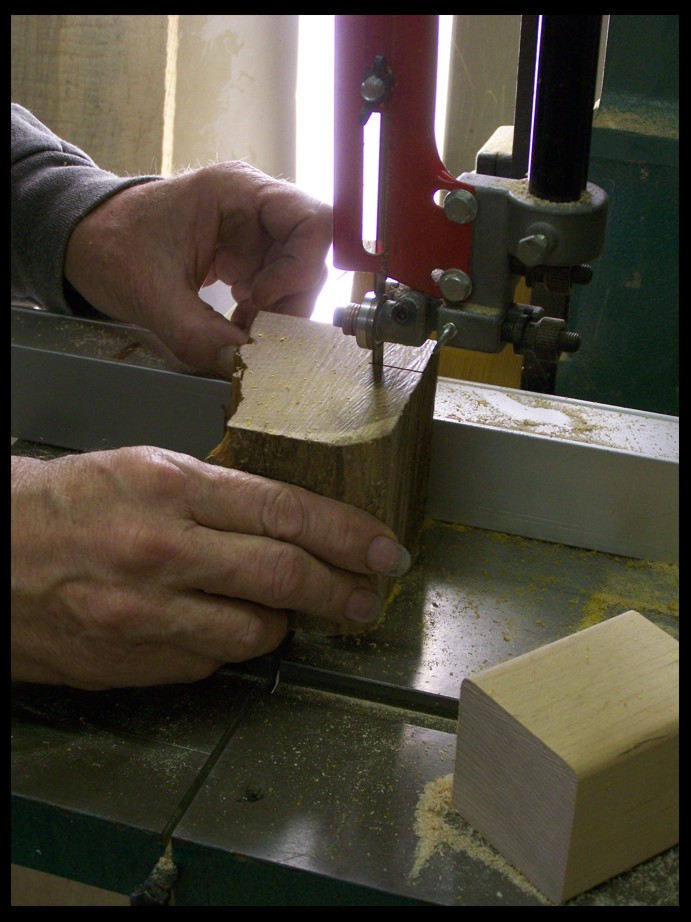
Turning a peg...
The complete mess ... on the bench and ready for fitting.
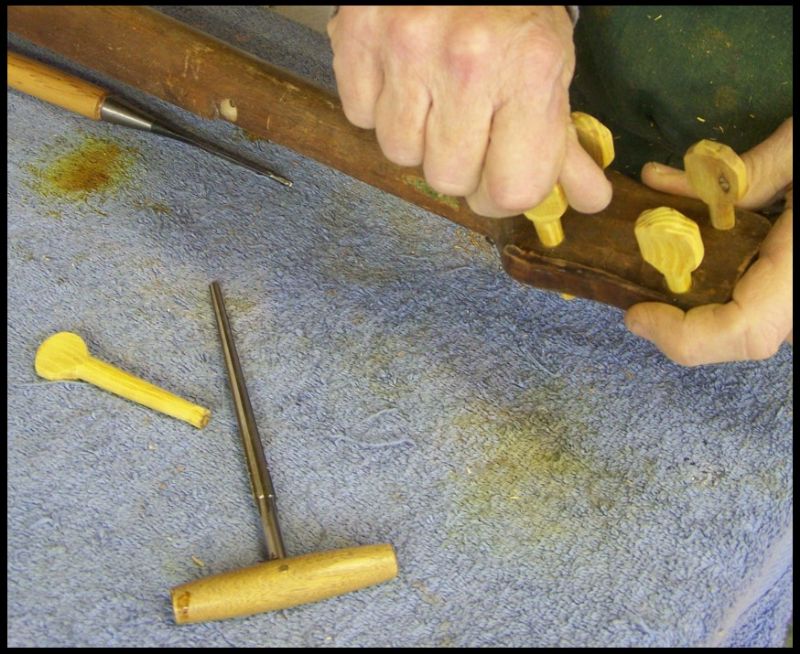
Fitting.
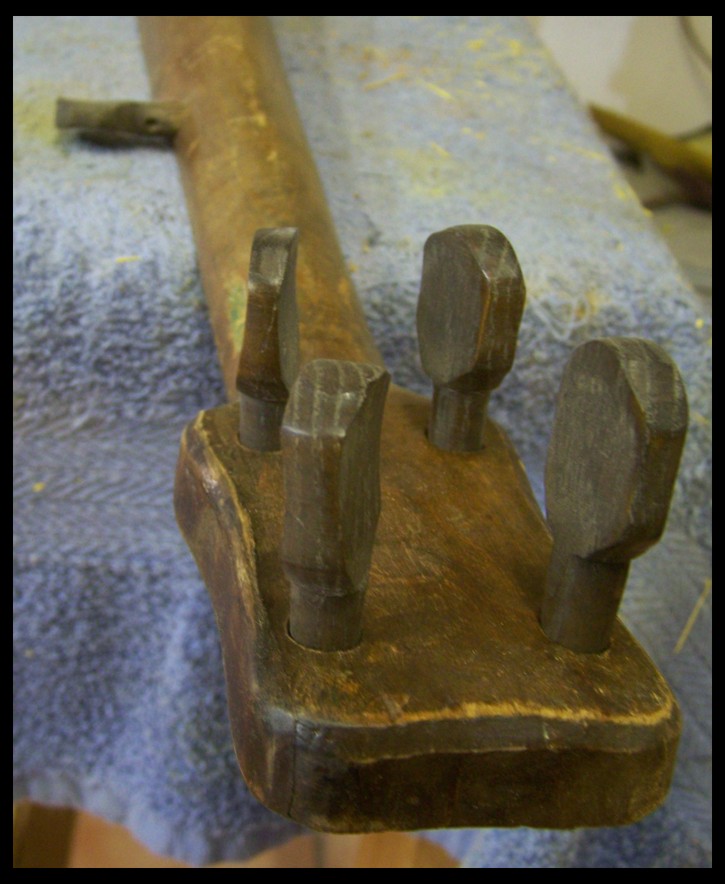
After letting them get old in a quick way, they look like this.
Here is the banjo with strings and a mock up bridge. I'll make the final one later.
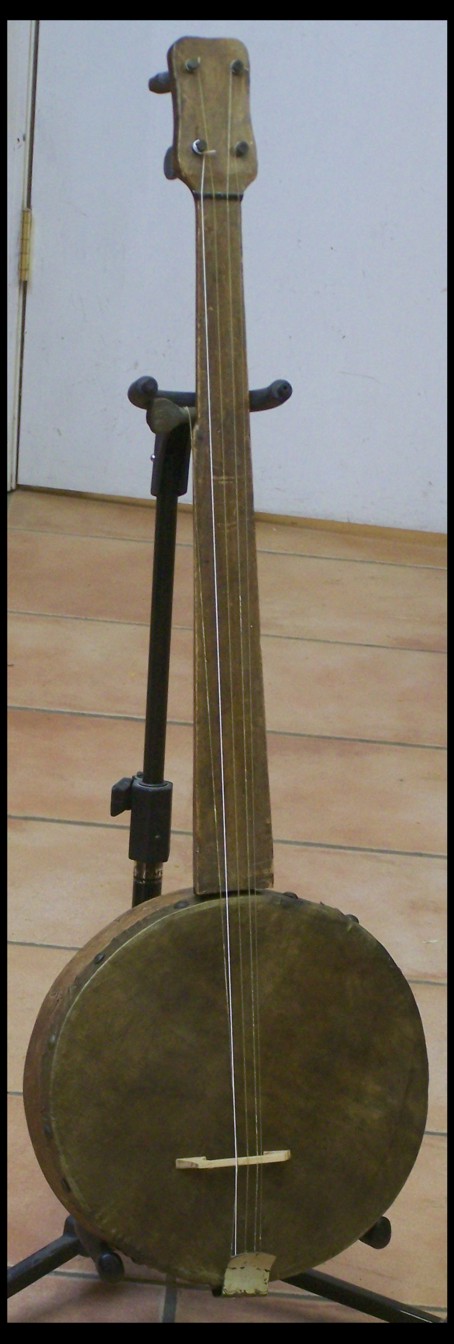
More later...
Edited by - Dan Knowles on 01/23/2013 17:08:45
Dan Drabek - Posted - 01/23/2013: 17:59:40
Good work Dan,
Not everyone would think to, or care to patinate the inside of the dowel stick hole.
Osage is one of my favorite woods too. It takes a lot of years for it to oxidize to a dark brown. Yours looks very convincing.
DD
Dan Knowles - Posted - 01/23/2013: 19:13:34
Dan,
Thanks. One of the signs I keep up in my shop says "It should look like I haven't been there." I try to live and work by that as much as possible.
Dave1climber - Posted - 01/23/2013: 19:28:24
Dan
How do you bring the head up to the correct tension?
By the way that banjo looks really old, even the new parts.
Dan Knowles - Posted - 01/23/2013: 19:37:14
Dave,
I pulled and clamped the fool out of it. Thanks age was the aim.
Dan Knowles - Posted - 01/24/2013: 20:21:17
24th. day of January, 2013
I just got done with band practice . We are looking forward to a very busy 2013 season. Most of our work will again be on the Mississippi river system. We are also hoping to record a new CD in the next few weeks to have out for this season.
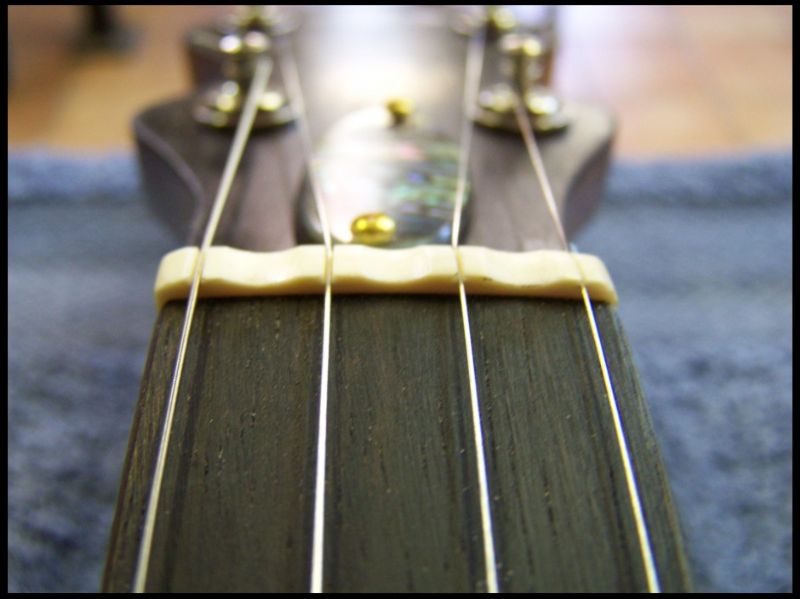
Talking about new I just caught a new banjo down at the shop. This is one that you have watched bits and pieces come together in this forum. I haven't named her yet. Perhaps y'all can help. I've certainly found that Banjohangout member to be quite helpful in this way!
First a bit about the banjo.
This instrument was built specifically to test the differences between the WHITE LADIE , the Electric & the Tubaphone tone rings. It is so constructed that the tone rings will interchange. In a few weeks I intend to have several banjo players help me with this test. But back to the banjo...
It features:
An aged copper & maple spunover rim, raw brass hardware (made by Bill Rickard), mahogany neck with two tone ebony fingerboard, backstrap & heelcap, oil finish neck & French polish rim & dowel stick, ivory nut and pip, thumb notch scoop, Stained Fiberskin head and a osage orange & ebony bridge. Currently it sports nickel plated nuts and J-hooks and a import No-Knot tailpiece but these will be changed to raw brass hooks & nuts and a hand made Knowles bridge before the tests begin.
So here she is!
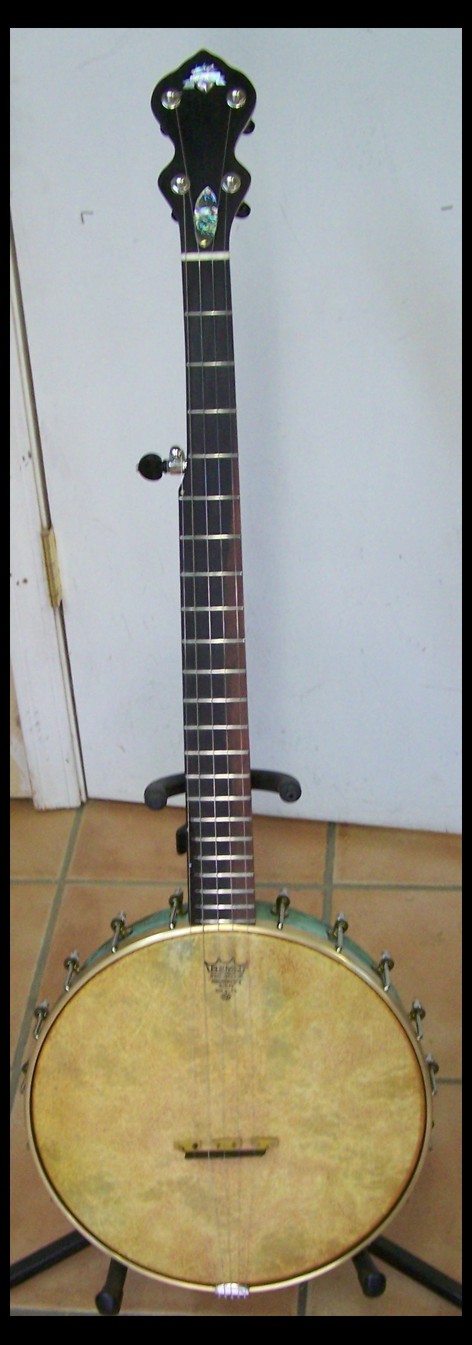
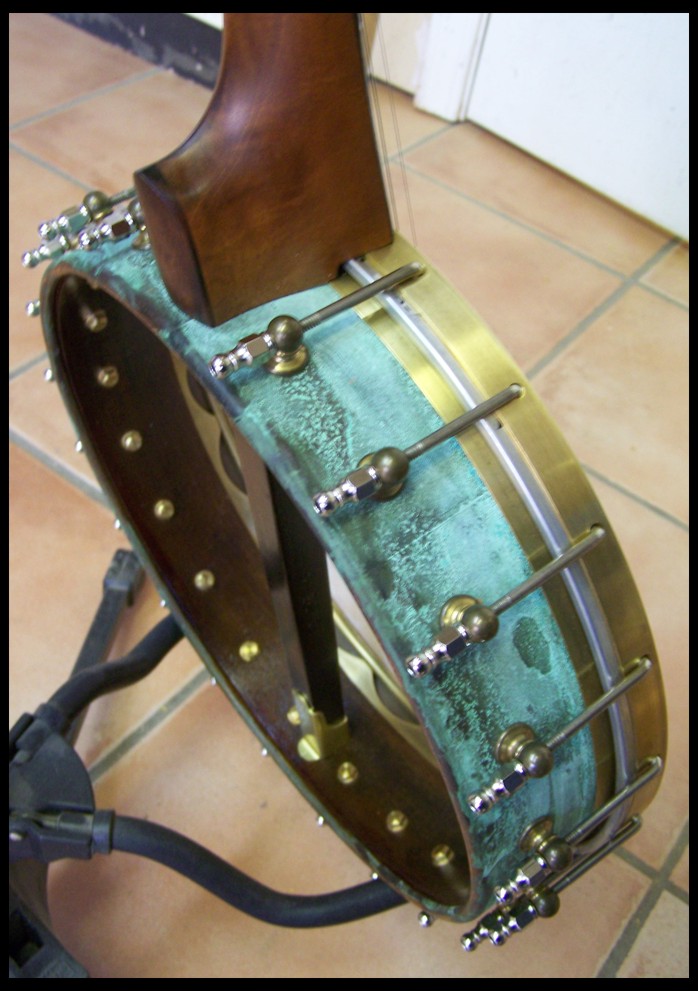
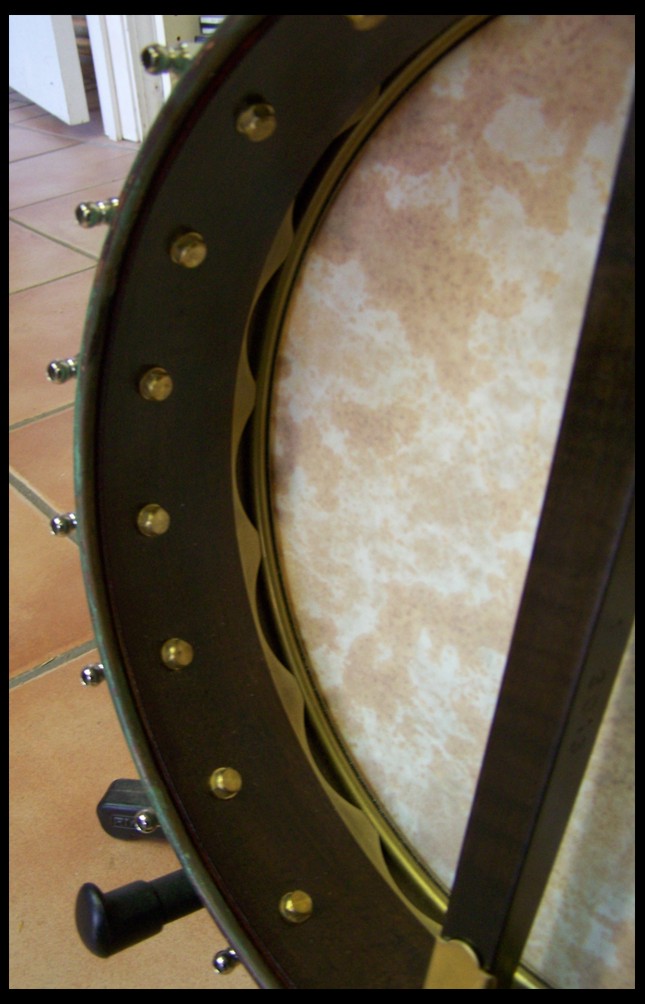
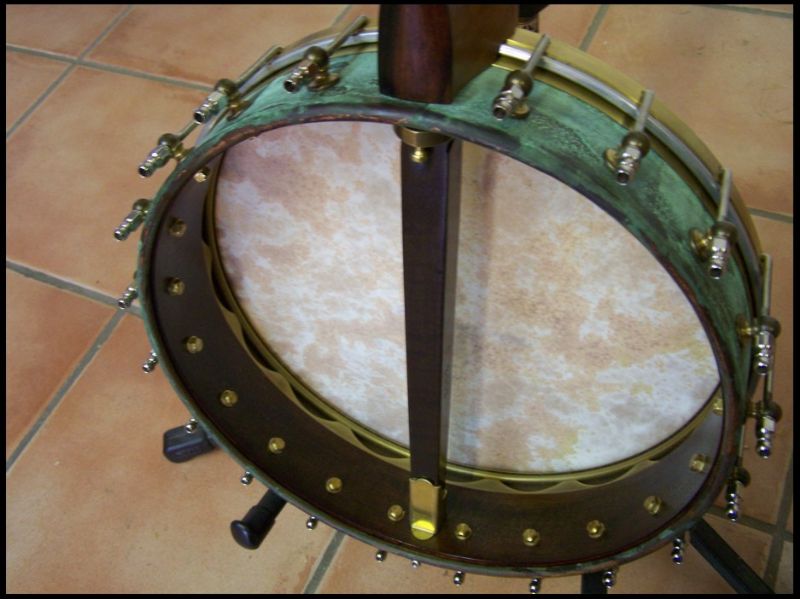
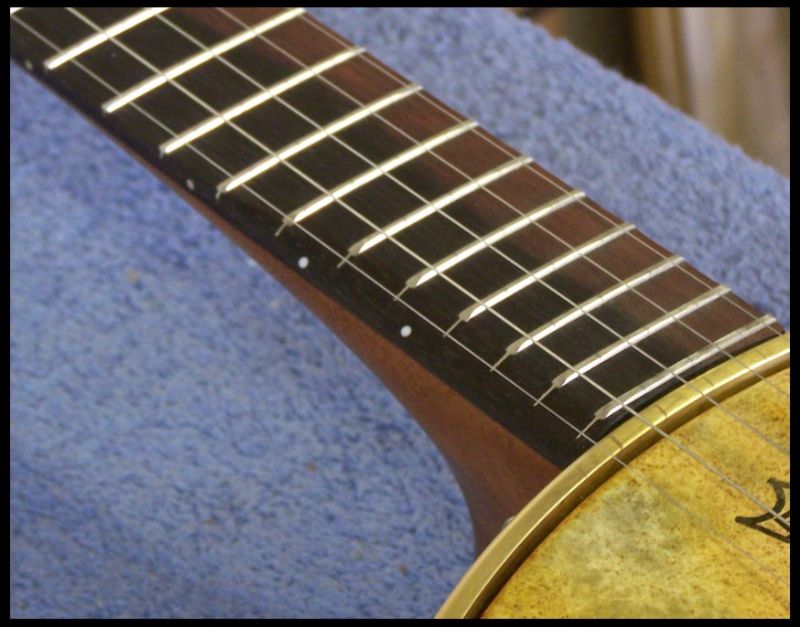
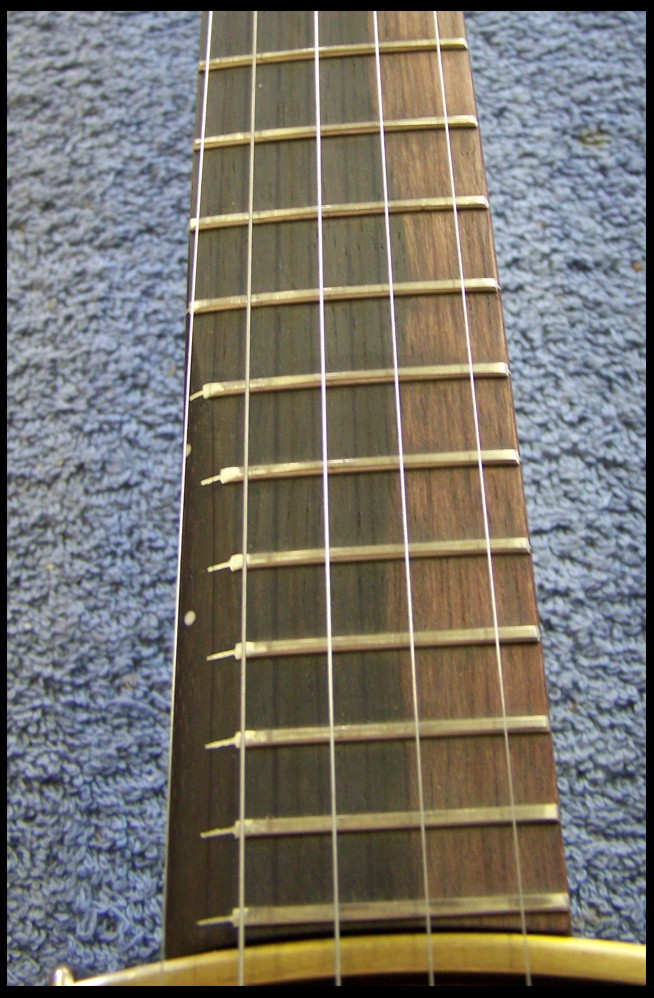
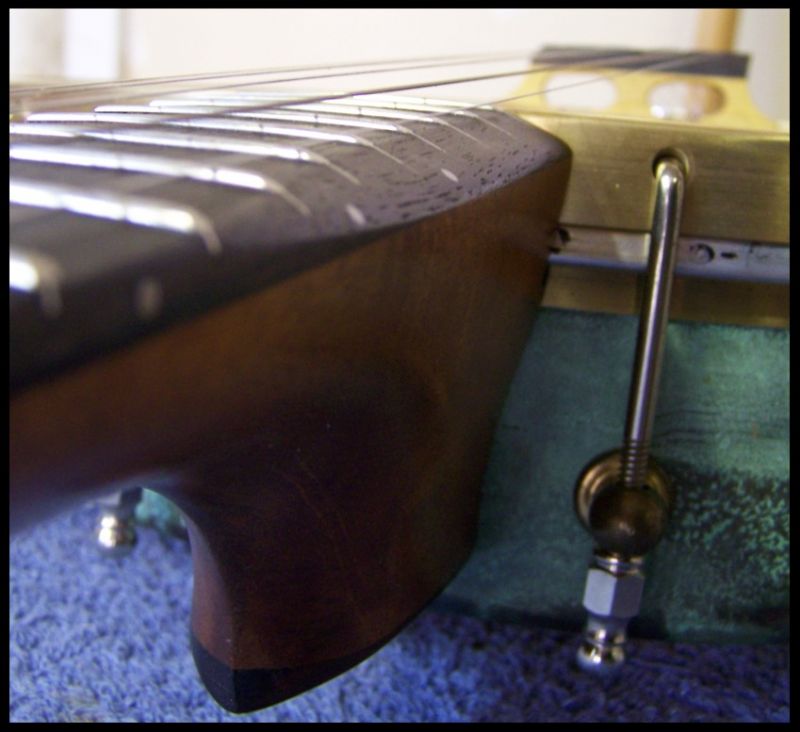
See you soon!!!
Edited by - Dan Knowles on 01/24/2013 20:24:04
Dave1climber - Posted - 01/25/2013: 07:02:48
Two Timing Tootsie
She is a good looker!
Edited by - Dave1climber on 01/25/2013 07:04:23
Bastertone - Posted - 01/25/2013: 10:40:18
Lord of the rings!
Otherwise known as "the precious"
Edited by - Bastertone on 01/25/2013 10:42:05
Paul Meredith - Posted - 01/25/2013: 19:08:14
I really like the beveled "scoop", and especially the way you used full width frets, then filed the whole thing down. Elegant and functional. A gorgeous banjo!
Kirk Jacobs - Posted - 01/25/2013: 20:54:00
Do you worry about the copper leaving green on your clothes or do you have it coated to keep the patina off you? Big fan of copper and I do like the looks of this banjo, great job!
Dan Knowles - Posted - 01/26/2013: 05:36:29
Dave, Bastertone, Aeroweenie,
Thank you so much... The scoop is basically pushing the envelop from a Tom Nechville design. I think his version is standard on his Moonshine line of banjos. Most players I've talked with tell me that what bothers them is the feel of the frets on the 5th. string side of the neck. Peter Boettcher once told me "Leave those frets in boy. That's what God gave you the high notes for!" I guess that is me try fulfill his charge.
Kirk,
Thank you. The green coming off was something I worried about. It behaves much like any other patina that I have used to this point, it stays where it's put and doesn't transfer itself to your hands or clothes. It does take quite a long time to develop though. I gave this its first patina bath almost a year ago. I've watched it grow an develop to this point. I could seal it with lacquer or oil but why stop a good thing.
Edited by - Dan Knowles on 01/26/2013 05:42:26
Dan Knowles - Posted - 01/28/2013: 20:00:50
1-28-2013 Ketchup!
This has been a few very busy in fact so busy this is the first I've been able to get back to the Hangout... amazing how life can be that way.
Thurs & Friday were BOOKING (in caps!) days, not much to show but Dan writing and gaining cauliflower ear. Still it was quite successful. We will be performing on the QUEEN OF THE MISSISSIPPI riverboat a bunch this year. Hopefully I'll be able to post from the rivers when I'm out! Saturday was a instrument building, apartment repairing, Skyping and Art school involving. Sunday was apartment fixin' and instrument visiting and today was a crazy morning and a long teaching afternoon. Still in between all of these activities some luthing transpired. What's more a few photos were made! So here goes just a taste tonight.
I made up some ebony & maple veneers (ripped from raw stock and thicknessed in the sander) for David Emery's banjo neck and glued them up...
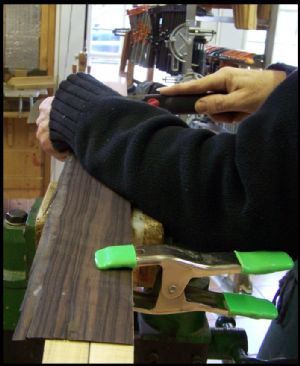
They dried and I was able to plane them flush to the edges. This is important because it will facilitate the truss rod milling later.
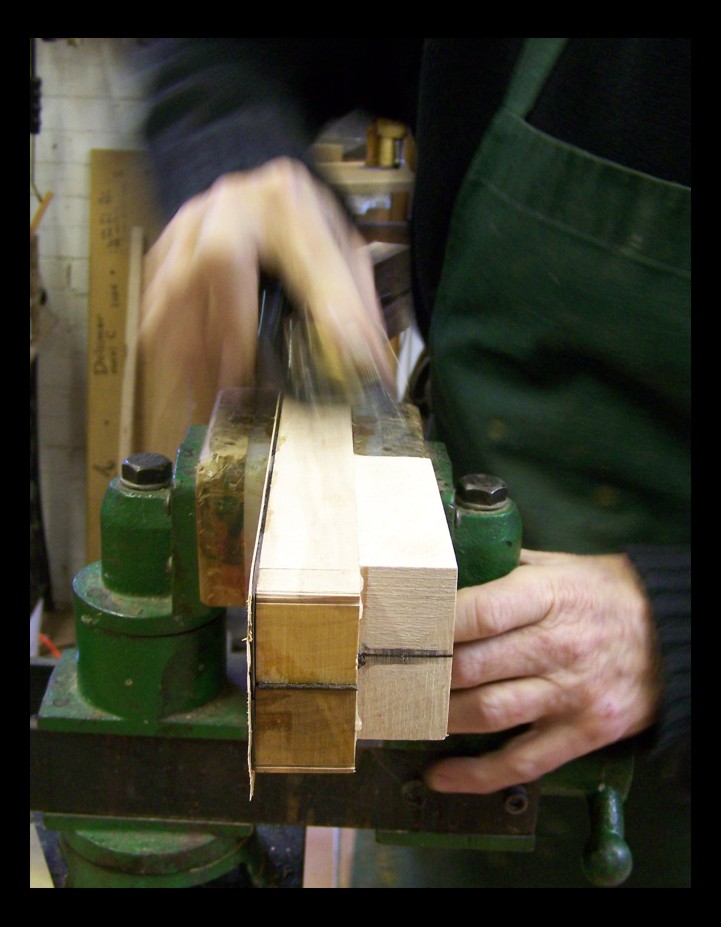
I laid out the neck thickness so I could begin preparing for the backstrap.
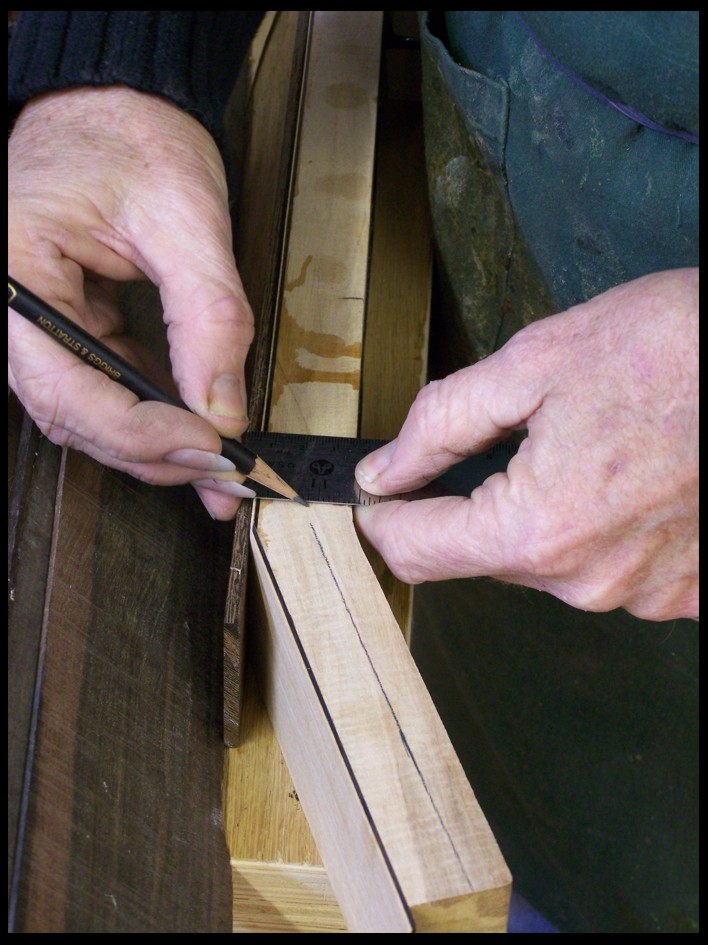
Then I milled the t-rod slot on the table saw. I've got this old saw set up only for milling truss rod slots. There are three 7 1/4" blades stacked together and they are just the width of the truss rods I use. I seldom have to adjust the height even. It works great.
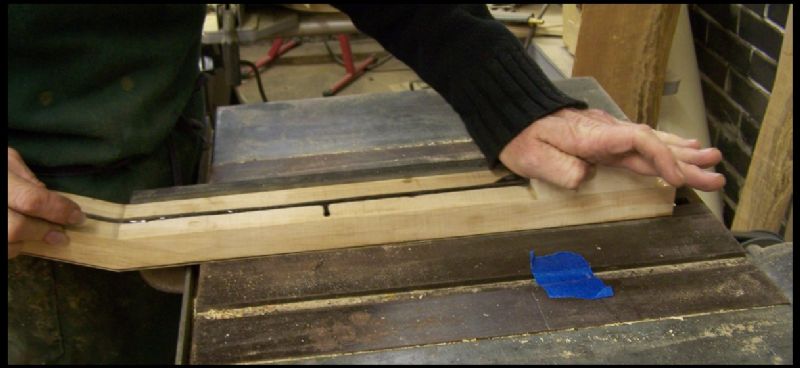
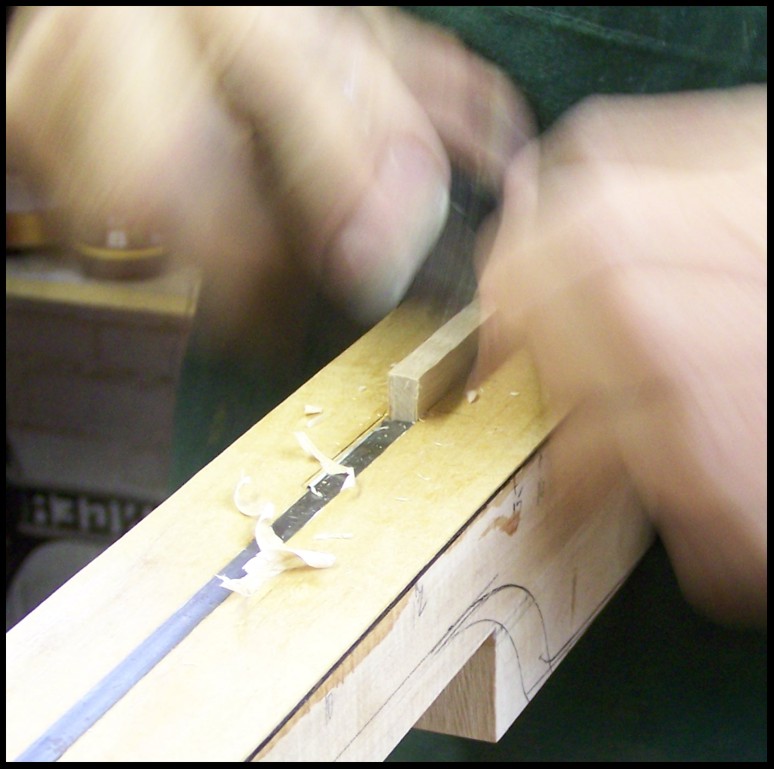
With the truss rod installed, the cover blocks are planed flush..
In the midst of this David's samples returned...I wondered which was his favorite?
Good it turns out to be C, which was mine also. Great minds... well at least David has one!
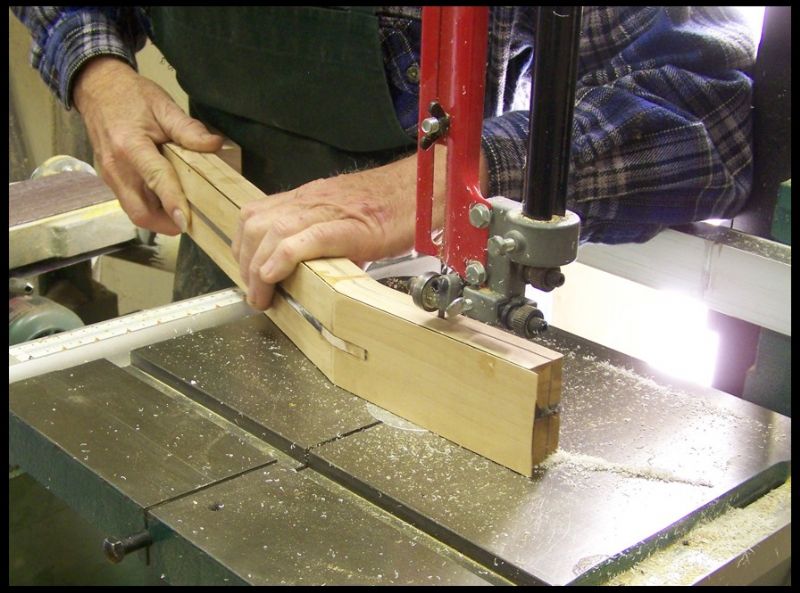
Soon I grabbed up the neck to mill on the band saw.
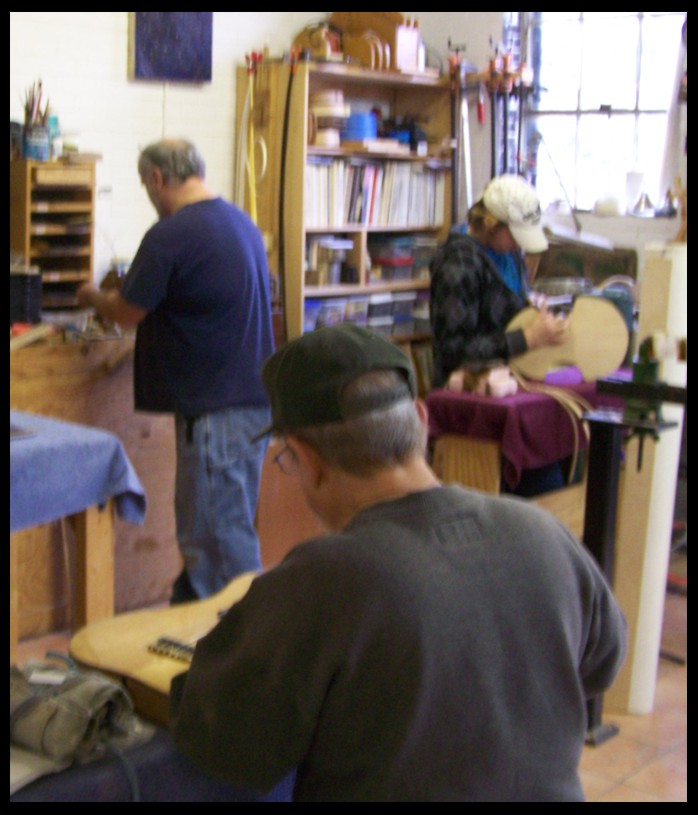
Saturday came along with my good batch of students...
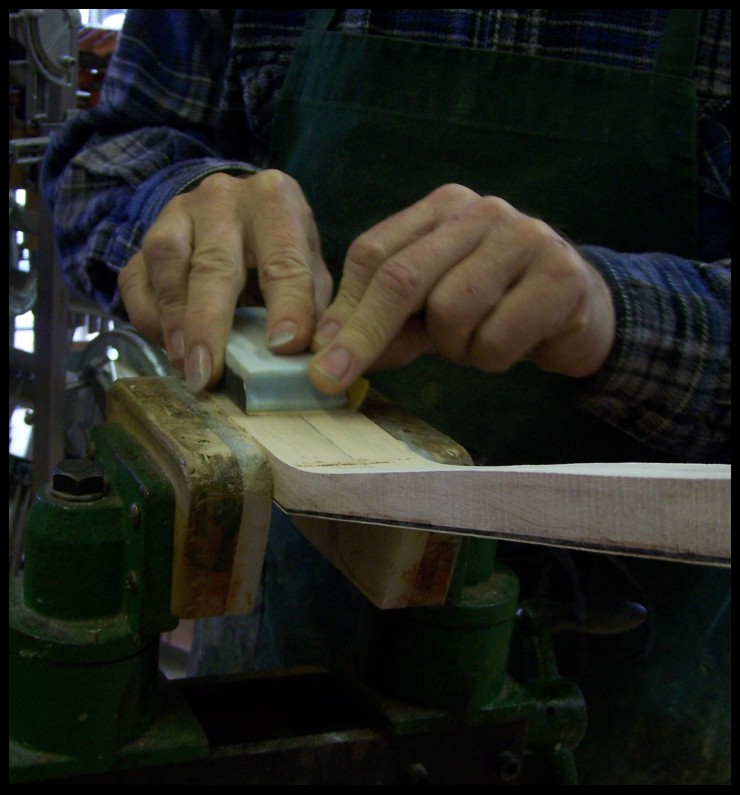
While they worked I trued the backstrap aria with sandpaper. The sawing on this one was very accurate but the saw kirfs still needed to be got rid of.
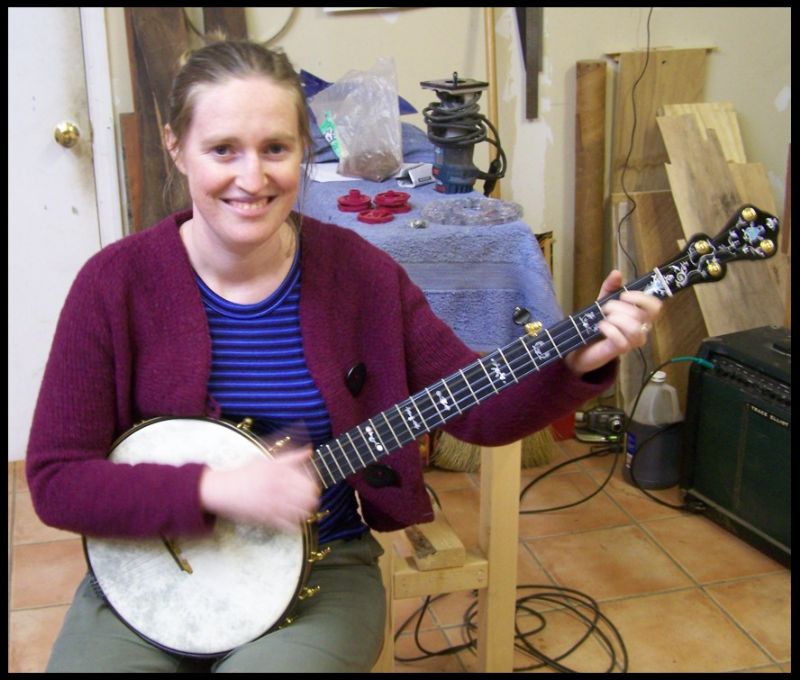
Sunday we had a wonderful visit with Pria Schwall-Kerney. She is a very fine fiddler and Old-Time banjo player. She is from Melbourne, Australia and came over to adopt the first ANGEL OF MERCY banjo. It was interesting the number of Australian things she found on the instrument, opals inlaid, gum flowers engraved, Australian black and white pearl inlaid and several other things. It was as if it was deigned specifically for her... interesting.
More very sooooooooon...........................
Edited by - Dan Knowles on 01/28/2013 20:02:12
pastorharry - Posted - 01/28/2013: 21:14:11
Dan, the angel of mercy and double trouble tone ring banjo both look great. I was on skype with David on saturday night...it was 12:00 midnight for him and he couldn't stop talking about the banjo you are building him, he's pumped!! Sounds like a great tour coming up for you, keep a sharp eye on those river boat gamblers! Aloha, Harry
Dave1climber - Posted - 01/29/2013: 03:32:39
Dan
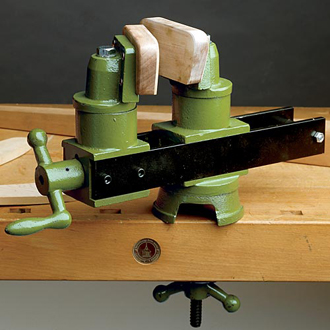
You make assembling the neck look easy, probably because you have done it more than once or twice. I will be very interested to see how you do the back strap. I would think that the back strap reinforces the neck in a area that can be fragile. I am also wondering what the extension on the heel of the neck is for? The other thing that i am curious about is you vice, it looks very sturdy, is that something that is available from a suppler?
That dark ebonyizying stain will really set off that instrument! It will be stunningly good looking. 
Thanks for taking the time to post what you are doing, I find it to be very interesting.
Dave
DEmery - Posted - 01/29/2013: 09:24:46
Dan it was super spending time this last weekend discussing the details on the slot head. I know the many folks watching your thread will enjoy watching this banjo project unfold. Have we decided which wood will be used for the caps, back strap, and fingerboard? The color tones in you walnut stain along with the "old penny" dry relic hardware will lend itself to some interesting choices. You discussed options that range from ebony to rosewood. Have you landed on a preference. I look forward to watching..... David E.
Dan Knowles - Posted - 01/29/2013: 18:10:38
Pasture Harri,
Thanks so much! I think the only one more pumped about this banjo might be me!
The only tour I think I might like better would be to visit you! and now! Away from this cold.
Dave,
I've done it several times (neck assembly) and I can assure you that my job is to make it look easy! I'm planning on gluing up the backstrap tomorrow...we'll see
I looked through most of my photos here on the hangout and didn't find one that tickled my fancy. So I went to Garrett Wade and got this photo.. This is a pattern makers
vise. Here are three woodworking supply companies that have it. garrettwade.com/patternmakers-...36A01.03/ and stewmac.com/shop/Tools/Vises/G...Vise.html or woodcraft.com/product/2003516/...vise.aspx
David,
I had a great time talking with you via Skype. Two hours gone in a heart beat and felt like fifteen minutes.
I have put a lot of thought into the wood and the quality of the material being used in this instrument. As you well know (from handling the samples) this maple is AAAAAA grade, better than any master grade I have ever handled. With that in mind I feel that anything less than a precious timber (I know they are all precious) would be demeaning to the project. I love ebony (as most of you well know) but though quite costly I've been feeling that the almost harsh contrast and Victorian severity of ebony may not make it the best choice. Something dark with a hint of red or old copper to blend with the aging of the brass would fit. This led me to my dwindling stash of pre-ban Brazilian Rosewood. Color wise it fits the bill as does its rarity. So I am going with Brazilian Rosewood for the fingerboard, heelcap and top layer of the backstrap.
DEmery - Posted - 01/30/2013: 03:01:28
Dan that is an outstanding choice. It will pull all the color tones together and make the banjo pop for sure. You have been holding this Brazilian Rosewood for a long time as you have the maple. Does it have any particular history? You told me the story about where the maple was cut and how you came to have it. What do you know about the rosewood? Thanks for offering it up Dan. You have always put outstanding materials in our projects. David E.
Dan Knowles - Posted - 01/30/2013: 04:37:29
David,
This particular piece of Brazilian Rosewood was purchased from luthier Tom Morgan 10-15 years ago. He bought it (along with about 2000 top sets & other wood) from Martin Guitar Co. around 1960. As I recall Mike Longworth was his friend and helped him to make the buy. Then it was considered to be scrap, now it is a premium piece. Interesting how times change.
Page: 1 2 3 4 5 6 7 8 9 10 11 12 13 14 15 16 17 18 19 20 21 22 23 24 25 26 27 28 29 30 31 32 33 34 35 36 37 38 39 40 41 42 43 44 45 46 47 48 49 50 51 52 53 54 55 56 57 58 59 60 61 62 63 64 65 66 67 68 69 70 71 72 73 74 75 76 77 78 79 80 81 82 83 84 85 86 87 88 89 90 91 92 93 94 95 96
Terms of Use | Privacy Policy | Privacy Consent (EU/GDPR Only)
Copyright 2026 Banjo Hangout. All Rights Reserved.


