DVD-quality lessons (including tabs/sheet music) available for immediate viewing on any device.
Take your playing to the next level with the help of a local or online banjo teacher.
Weekly newsletter includes free lessons, favorite member content, banjo news and more.
Premier Sponsors


|
Please note this is an archived topic, so it is locked and unable to be replied to. You may, however, start a new topic and refer to this topic with a link: http://www.banjohangout.org/archive/251124/4
Page: 1 2 3 4 5 6 7 8 9 10 11 12 13 14 15 16 17 18 19 20 21 22 23 24 25 26 27 28 29 30 31 32 33 34 35 36 37 38 39 40 41 42 43 44 45 46 47 48 49 50 51 52 53 54 55 56 57 58 59 60 61 62 63 64 65 66 67 68 69 70 71 72 73 74 75 76 77 78 79 80 81 82 83 84 85 86 87 88 89 90 91 92 93 94 95 96
Dan Knowles - Posted - 01/04/2013: 19:42:03
4th. day of January, 2013
Wooo... I almost slipped up and wrote 2012, that was a close call! I've done good so far and I hope that you have too.
Here is a bit of my day today...
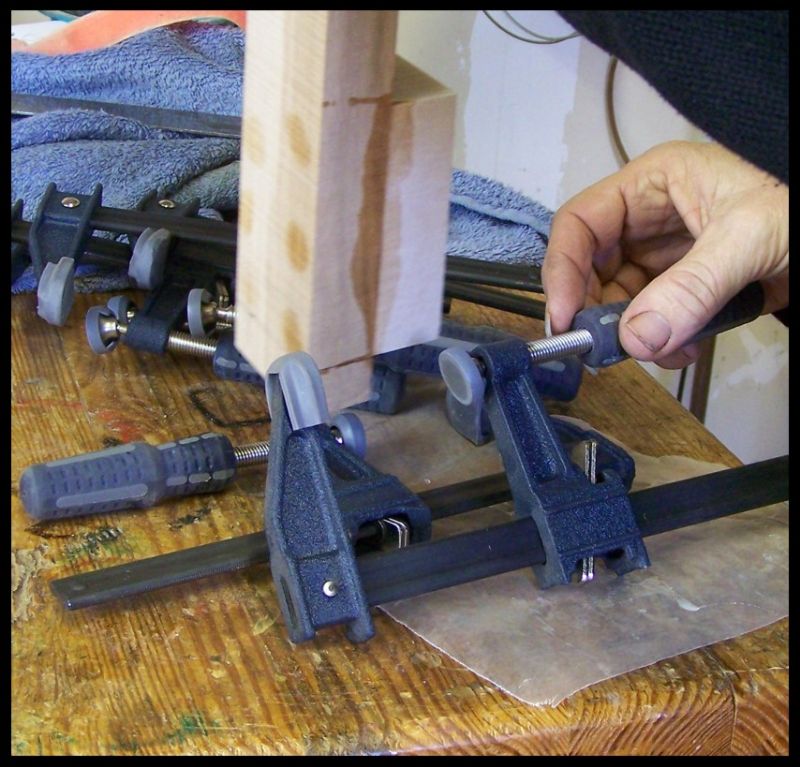
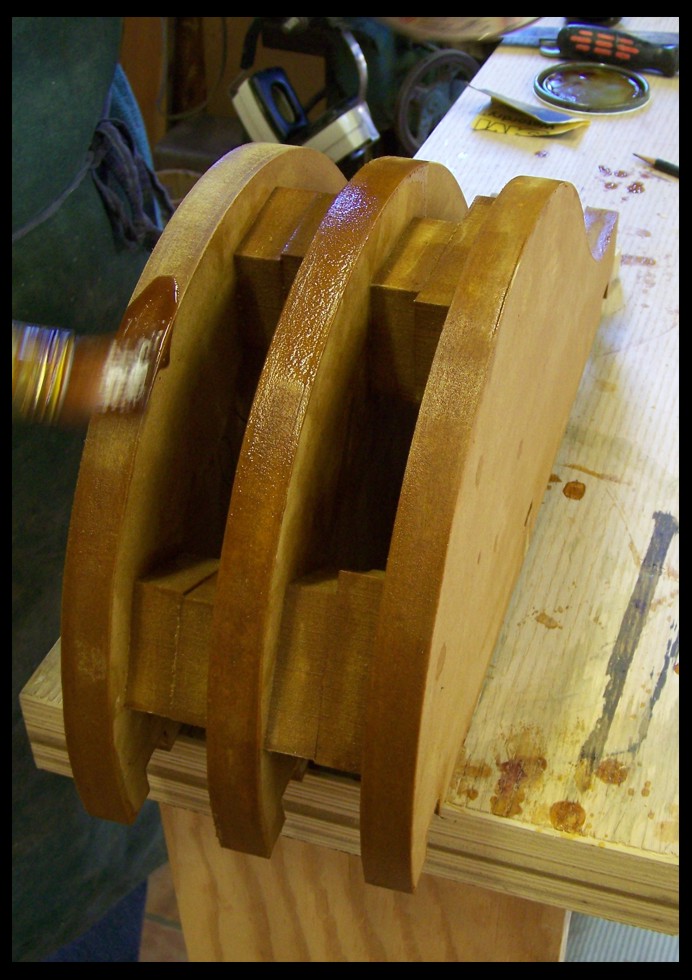
I broke (removed) the clamps from the heel block of David Emery's banjo.
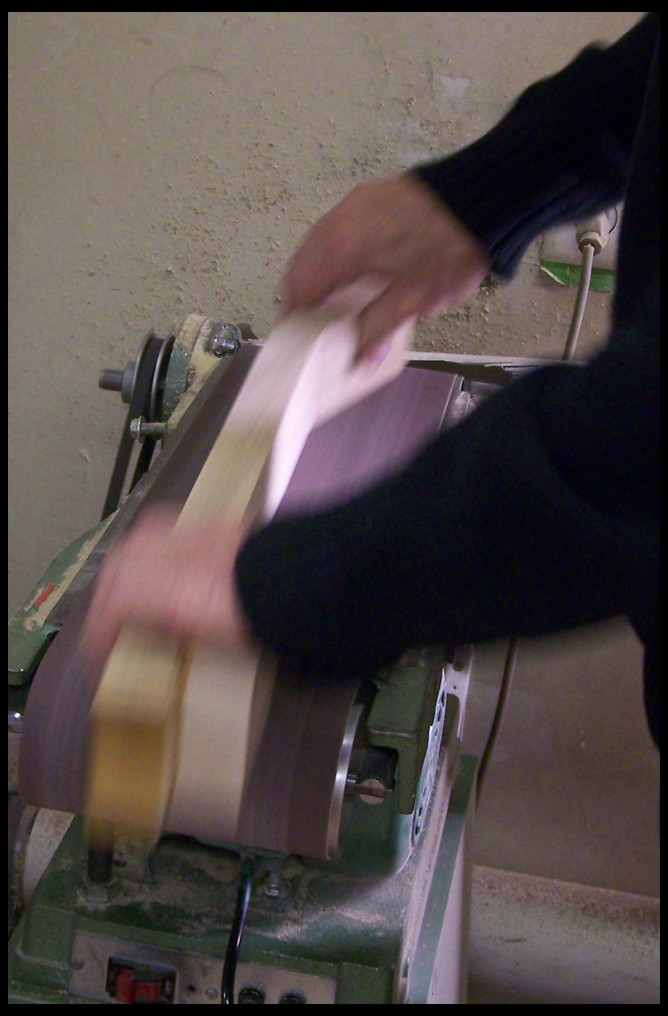
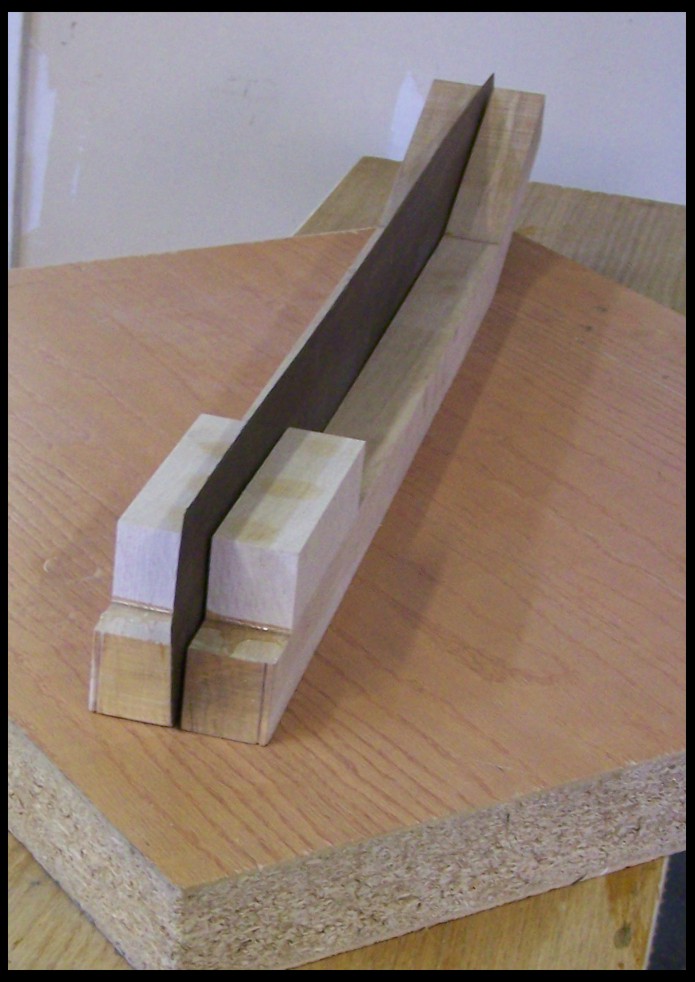
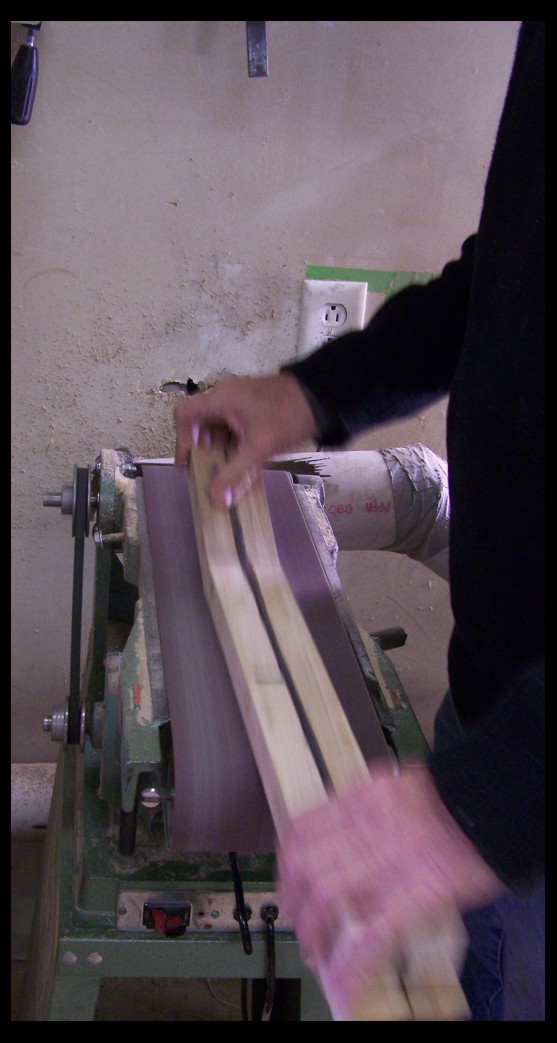
Then because I'm going to split this puppy in two and reverse the halves for strength, I trued the outside edges on the belt sander.
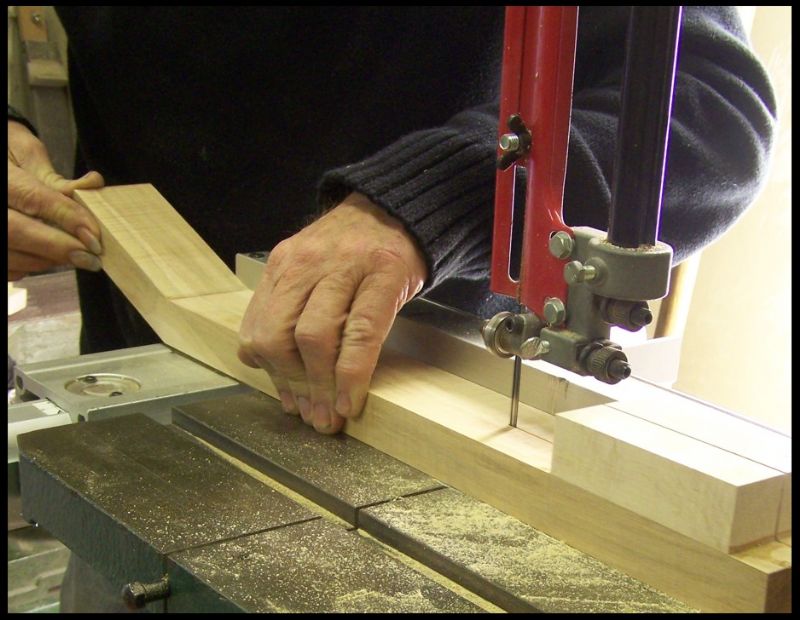
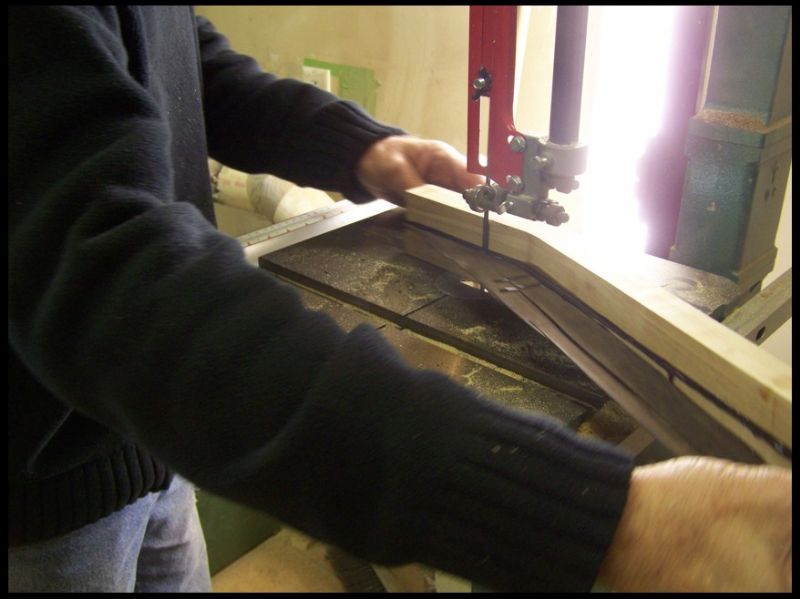
And chopped it down the middle...
Next I found a thin piece of ebony and slicked it up it in the thickness sander...
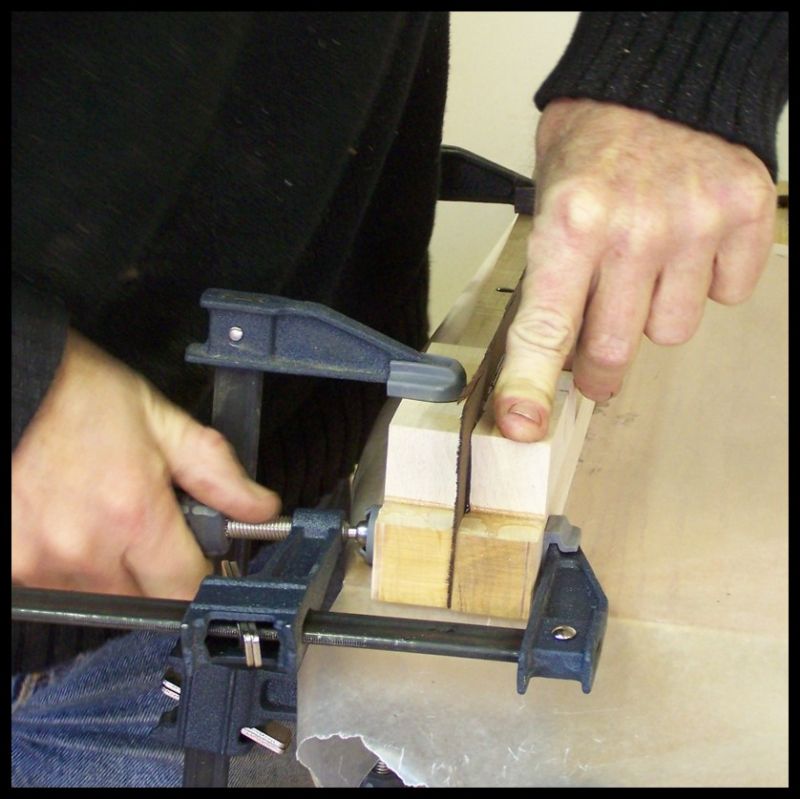
Here the ebony is being dry fitted between the two flipped halves...
Applying the epoxy...
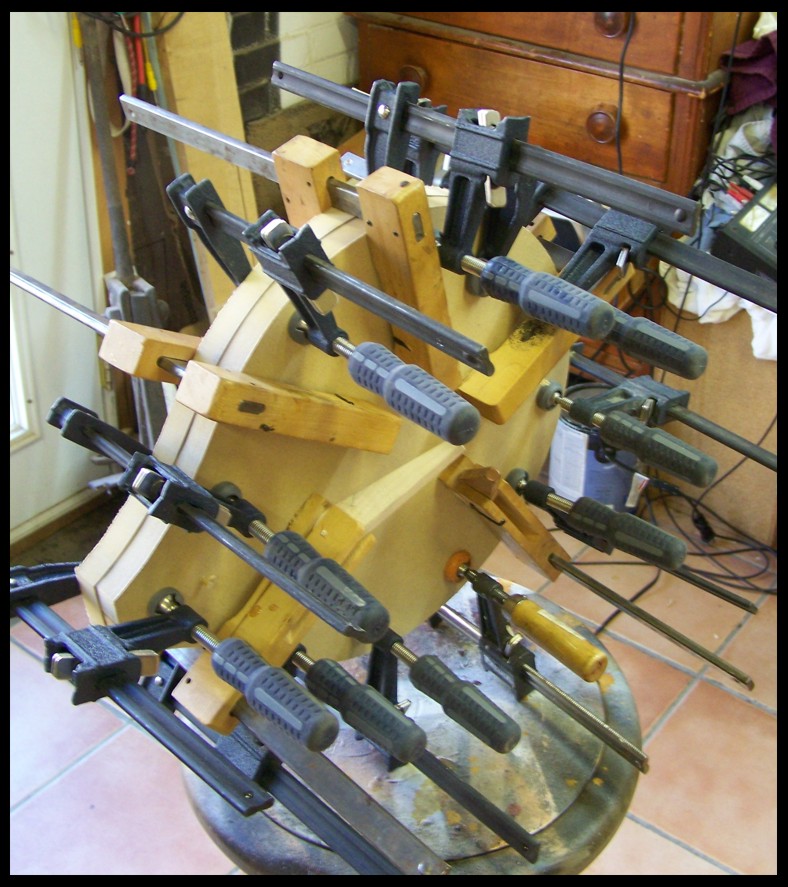
And squeezing the sandwich together...
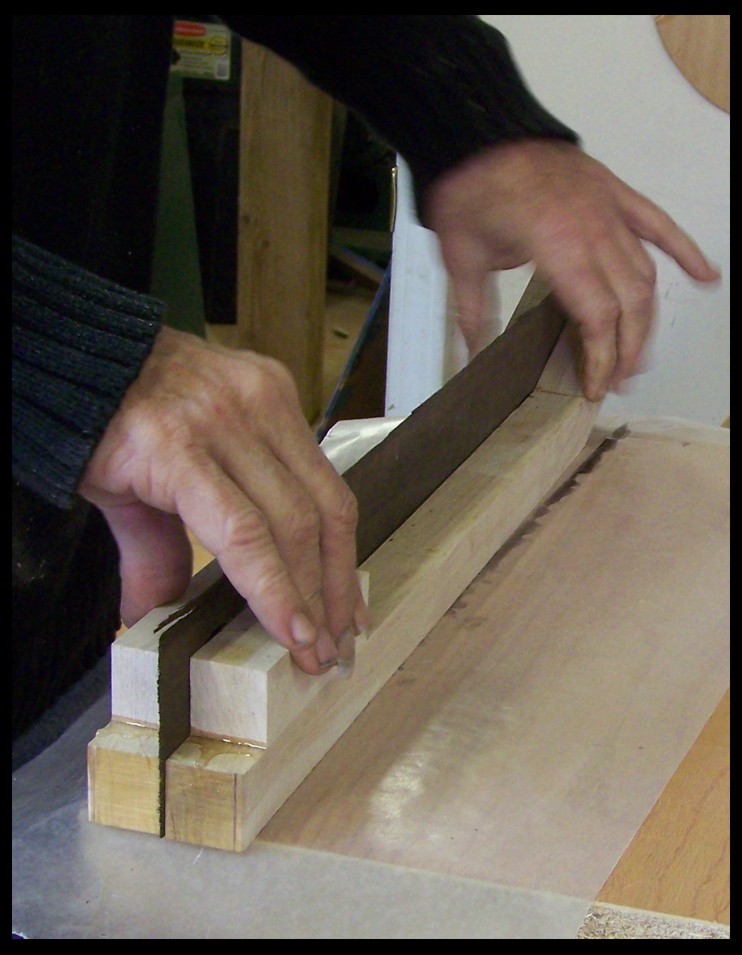
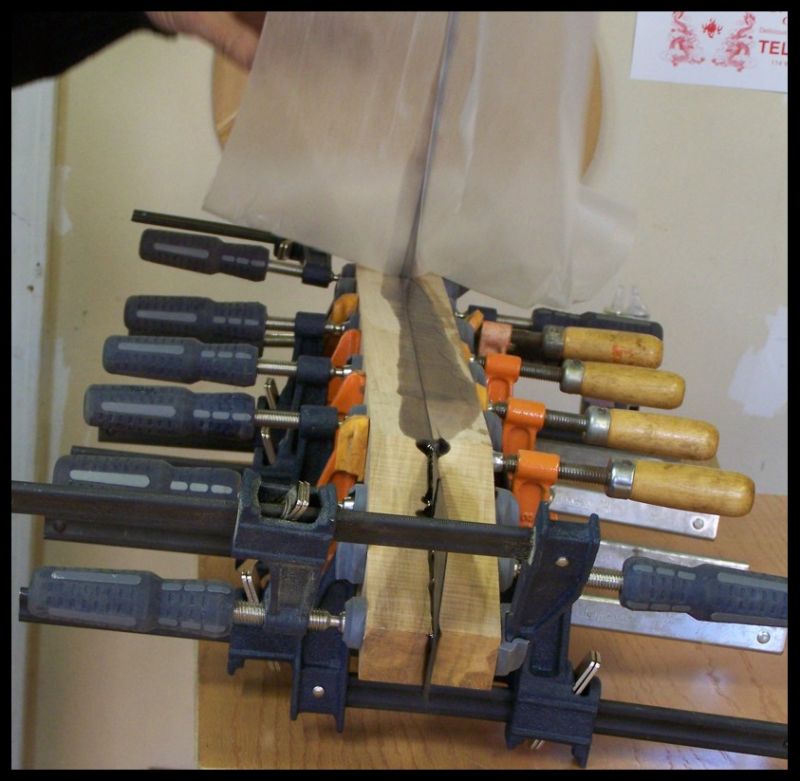
And starting to clamp it..First I clamp one half to my clamping table this seams to make keeping the other half lined up much easier.
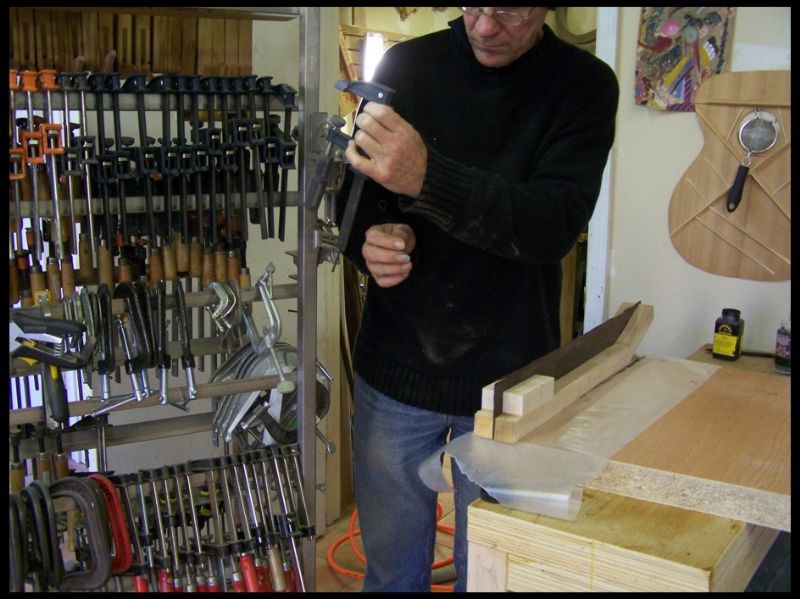
Clamped (but released from the table), then flipped to free the wax paper.
More tomorrow...
Edited by - Dan Knowles on 01/04/2013 19:42:42
DEmery - Posted - 01/04/2013: 19:52:26
Dan each time we work through one of these projects it amazes me. One would think I'd get use to it. Knowing what a premium piece of maple this is and the process you are going through to build a slot head neck is again simply amazing. Normal pickers order a banjo and all the magic of building has already taken place. We open the case and there is a finished banjo. The detailed photos remind me of what it takes to turn a board into a musical instrument. When we get to carving this neck and laying on the finish; I know the folks watching will be glued to these photos. I can imagine what it will look like but it is always looks like so much more when you get it complete. I will keep watching........... David E.
Shawn Hoover - Posted - 01/04/2013: 20:00:31
I'm glued already. It's a treat to watch this process. I've seen billets resawn and flipped, but not a perfectly good scarfed blank. It's gonna be a sweet neck!
I remember when I tried to laminate a neck with multiple pieces of wood and slow set epoxy. There were convulsions and shouts that would shame my mother. Dan just looks like he's having fun.
Dave1climber - Posted - 01/04/2013: 20:17:17
Dan
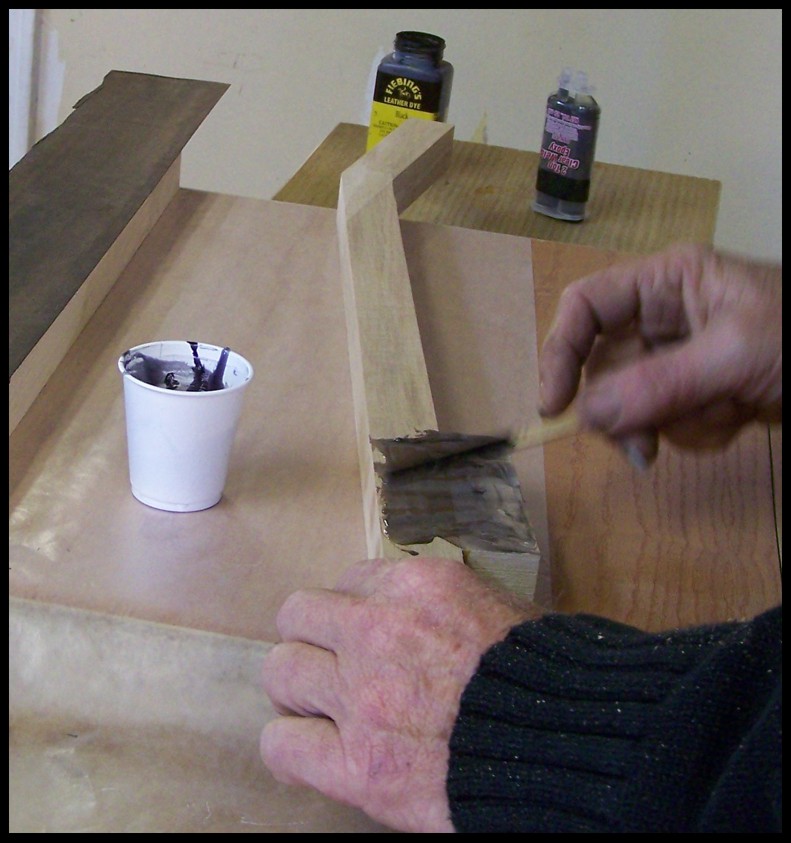
I noticed black shoe dye, I assume it went in the epoxy so no nasty glue line. ![]()
Some times I don't post, but I always look.
Dave
Dan Knowles - Posted - 01/05/2013: 18:07:13
David..
With such praise I guess I'll certainly keep on building. I hope this next post has something for ya.
Shawn,
Yep I do enjoy what I do for a living. I feel so fortunate to be able to do something that I really feel passionate about.
Dave,
I wondered who would catch me on that and I figured you might just be the one! You are exactly correct.
Dan Knowles - Posted - 01/05/2013: 18:35:10
fifth of January, 2013
Saturday here again. Now I'm resting and thinking with some satisfaction of this day just past.
It was a busy day which started at the shop early. I got in and removed clamps from "THE" banjo neck...
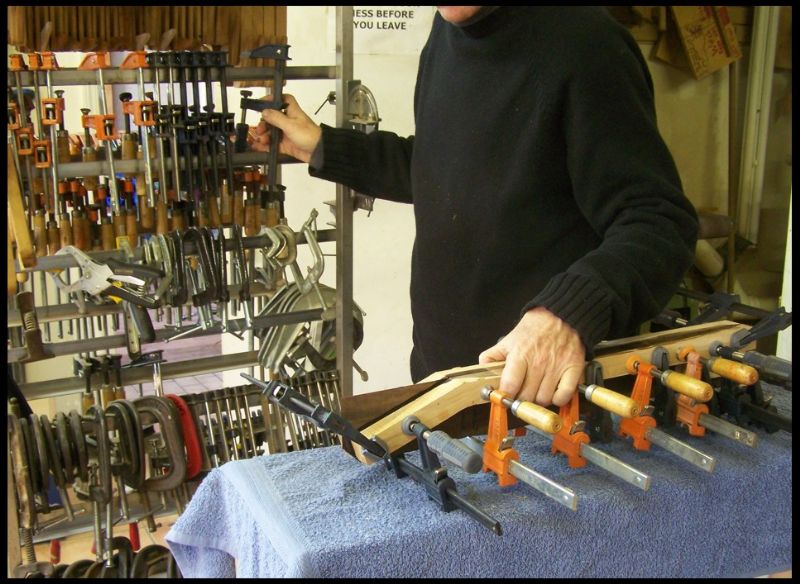
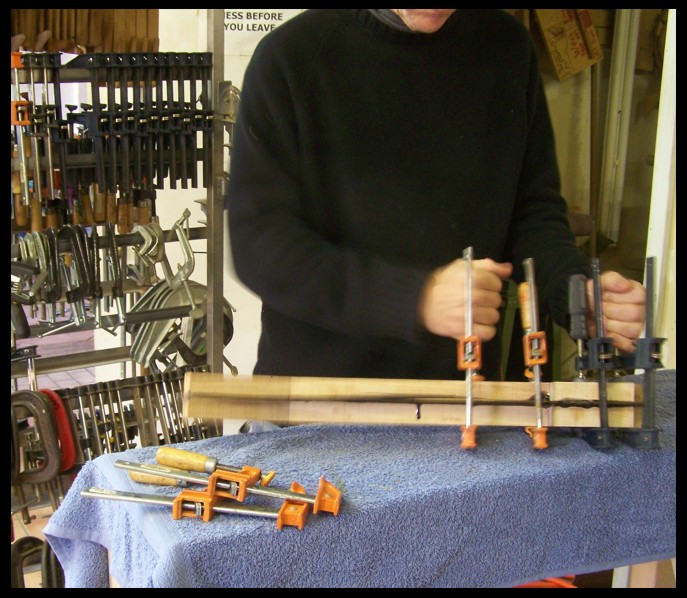
After the clamps were removed I cut away the extra ebony.
Then trued it up on the sander...
Do you remember a few weeks back when we started making the batch of Walnut stain? Well here it is as of today.
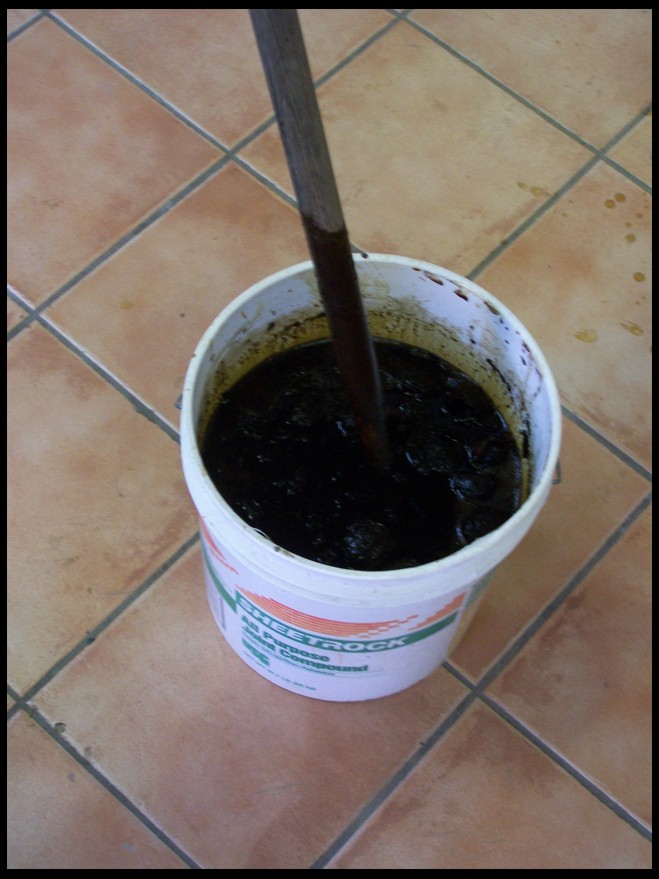
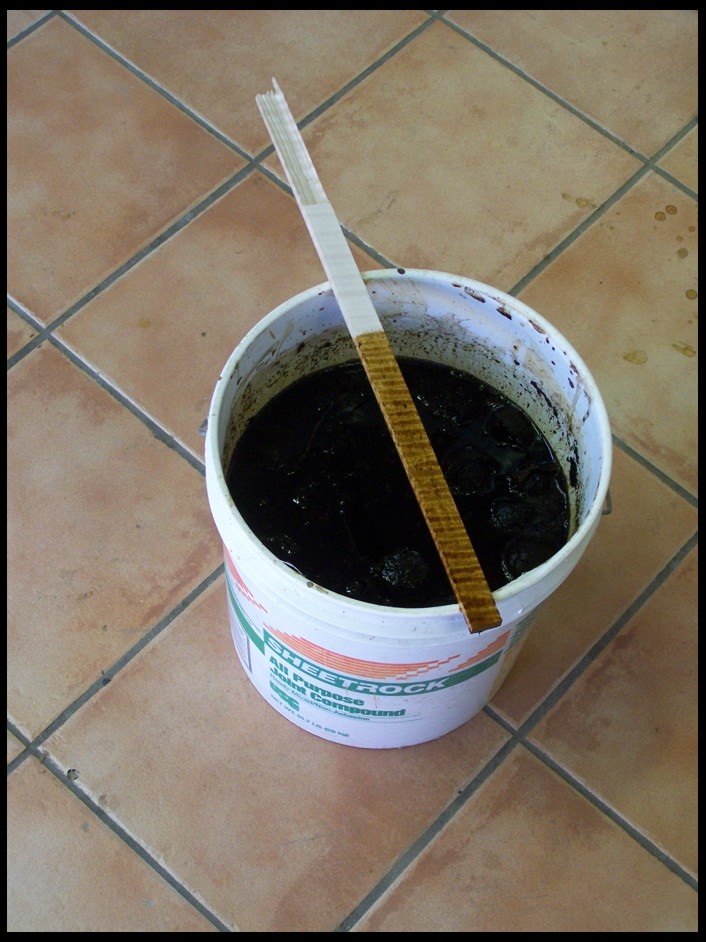
I stuck this piece of figured maple scrap down in the bucket just to see how it was doing...
Well the students started showing up for instrument building class at 8:30 and went to work. Today a lot was accomplished.
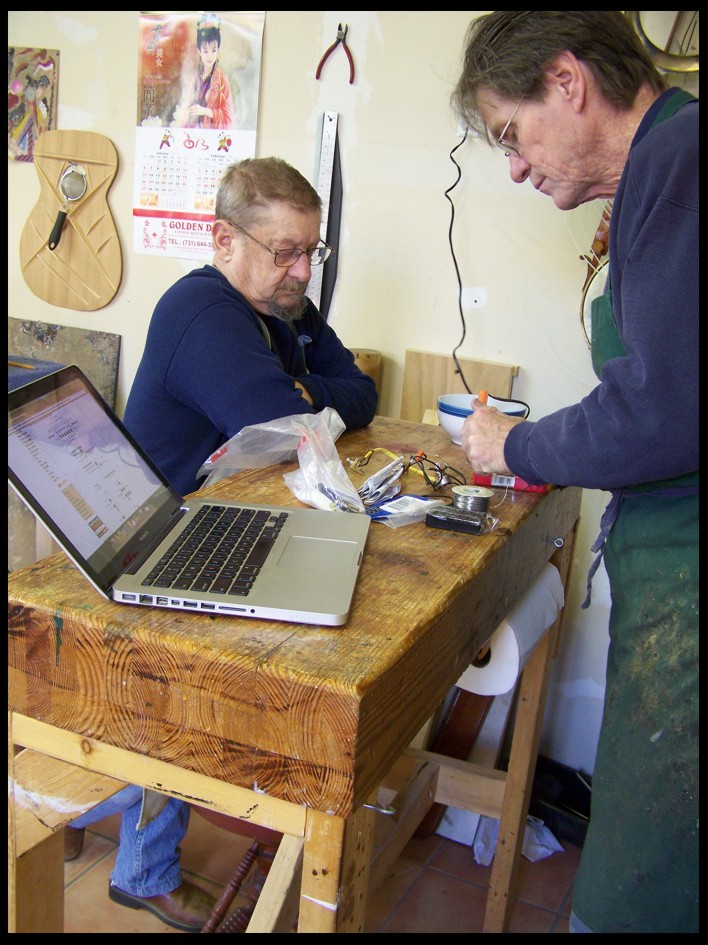
Here I'm helping Jerry wire his electric...
Here's Kevin (Steve) goin' to town on his latest...
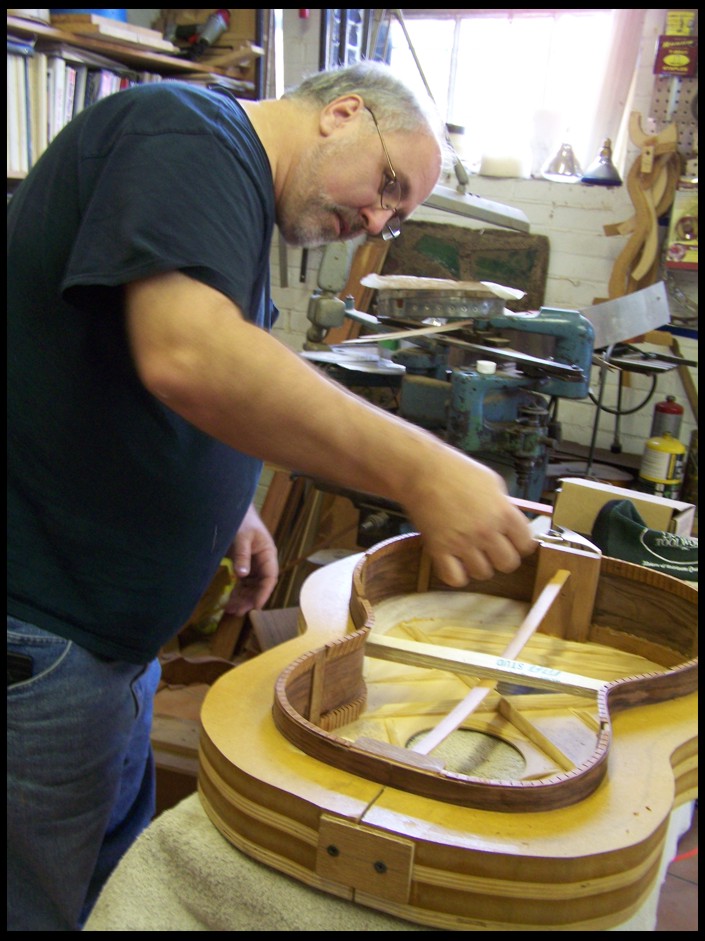
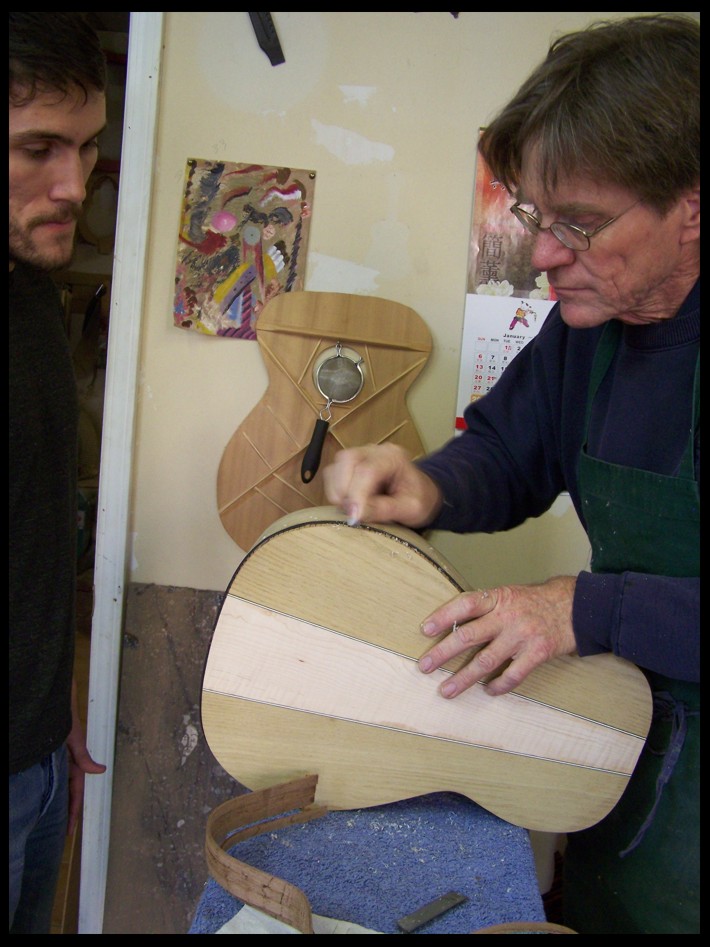
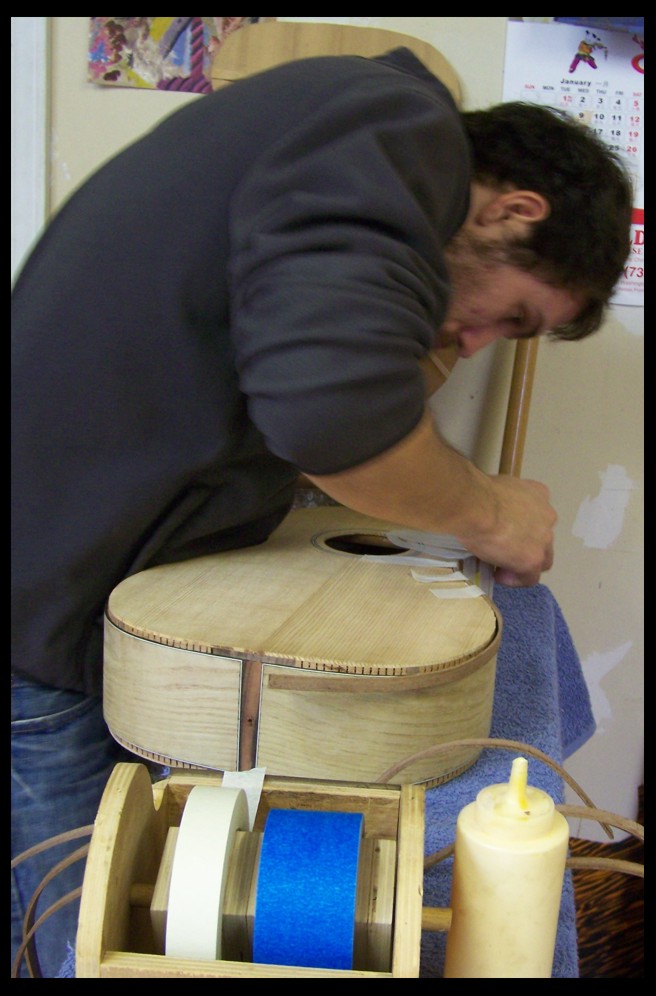
I'm helping Eric with a scraping technique. I love the work he's doing. Isn't this 3 piece back Killer! How 'bout this for a first guitar! It is sycamore and curly silver maple.
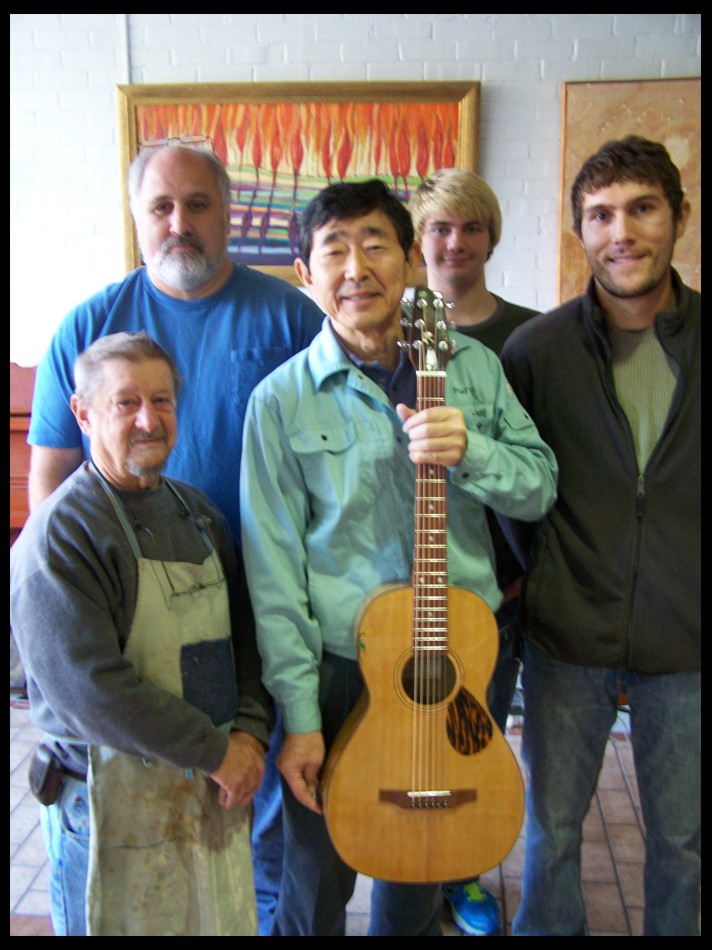
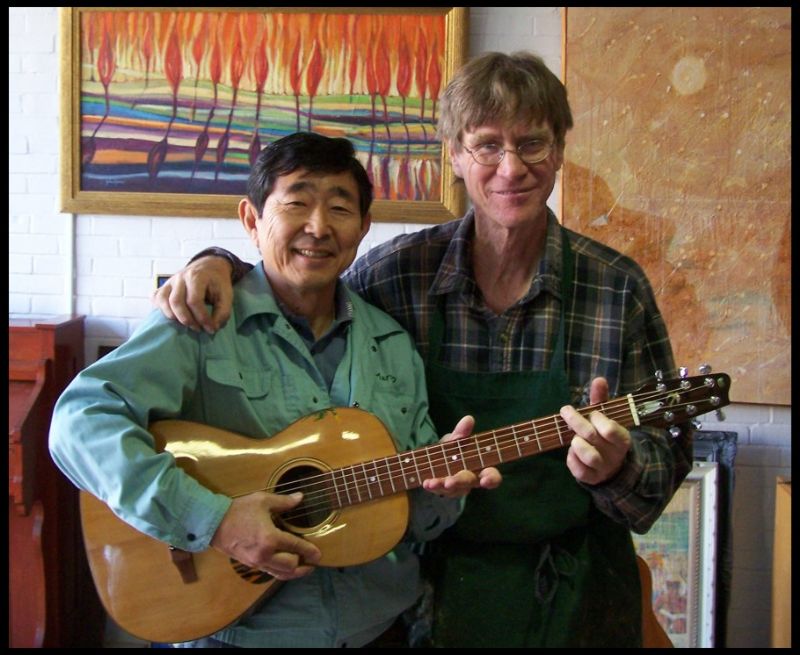
Here is the class on a birthday... a guitars birthday that is... This was some time ago on the day that Daisuke compleated his guitar. Can you feel the pride? They are (from left to right) Jerry Bierley, Kevin Bailey, Daisuke Kakiuchi, Chandan Jayne & Eric Cendajas.
See Ya Next Time...
Dave1climber - Posted - 01/05/2013: 20:54:21
Dan
That walnut stain looks like its going to be some mighty powerful stuff!! ![]() Be very careful how you handle that potent mix!
Be very careful how you handle that potent mix! ![]()
It looks like your wiring Jerry's electric! ![]()
Nice looking back on Eric's guitar.![]()
DEmery - Posted - 01/06/2013: 04:45:16
Dan I was excited to see the progress on our neck and for my taste..., that walnut stain is really a perfect choice. It pulls the curl out and mutes the yellow tones in the maple. With a flat oil finish - it will look old and organic. Hook that to the spun relic rim and it will blend just right visually. I know musically we are on a good track.
Oh yea...that three piece back on your student's guitar is really pretty. That has to be a lot of fun for the group to get this kind of help and end up with a guitar made by their hands. David E.
cmymarvin1973 - Posted - 01/06/2013: 11:10:41
Dan,
is that a home made thickness sander? Do you have more pics of that?
Thanks for the journey, have not commented, but I check in every day.
Dan Knowles - Posted - 01/06/2013: 15:24:58
Dave,
It is interesting to me how the stain is increasing in strength as time passes. It was made up about 3 weeks ago and is becoming richer in color as each day passes.
Yes I'm helping wire in a coil tap switch. That was the easy part though. He didn't want a rear panel to access the electronics and I didn't really emphasize the difficulty of pulling all of those pots and wires in. Most of his day was spent doing so.
Dave & David, Eric says "thanks!"
David,
I agree about the stain. It will be interesting to see how it works on the heavily figured neck wood.
CMY,
Yes this is a shop built tool. I may have to make a few to post. Thanks for joining us!
dbrooks - Posted - 01/06/2013: 15:32:10
I really like the size and shape of Daisuke's guitar. And I like the smile and look of pride and satisfaction on his face.
David
Dan Knowles - Posted - 01/06/2013: 18:53:56
Sunday,
David, I couldn't agree more. I call Daisuke my honored younger twin brother. This is because he is 8 days younger than me and at the time we met was living across the street from us. So minus the little detail of different mothers and fathers....
Daisuke is barr none one of the most intelligent human beings I have ever met. He works for an automotive company and spent the last six years here in Paris. He's now living back in Japan with his family.
One more photo!
Back tomorrow!
Dave1climber - Posted - 01/06/2013: 20:35:34
Dan
Yes its very easy to see the family resemblance!! i also have to believe the you must be quite intelligent also as evidenced by the fact that you are doing what you like. ![]()
![]()
By the way, who is the artist of the paintings in the background? ![]()
BNJOMAKR - Posted - 01/07/2013: 02:41:35
quote:
Originally posted by Dave1climber
Dan
Yes its very easy to see the family resemblance!! i also have to believe the you must be quite intelligent also as evidenced by the fact that you are doing what you like.
By the way, who is the artist of the paintings in the background?
I know the answer to that question... It's Mr. Dan Knowles!
Edited by - BNJOMAKR on 01/07/2013 02:42:27
Dan Knowles - Posted - 01/07/2013: 06:02:49
Dave & Marvin,
One of the finest artist in Henry County, Tennessee created the painting above Daisuke's head. His name is John Monroe and he has paintings that are hung nation wide. I feel very fortunate to be able to call him a friend of mine and fortunate to be able to display one of his works in my shop. The other painting shown partially and to the right is by yours truly.
Dan Knowles - Posted - 01/07/2013: 20:42:12
7th. Day of January, 2013
Today was a teaching day and boy was it packed tight with students. I had a couple of new ones who had their first lessons today. Mind you I 'm not complaining, just reporting, as my pal Dan Levenson says.
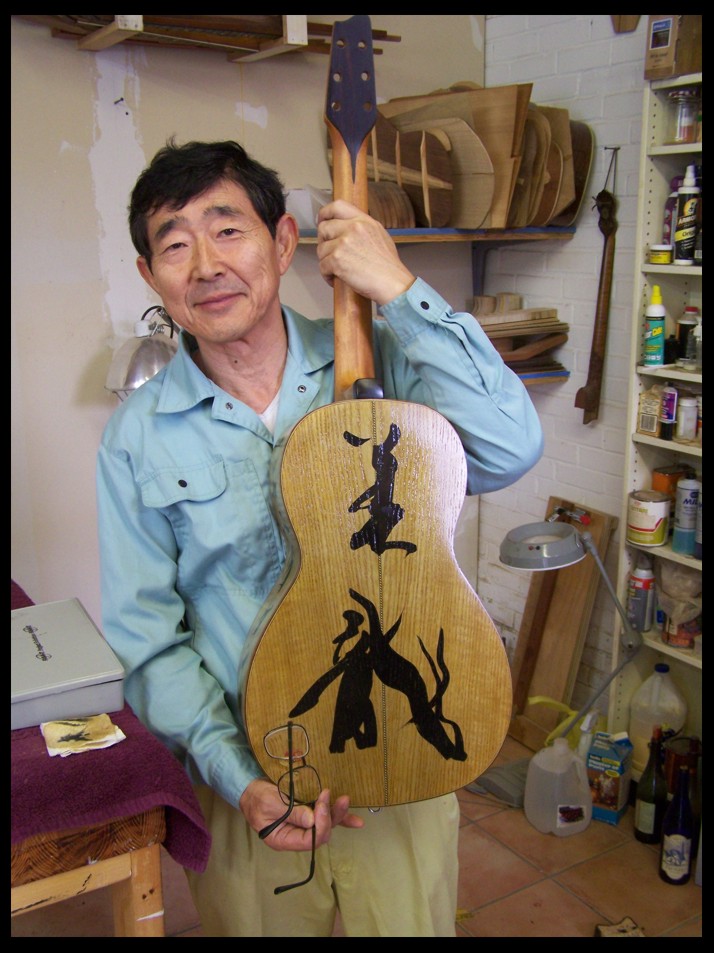
I got in late tonight and so didn't have time to work up any of todays photos. So I thought I'd post another photo of Daisuke and his guitar. He is a master calligrapher and did the calligraphy on the back of his guitar. I think it says "Beautiful Dragon."
more tomorrow...
Dave1climber - Posted - 01/08/2013: 06:09:08
Not only is the body of his guitar interesting, in a good way, the back of the peg head is what I think of as subdued elegance. The best!
Dan Knowles - Posted - 01/08/2013: 20:03:13
In 1814 I took a little trip along with Colonel Jackson down the mighty Missip, 2013
Busy, Busy and again I say Busy day! Not complaining mind you. Still it was busy. I got a lot done (and I'll show just a bit here) and I saw a bunch of folks but not I didn't travell down the...
My day in the shop started out with this Alverez guitar. It had had a neck crack that was glued up and finished over then left to cure. Today I rubbed it out and put it back together...
In the midst of this I took some time out to poor off the metal/ vinegar stain I started a few weeks ago. This is cool stuff. It goes on clear then turns grey/ brown to black depending on the tannins in the wood.
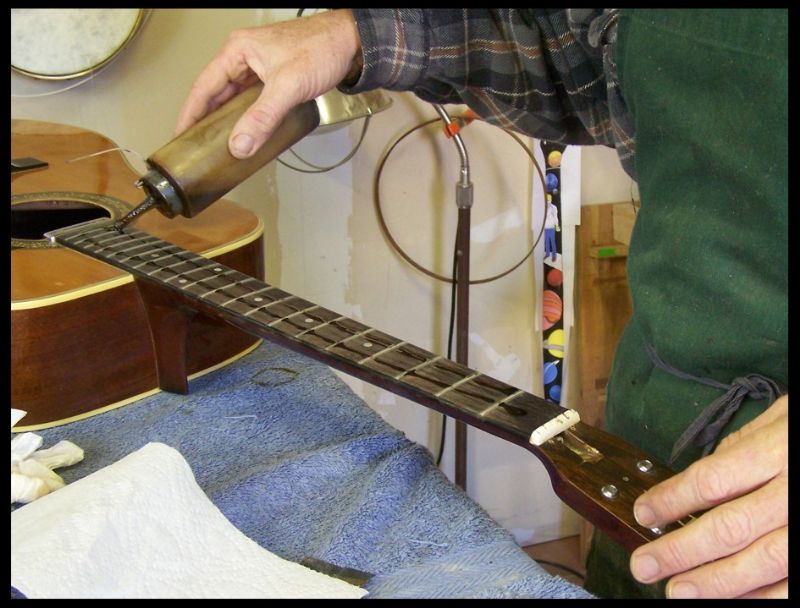
Back to the Alverez for a fingerboard treatment.
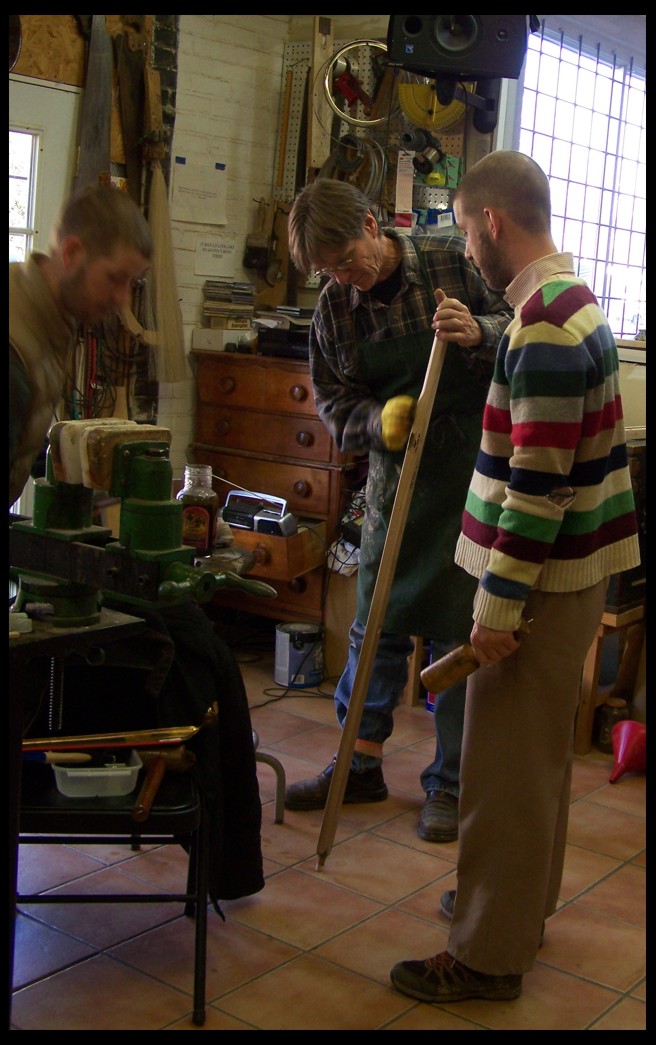
Brice and Eagen Snow stopped by for some help with their scythe.
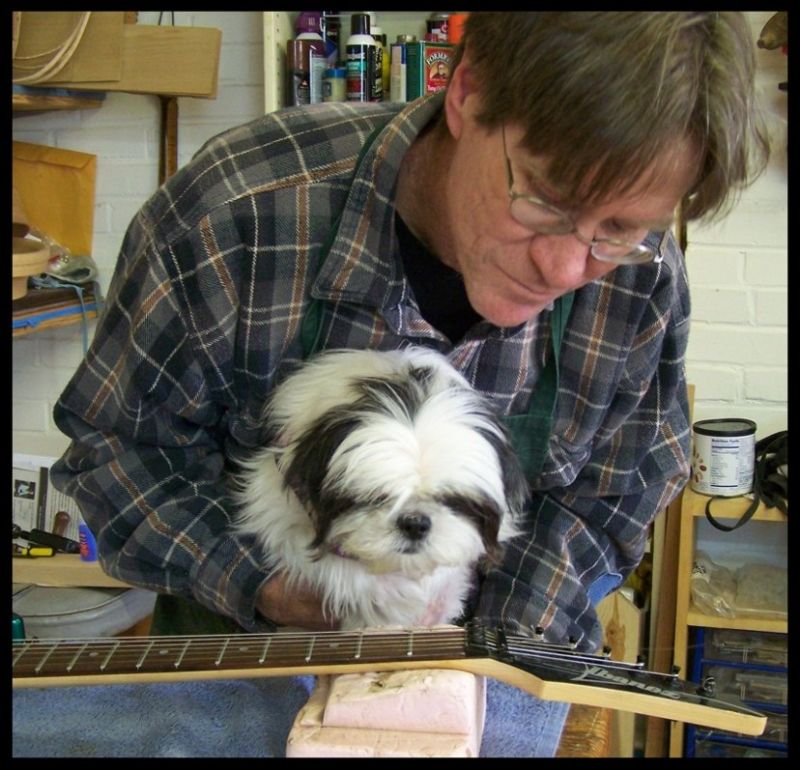
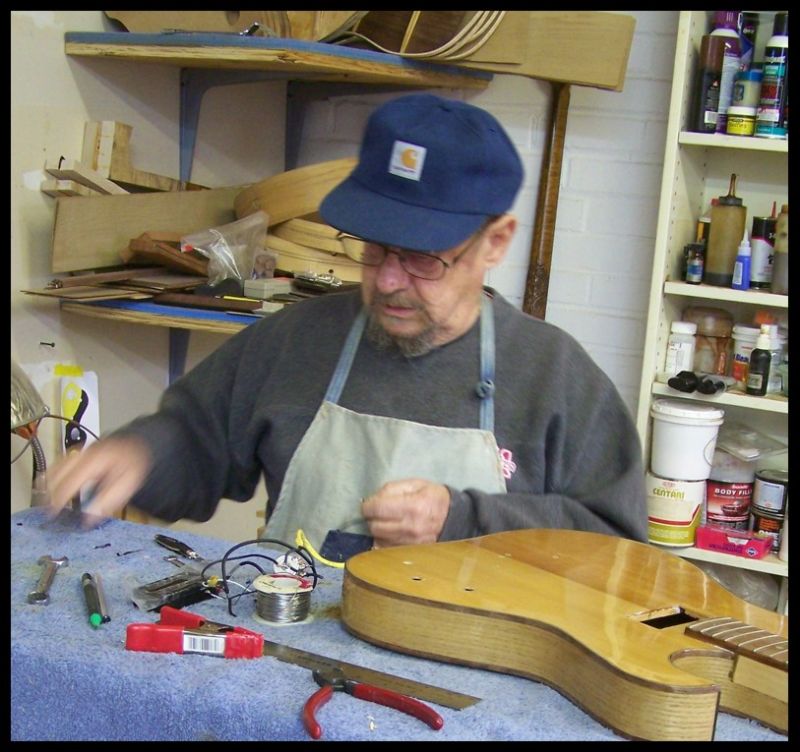
Our little dog Sophie helps me inspect a Ibanez electric... and she found the problem, it was in the electronics!
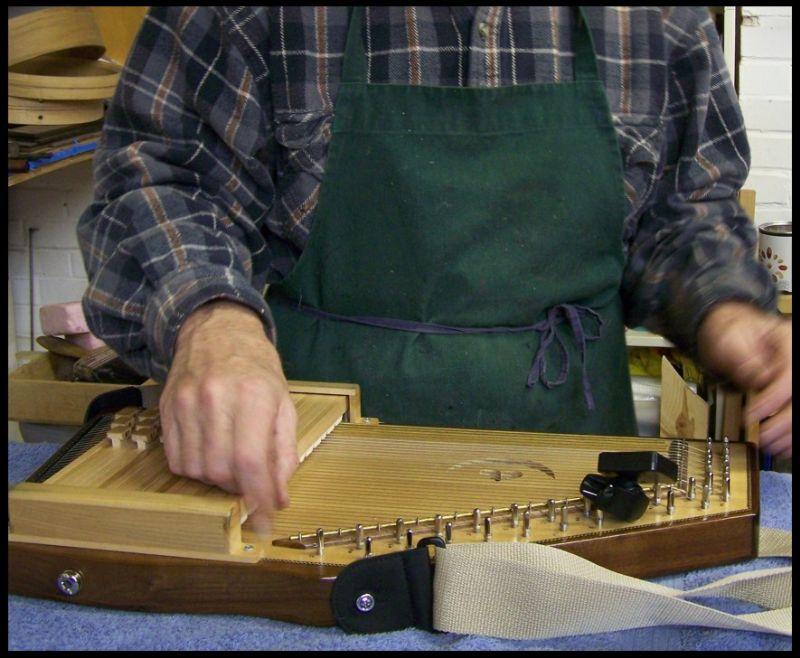
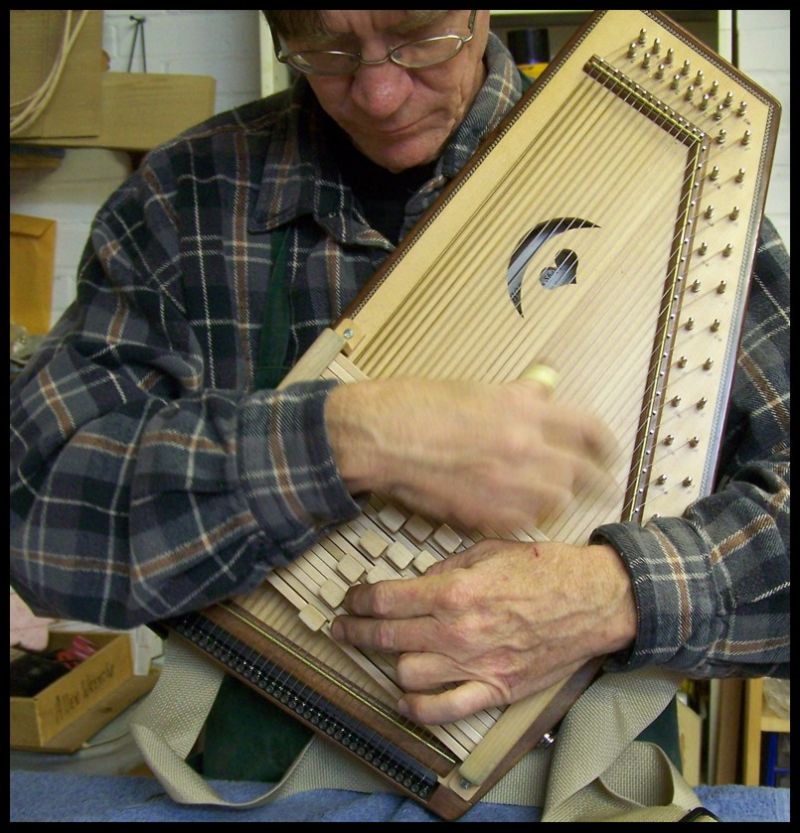
My friend and former Autoharp student Martha Taylor stopped by with her harp that was having some tuning problems. Fortunately it wasn't her harp. Her tuner was acting up.
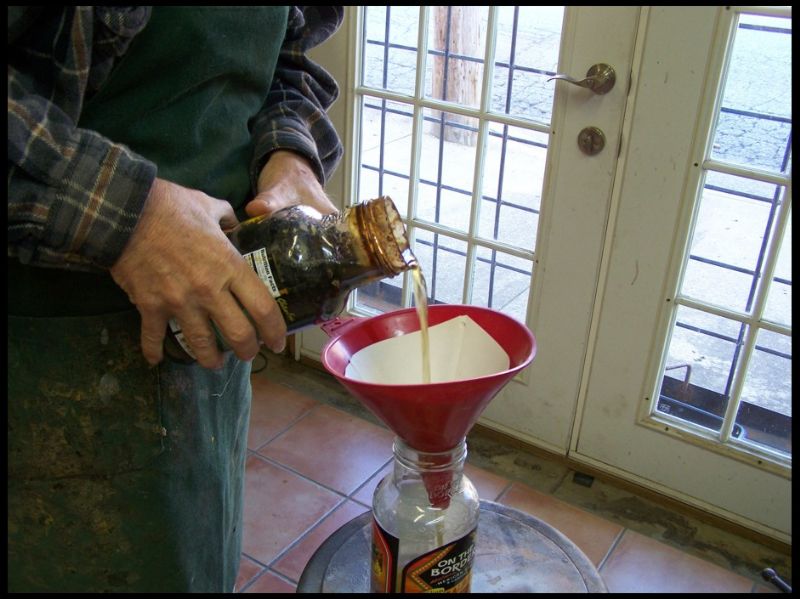
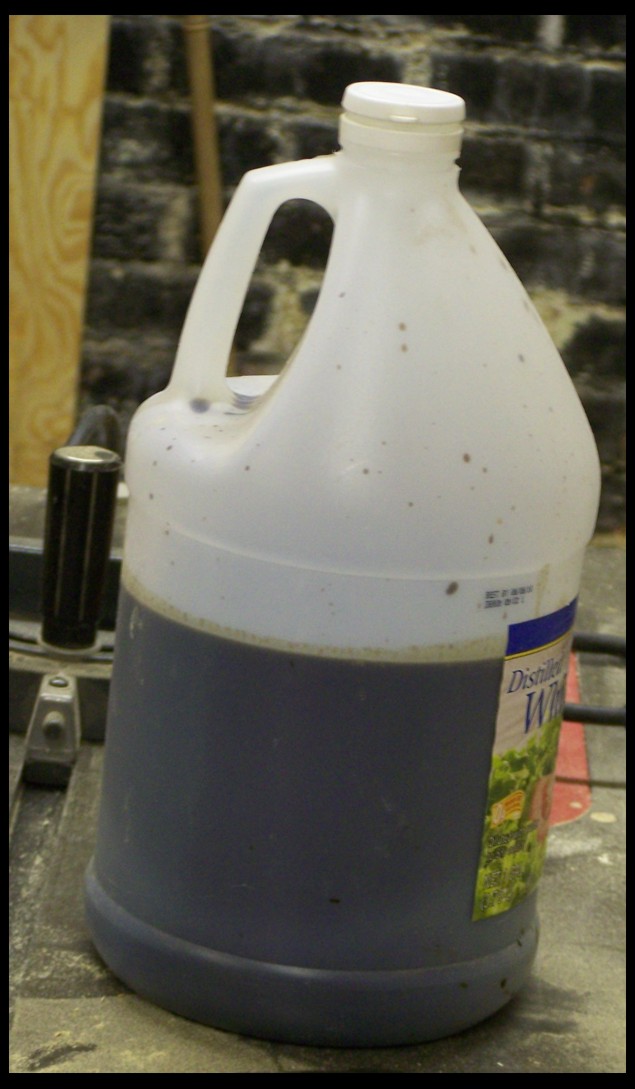
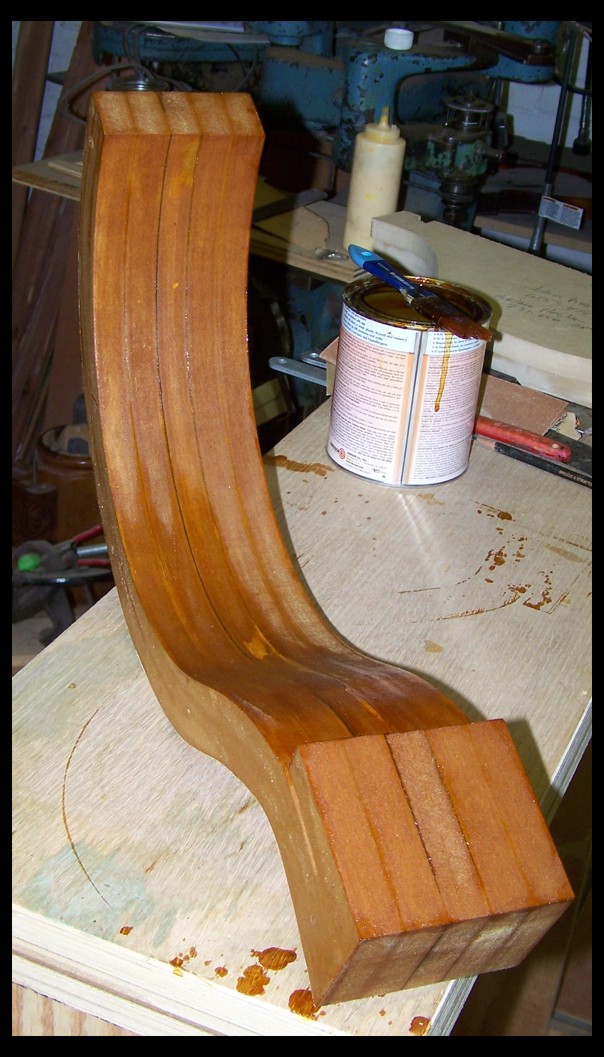
Finally towards the end of the day I got to a project I'd been hoping to get to all day... pouring off the walnut stain.
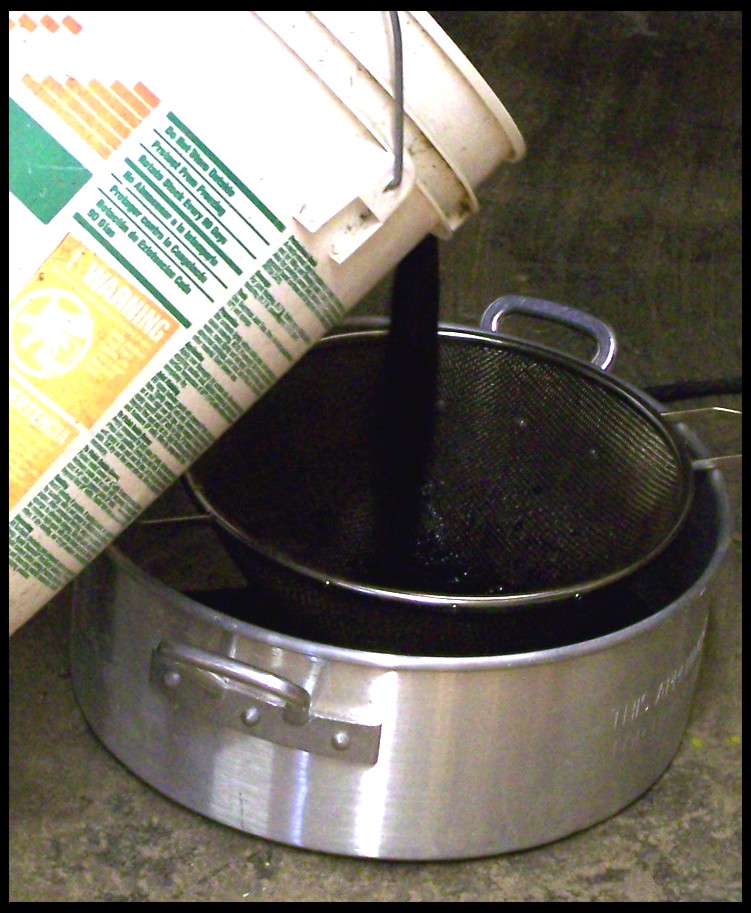
And I got about 2/3 of a gallon of stain concentrate from that batch... not half bad!
See ya on the 9th of January!
DEmery - Posted - 01/09/2013: 04:12:30
Dan if the test stick of curly maple you dipped in that walnut stain is any sign of when to pour it off...., it was time. That is nice stuff and the effect is really pretty. David E.
jbalch - Posted - 01/09/2013: 04:25:31
Dan:
Seeing photos of the neck repair on he Alvarez - reminded me of the wonderful cracked-neck repair you accomplished on the Gibson-made Dobro I used to have. The repair was invisible and flawless!
I think I may have mentioned that the dobro is now in the hands of Jack Pearson, one of the very best slide and blues players of his generation. Jack wanted a wood body resonator guitar as a complement to his 1930s National Duolian. He always liked the sound and feel of that instrument. We both marveled at the quality of your repair work. The dobro could not have found a better home....
Dan Knowles - Posted - 01/09/2013: 18:00:45
David,
Thank ya... I like the way it looks too. BTW I pored off a bit more from the bottom of the bucket today, it was very rich and brown. Sometime soon we will test drive it and use some type of finish too. I gotta tell ya though, it has a STRONG STINK!
John,
I'm glad Jack has got that one. It certainly fits him well!
Dan Knowles - Posted - 01/09/2013: 18:33:48
9th Day of January, 2013
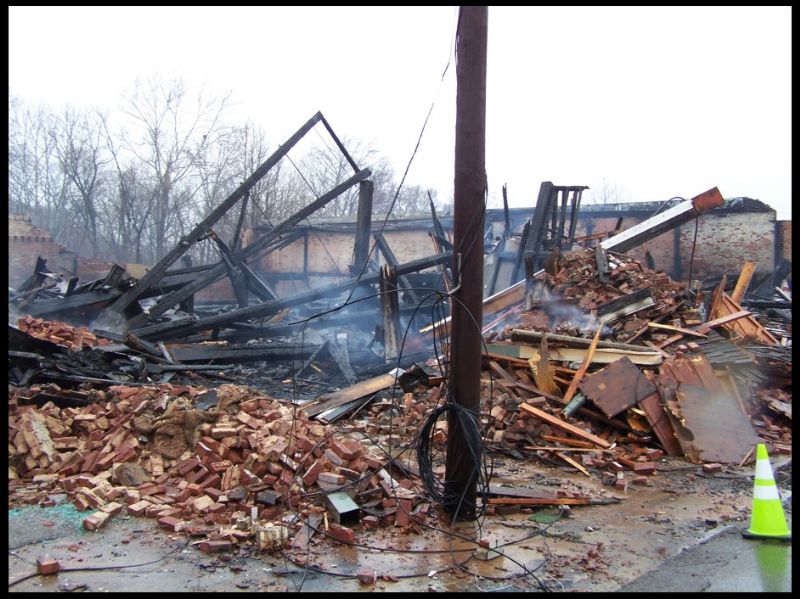
There was a BIG and I mean Big fire tonight here in Paris. A old building (ca. 1890's) very near our downtown and about 4 blocks from my home went up in flames. It was quite large, three stories, a basement (all wood with brick outside walls) to which lots of smaller buildings had been attached over the years.
I had just gotten home and had finished eating dinner when my next door neighbor Dan (yep my neighbor is a Dan and his next door neighbor is a Dan too! We just live on a Dan block. Be careful how you say that!) knocked and said "Have you seen the fire?"
It was right over his sholder, with flames shooting way into the sky! I couldn't miss it. So Chandan and I hooked up Sophie dog and walked over to check the fire out.
The whole building was engulfed, sparks were raining, sirens squalling and firefighters working frantically. I was told that fire trucks came down from Kentucky to help out. The whole neighborhood was out and everyone was stomping on the sparks when they landed.
Finally the fire began to die way down and became a thick grey smoke which blanketed the aria a bit south of here. So we came home.
So now I guess I can play show and tell about my work day.
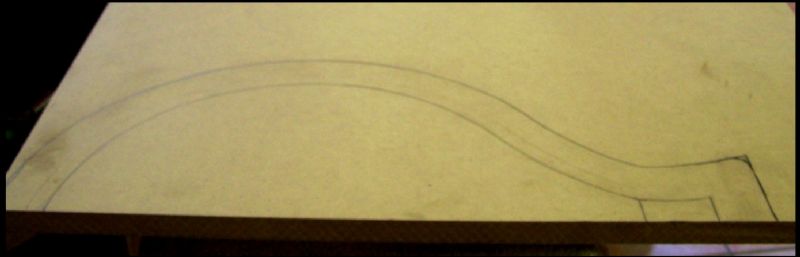
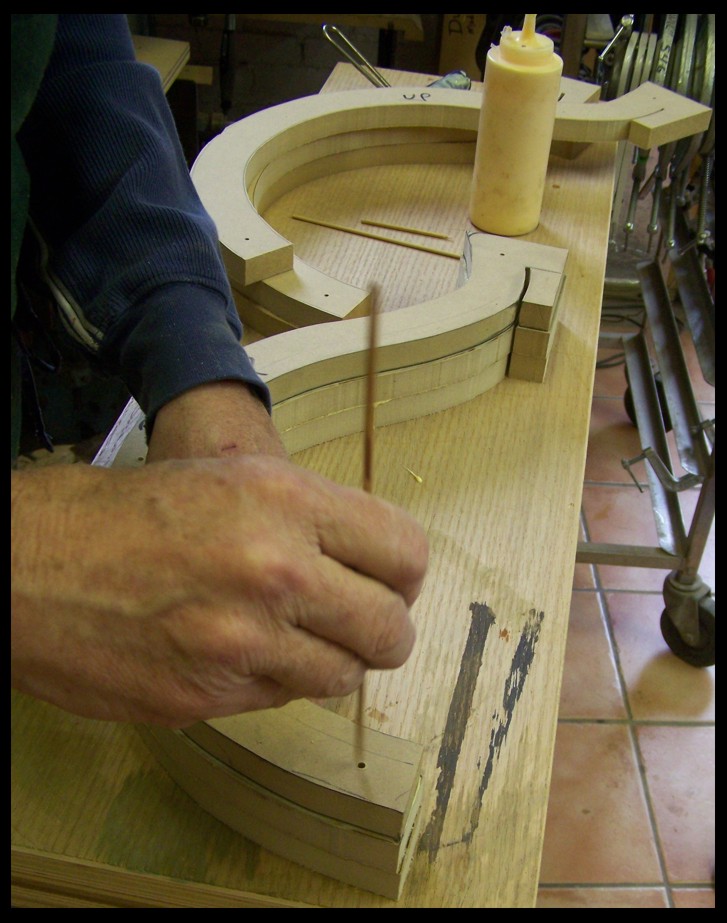
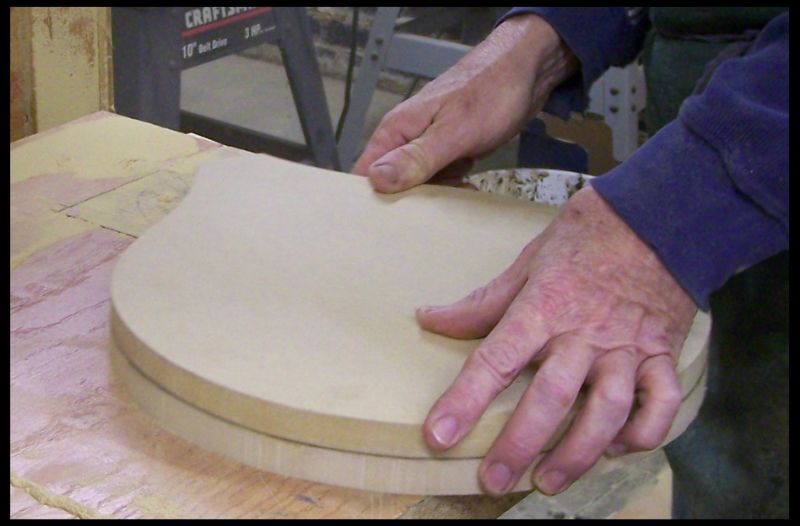
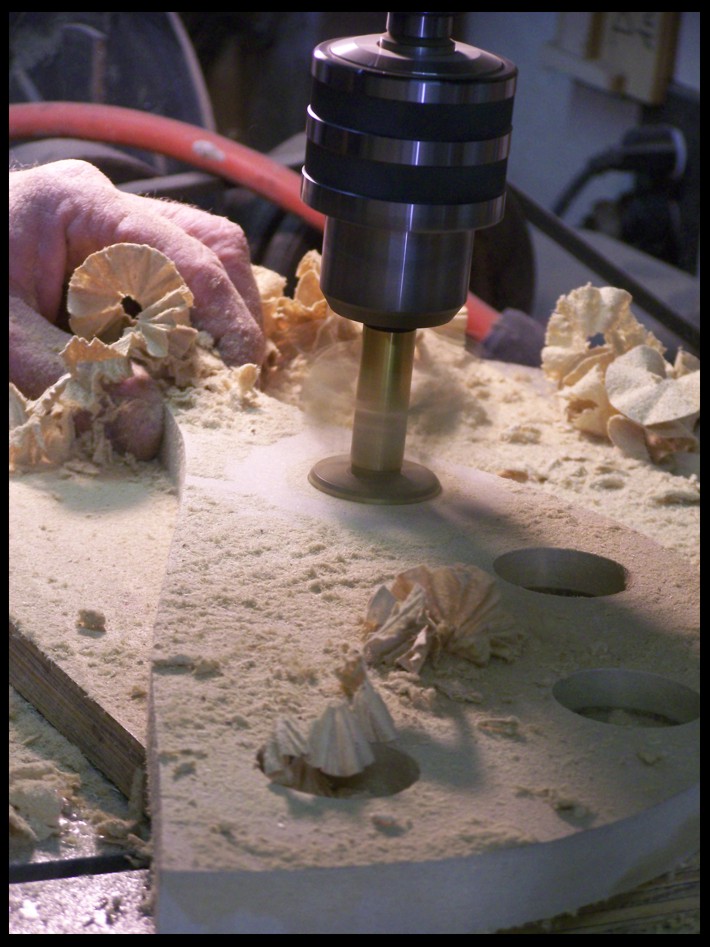
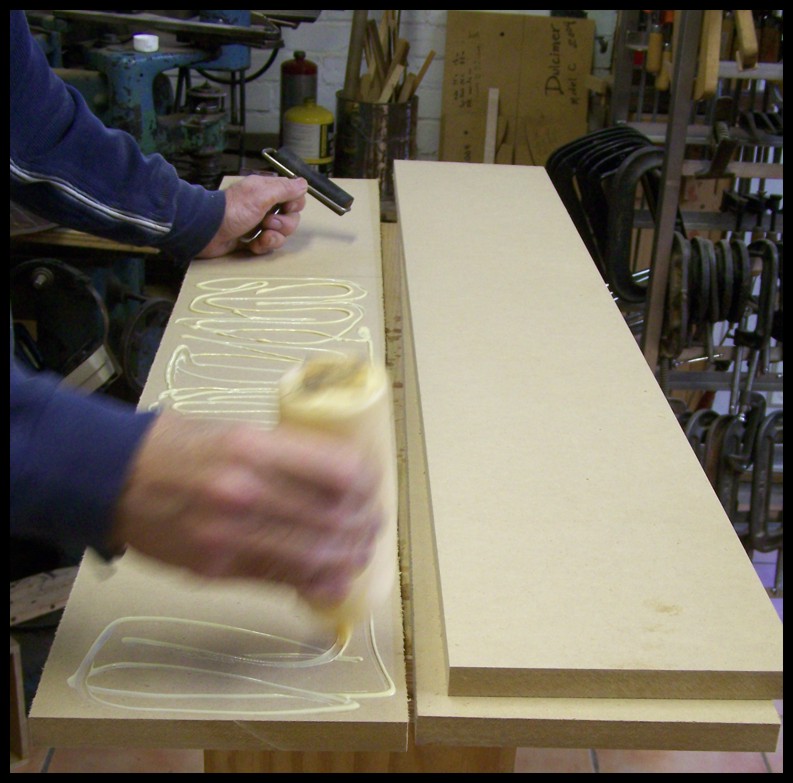
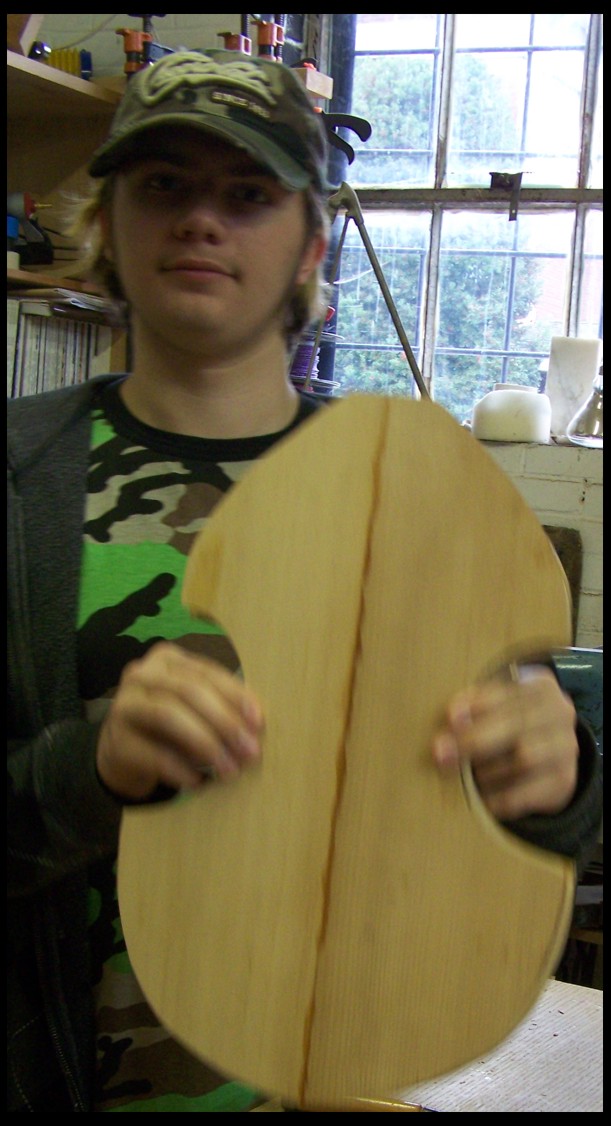
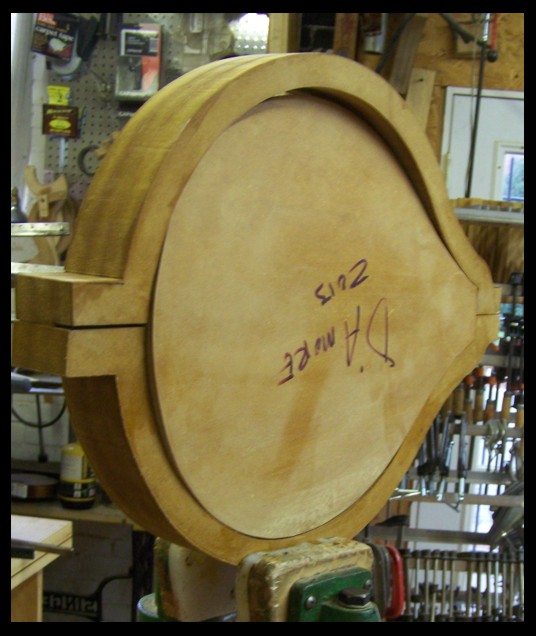
I began working to create the various molds and fixtures I'll be needing for the d'Amore instrument. Here I have laid out the pattern for the mold which I will laminate the sides. I'll also use it for gluing in the linings. It is laid out on a piece of MDF.
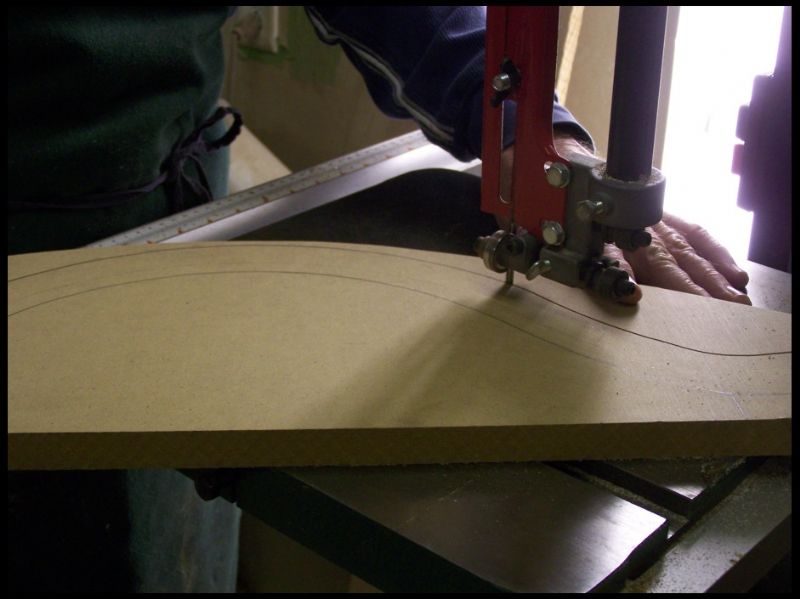
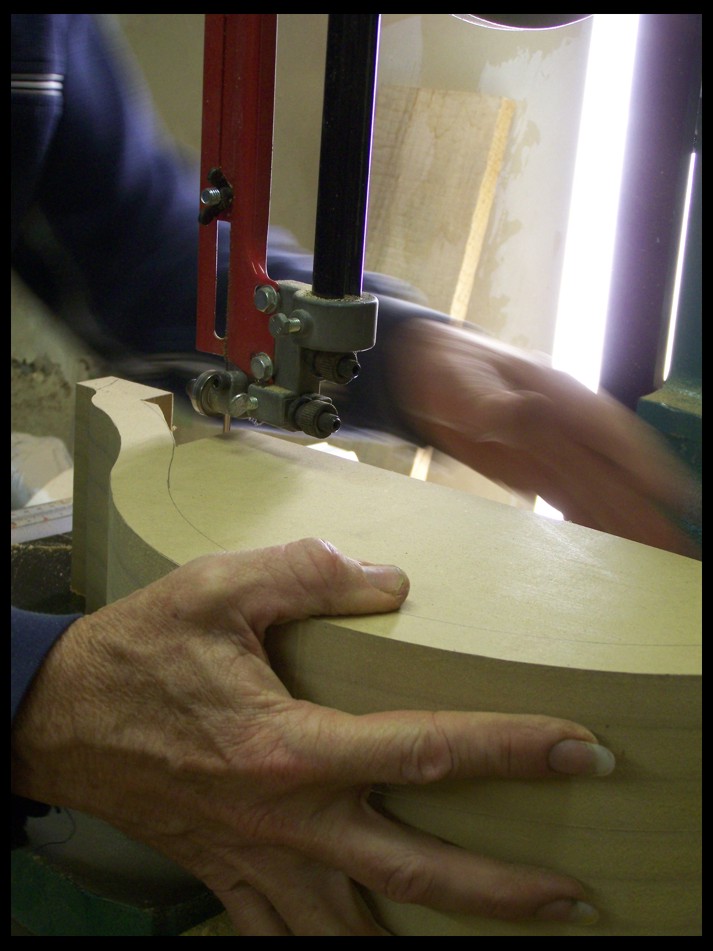
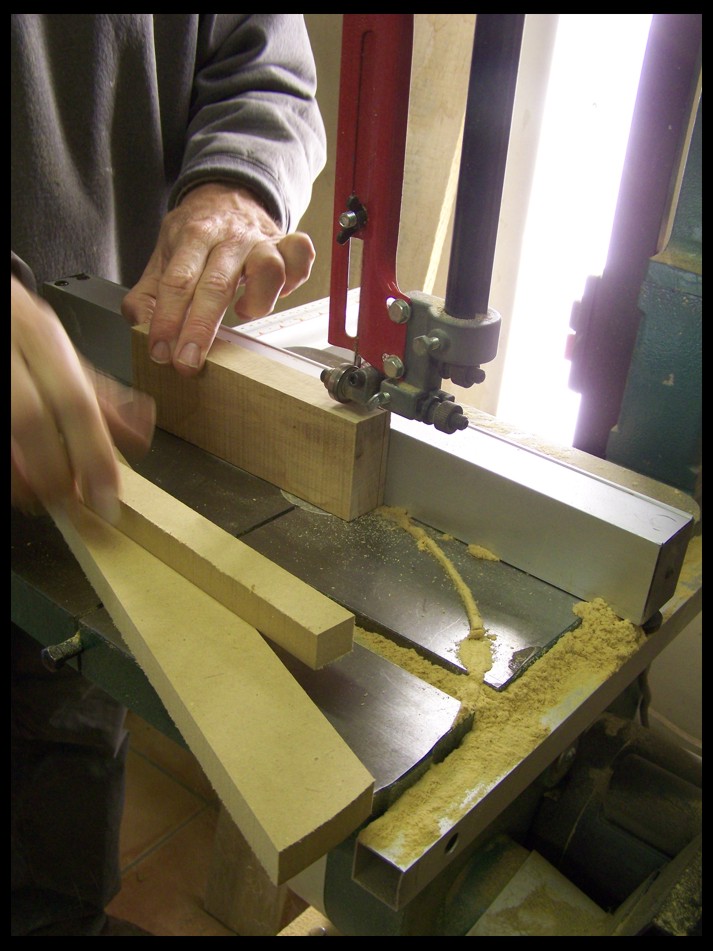
I'm chopping this first piece out on the band saw...
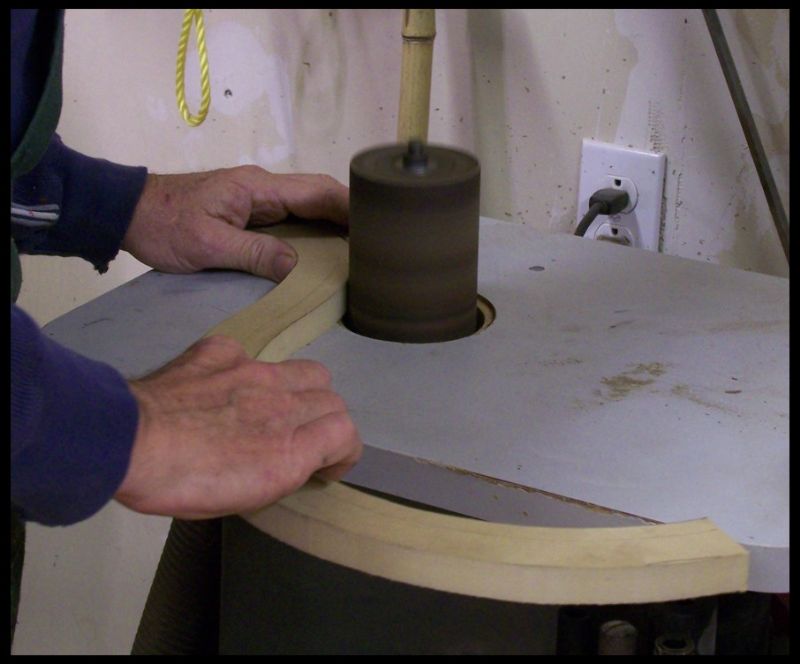
Then sanding it to shape.
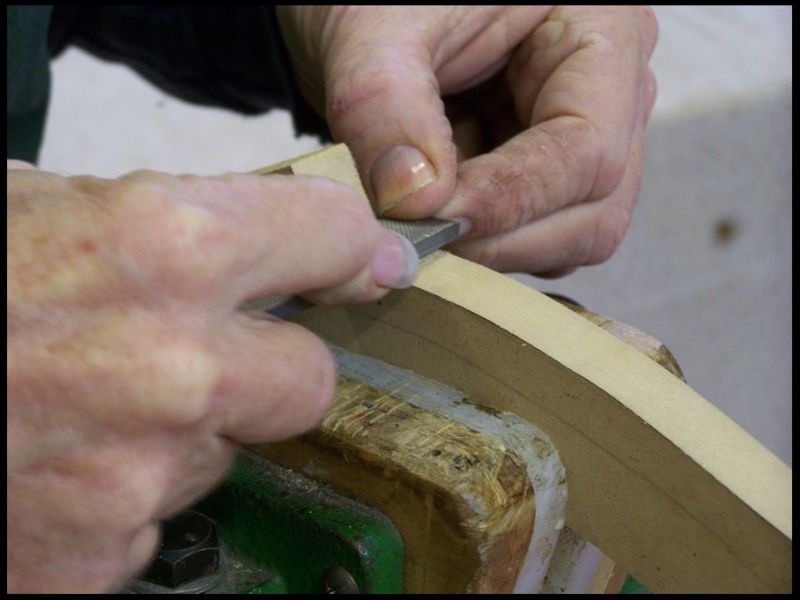
Then filing the slot that catches the excess from the side.
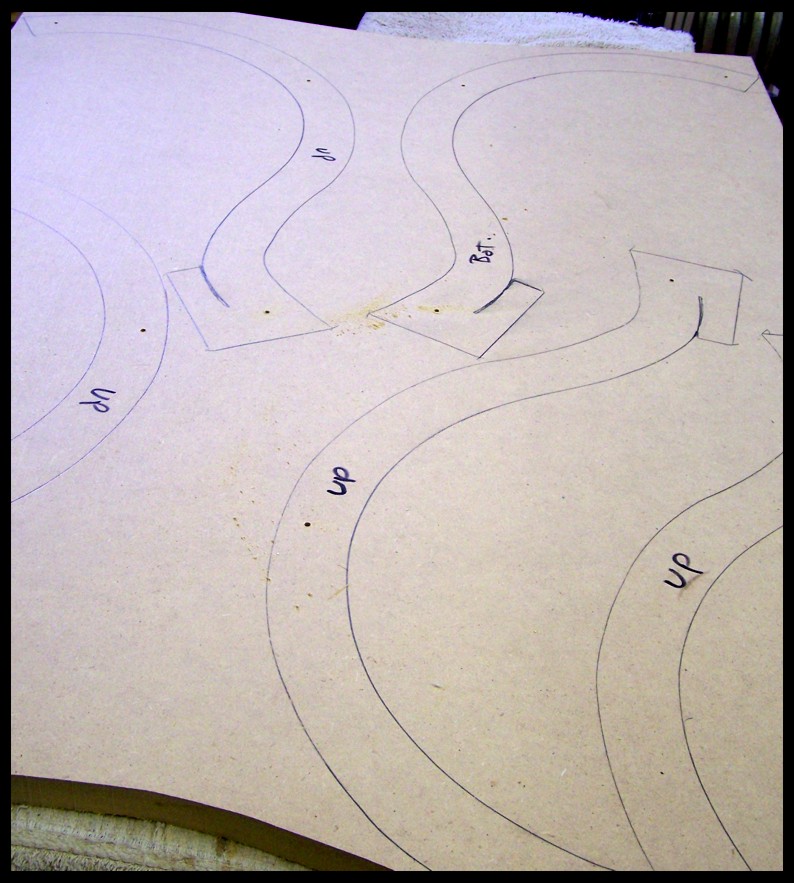
Using the pattern I lay out the rest of the pieces. these all need to be exactly the same shape.
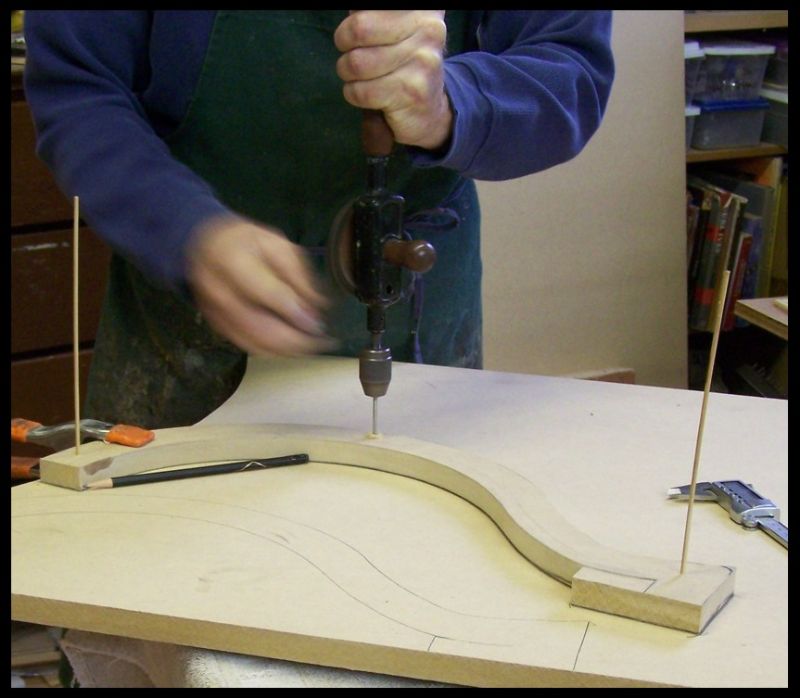
Drilling for locator pins...
All laid out and ready to cut...
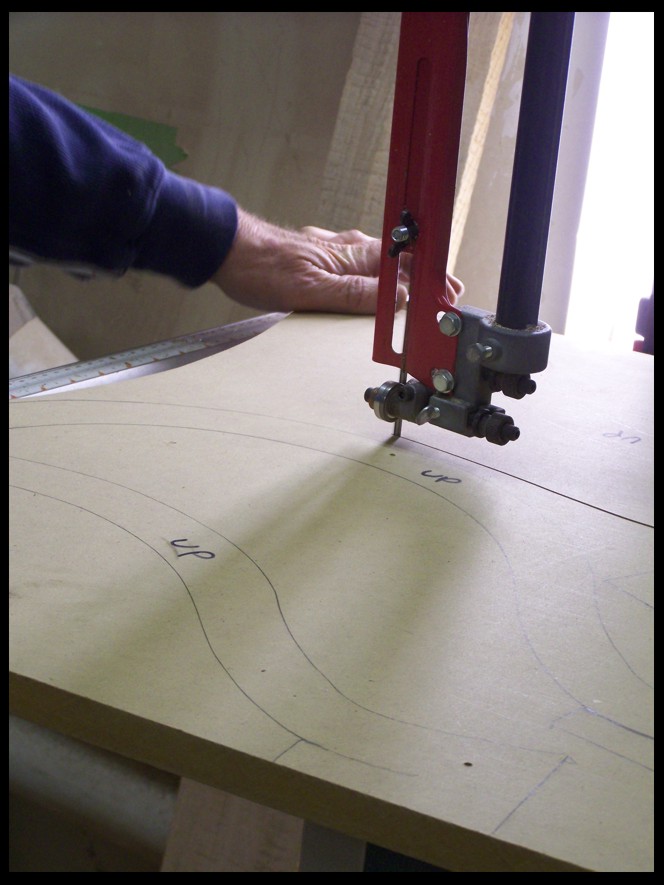
Now cutting...
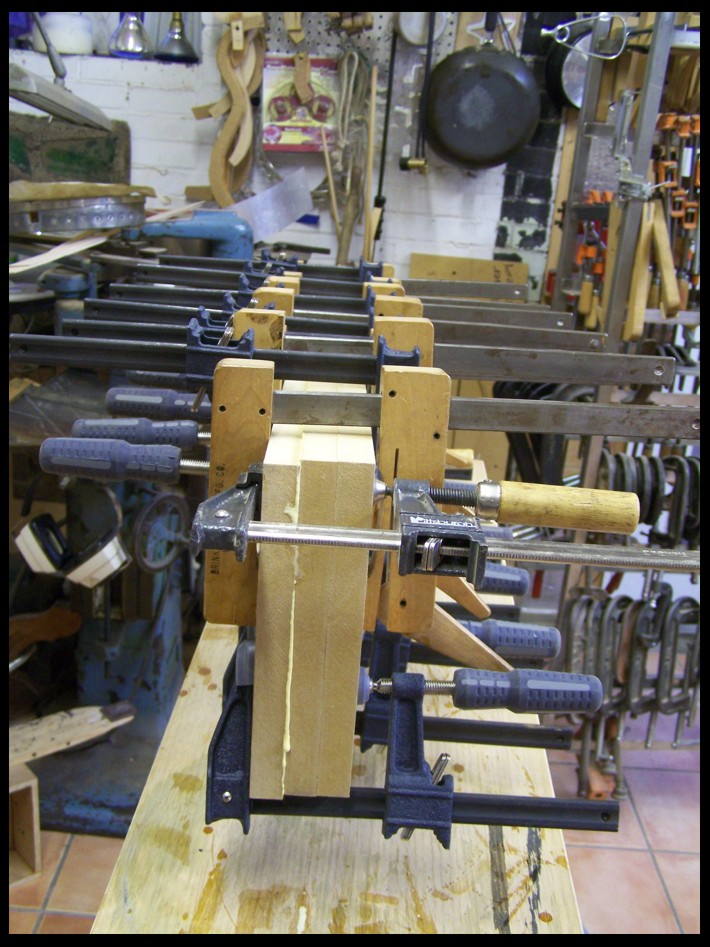
And beginning to glue...They are not perfect yet , but just watch...
Clamped...
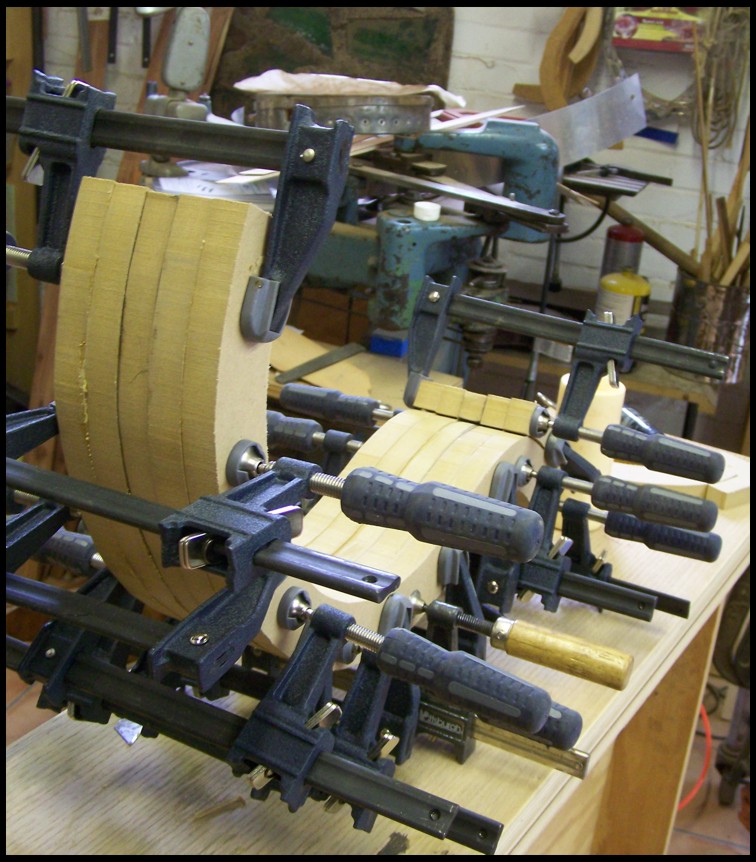
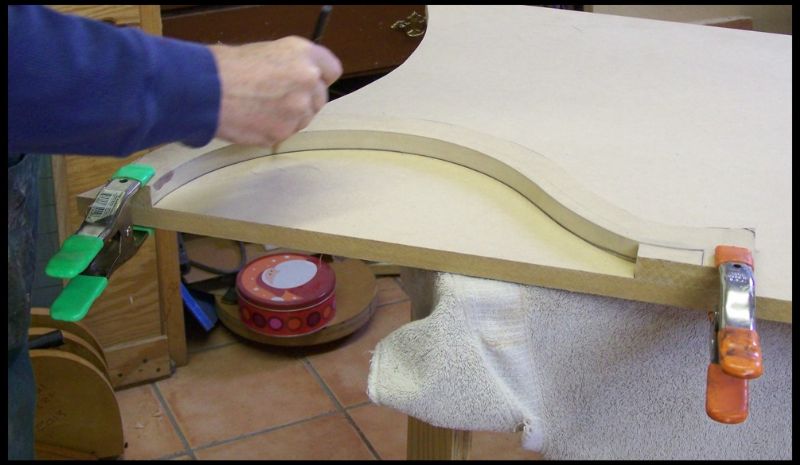
Now several hours later... I slick and true it up with a pattern bit on the router....
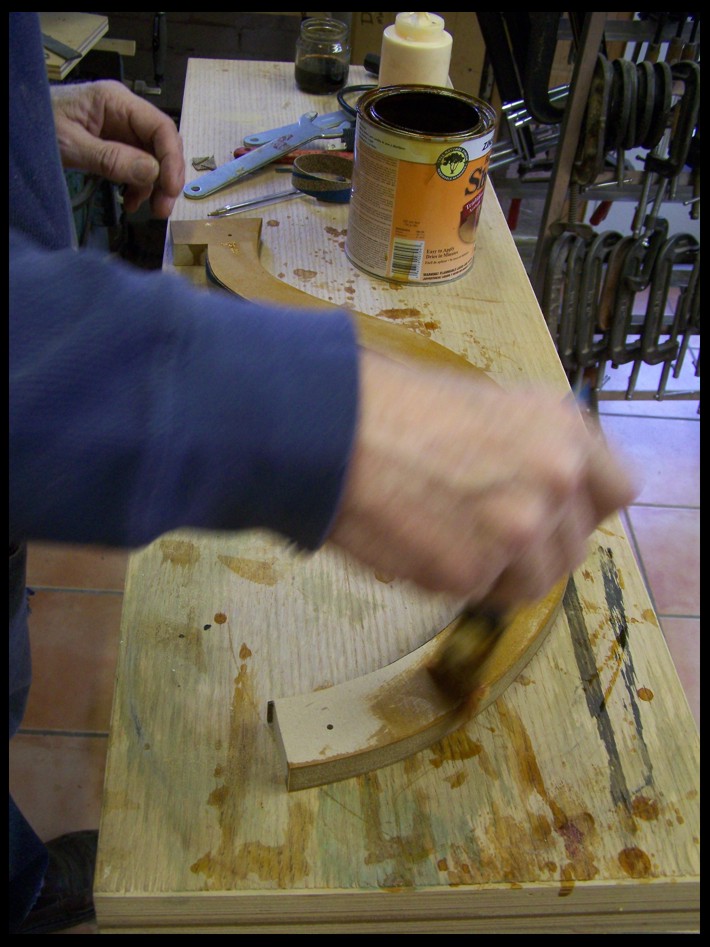
Then I paint on several coats of shellac. Nothin' special it's just out of the can.
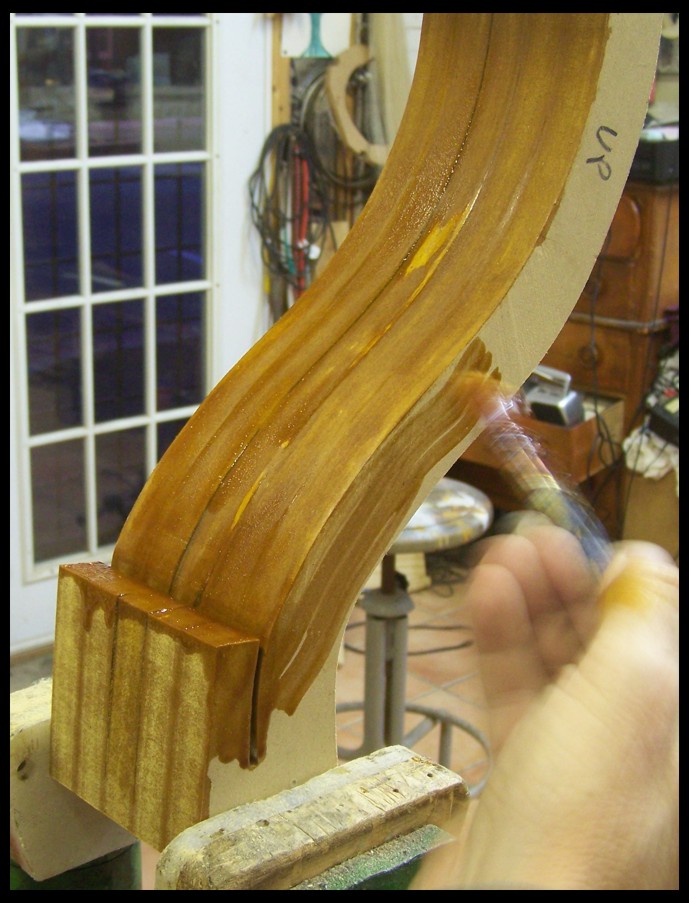
Coated and beginning to dry...
Se ya soon...
DEmery - Posted - 01/09/2013: 18:46:09
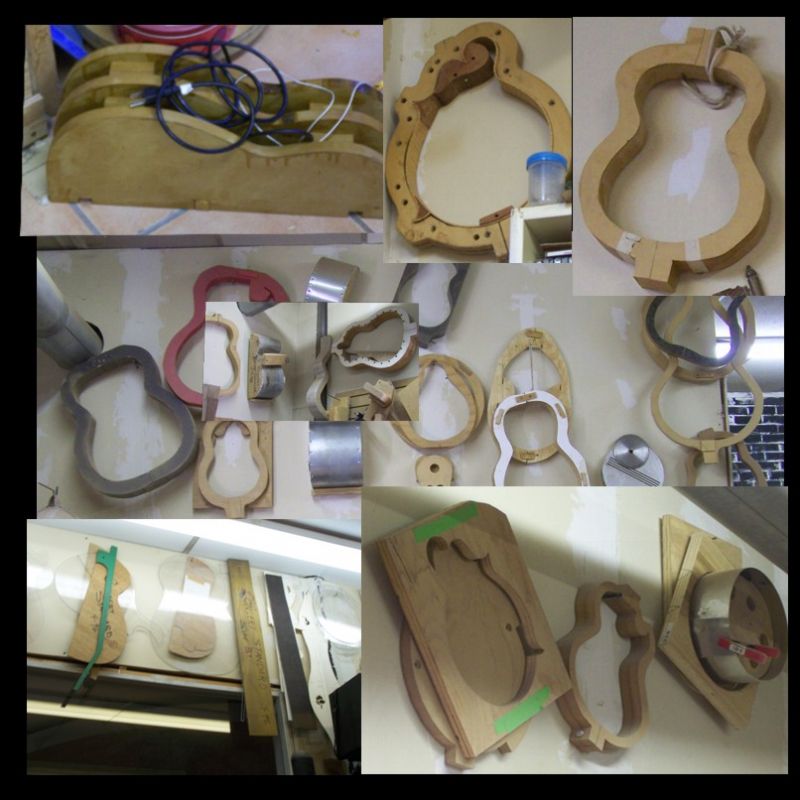
Dan for those of us that have string instruments built; it doesn't occur to us it takes as much building on the front getting ready to build as it does to build. How many times did I say build? I recall all the work you did to measure and prepare to build the Jacobs. It sure takes a lot of prep to do these one off pieces. For those that haven't seen a bunch of your "one off pieces" attached are photos that takes me down years of memory lane. David E.
Edited by - DEmery on 01/09/2013 18:54:33
Dan Knowles - Posted - 01/09/2013: 18:50:43
David,
That is quite true. I've heard said that luthier's are "Jig crazy." and I guess that's true and for good reason. I certainly spent most of my day jig making for the d'Amore and this fixture shown wasn't the only one built today.
Edited by - Dan Knowles on 01/09/2013 18:52:25
Dave1climber - Posted - 01/09/2013: 21:36:16
Build a jig, play a jig, is it a coincidence that one word is so important in the musical world.
Dan Knowles - Posted - 01/10/2013: 21:07:10
I like that. Build a fixture play a fixture.... doesn't have the same ring, does it?
Dan Knowles - Posted - 01/10/2013: 21:21:36
The tenth day of this year....
Today was spent mostly doing business outside of the shop and preparing to record and recording my friend Tommy Ogle's song THE WIND. We are planning to use this song as the title cut for the CD we hope to record over the next month or so. The tracking went quite well with all the members of my HOT BAND (Danny Conger, fiddle Sam Knowles, bass Mark Holladay, guitar) here. We recorded the track live (no overdubs) and it came out well. Tonights tracks will probably not be used on the final release. They were good but there were a few technical problems with the vocals.
Last night I posted an add for a banjo I inlayed and co-designed with Tom Nechville of Nechville Banjos. It is the prototype Moonshine openback. If you are interested in knowing more follow this link to the classified add banjohangout.org/classified/33380 Here is a photo of the inlay...

More soon...
Dave1climber - Posted - 01/10/2013: 21:50:40
That is one amazing banjo, I have to believe that it sounds as good as it looks.
Tim Sander - Posted - 01/11/2013: 12:23:17
Dan, speaking of jigs, what jig do you use to shape the heel end of a 5 string neck accurately? I'm needing to build one and would love to see your design.
Thanks,
Tim
Dave1climber - Posted - 01/11/2013: 15:45:41
quote:
Originally posted by tsander
Dan, speaking of jigs, what jig do you use to shape the heel end of a 5 string neck accurately? I'm needing to build one and would love to see your design.
Thanks,
Tim
Tim
You can see what I use for heel cuts here:
Dan, I would also be interested in seeing how you do the heel cut.
Dan Knowles - Posted - 01/11/2013: 20:06:12
Dave,
It is a very sweet one.
Jay,
I'm glad you've joind us. I hope you enjoy the trip.
Tim & Dave
I use a JIG on my band saw to make the basic heel cut, then I refine it on a sanding JIG I made for the drill press, then lastly I hand sand it to make sure it is perfect on the body. I'll be showing this process and all of the associated fixtures when I set them up in a few weeks. BTW Dave that mill set up you have is way too cool.
Dan,
Thank you.
Dan Knowles - Posted - 01/11/2013: 20:29:25
I'll write my regular post here in just a moment.
Last night my band mates came over and we recorded a demo of a tune that was written by my friend Tommy Ogle. It is titled THE WIND. Take a listen and let me know what you think.
I do hope you enjoy it.
banjohangout.org%2Fmyha...ID%3D29180">banjohangout.org%2Fmyha...ID%3D29180" target="_blank">hangoutstorage.com/jukebox.asp...D%3D29180
Edited by - Dan Knowles on 01/11/2013 20:30:08
Dan Knowles - Posted - 01/11/2013: 21:03:24
JIGS, JIGS & more JIGS!!!
11-1-two thousand thirteen
I told you about the fire the other night... right? Well the next morning I drove by it (taking my grandson Chandan to school) and I could still see fire! The thing was more than smoldering. By lunch this is what this Paris, Tennessee landmark looked like.
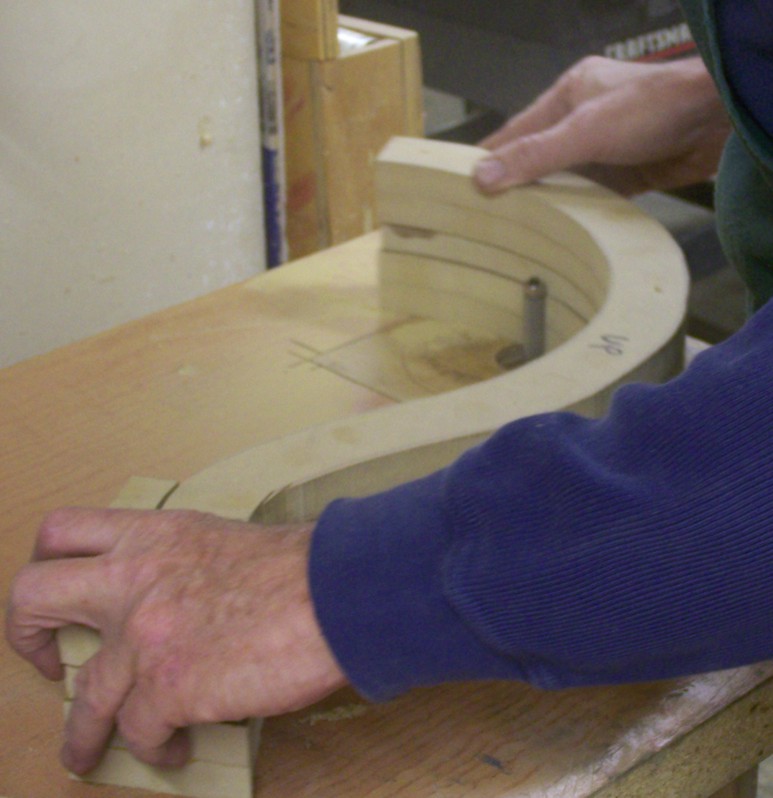
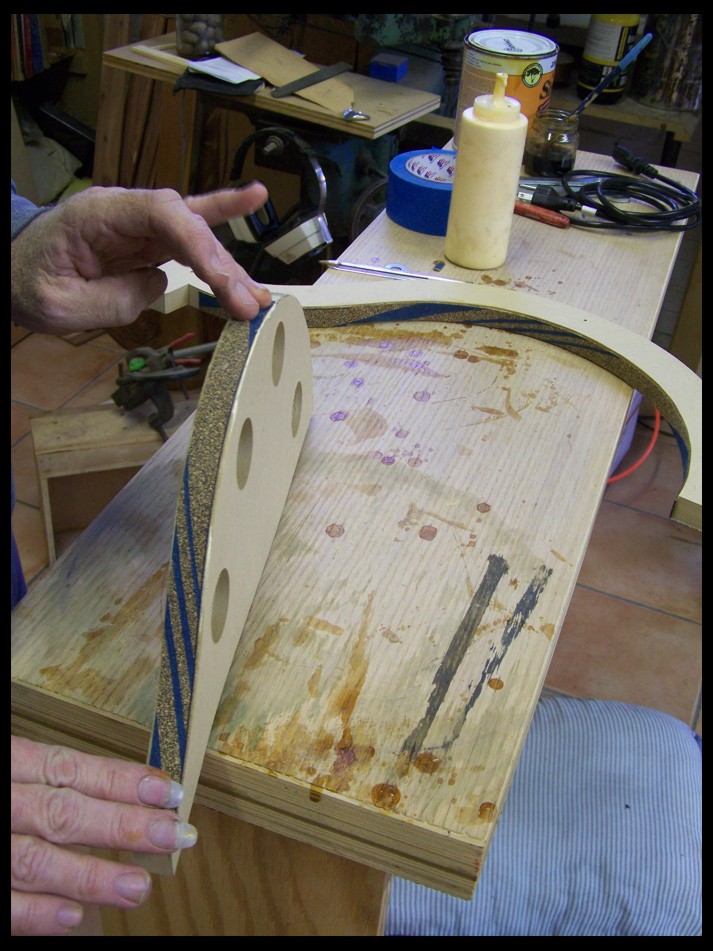
This jig making for the d'Amore has become a big business at the shop these days. I made some more today. Here a side bending mold gets a couple coats of shellac.
And a jig for determining the shape of the sides (as it relates to the barrel arched top & back) is being glued.
Out of clamps it is trimmed on the router table.
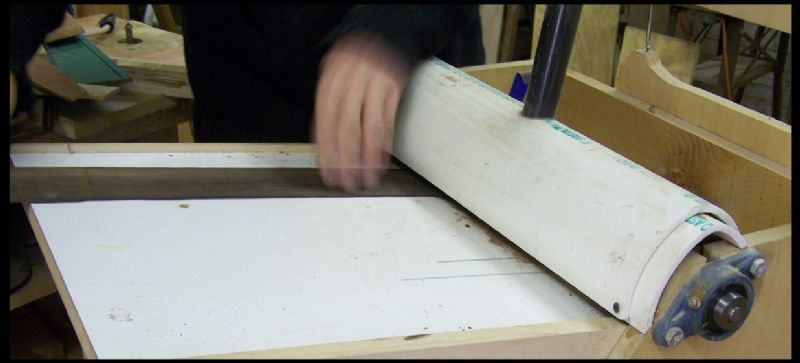
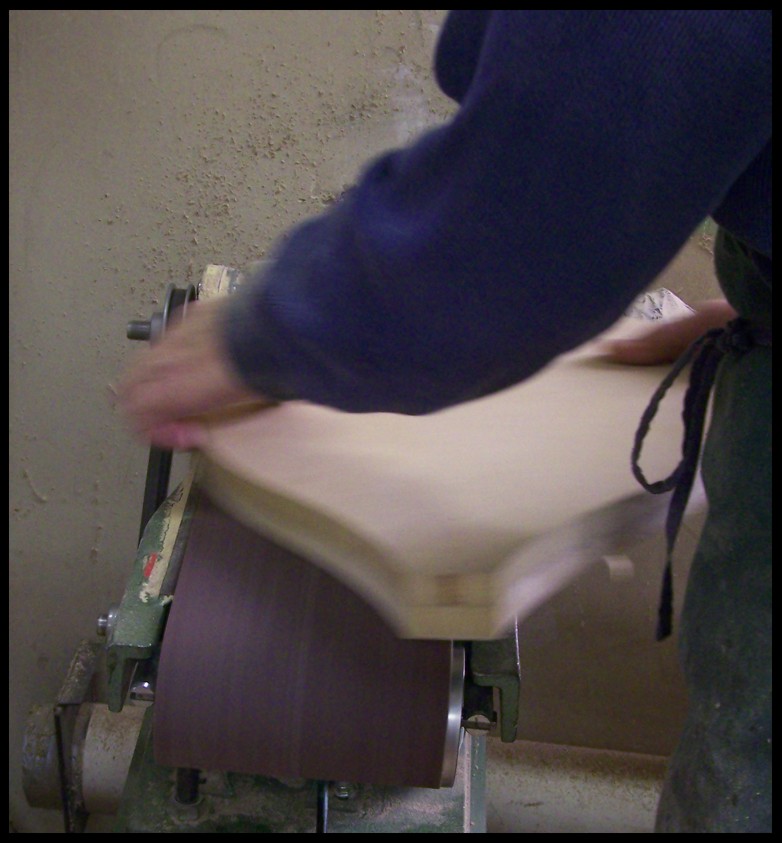
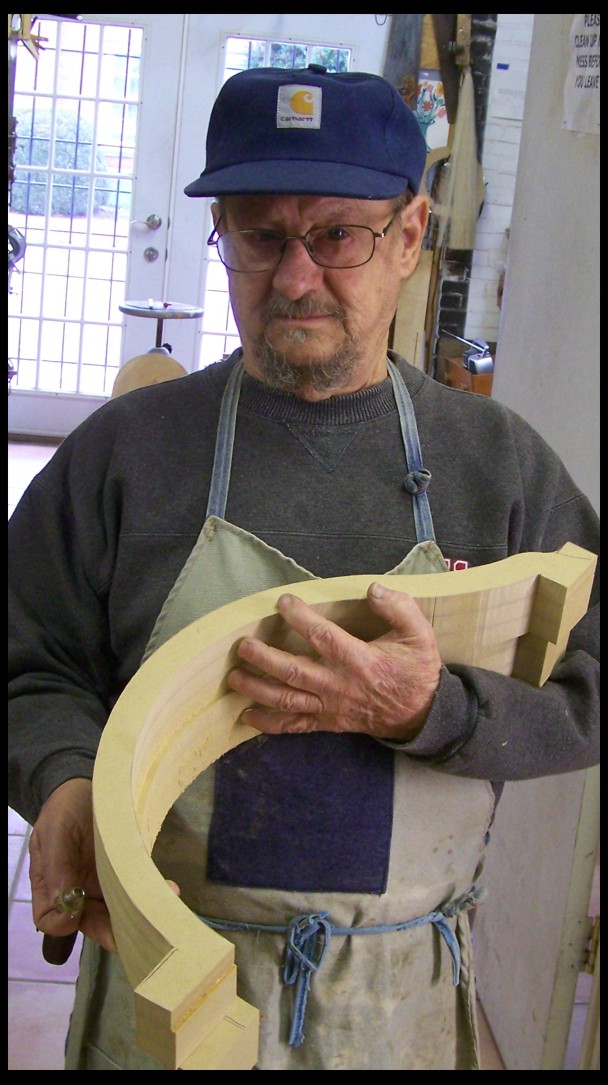
Here the basic barrel shape is being planed.
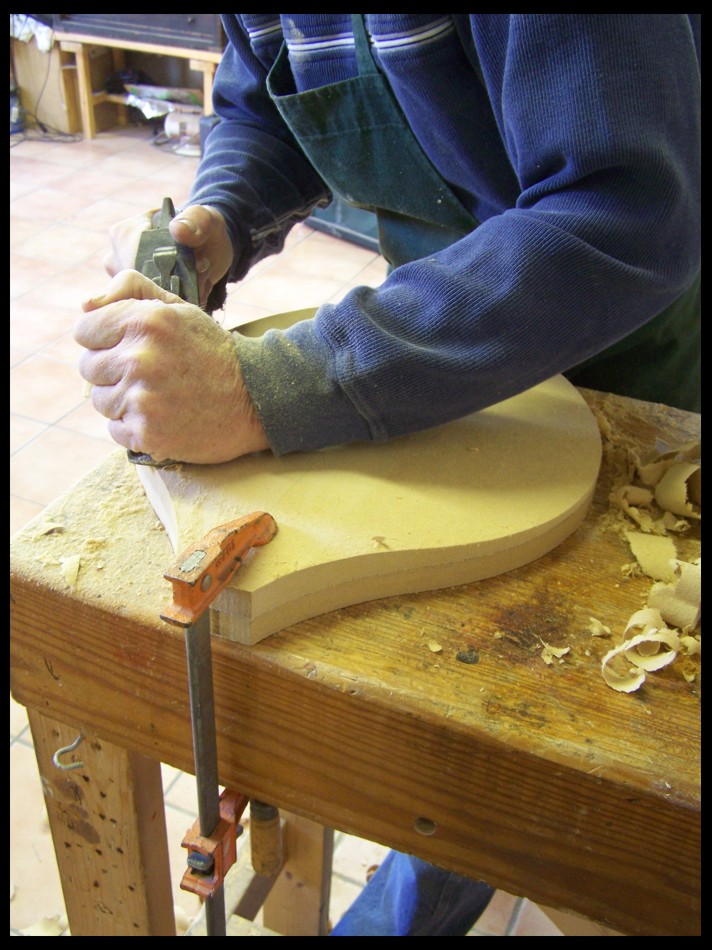
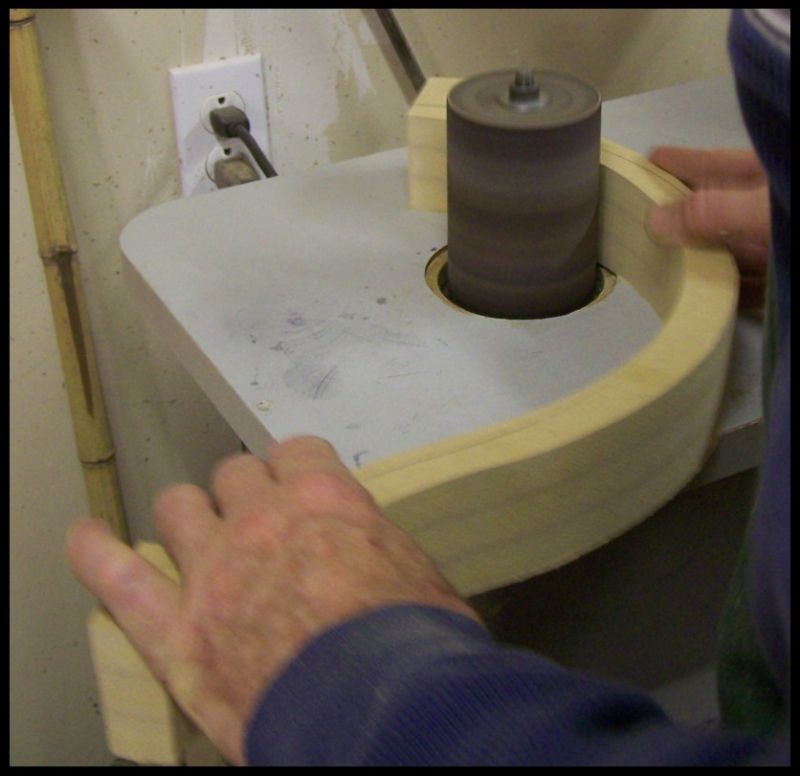
The shape is refined on the sander...
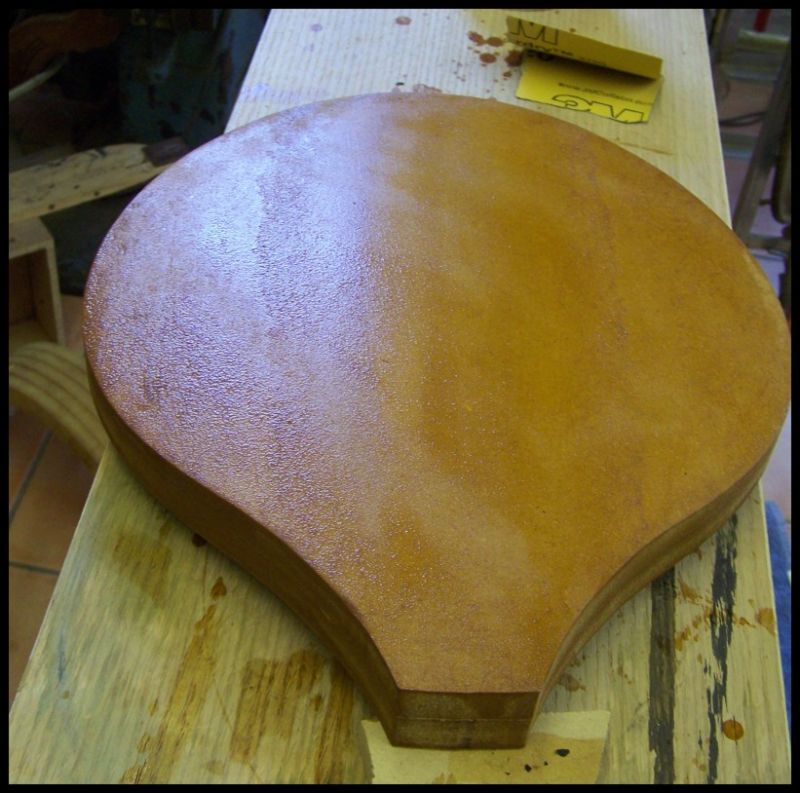
The form with its first coat of shellac.
And another jig , this one for laminating linings.
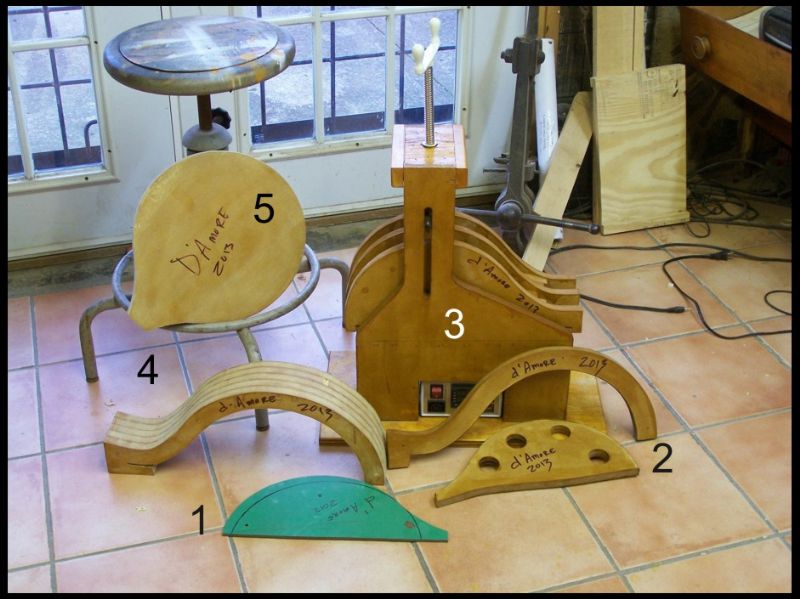
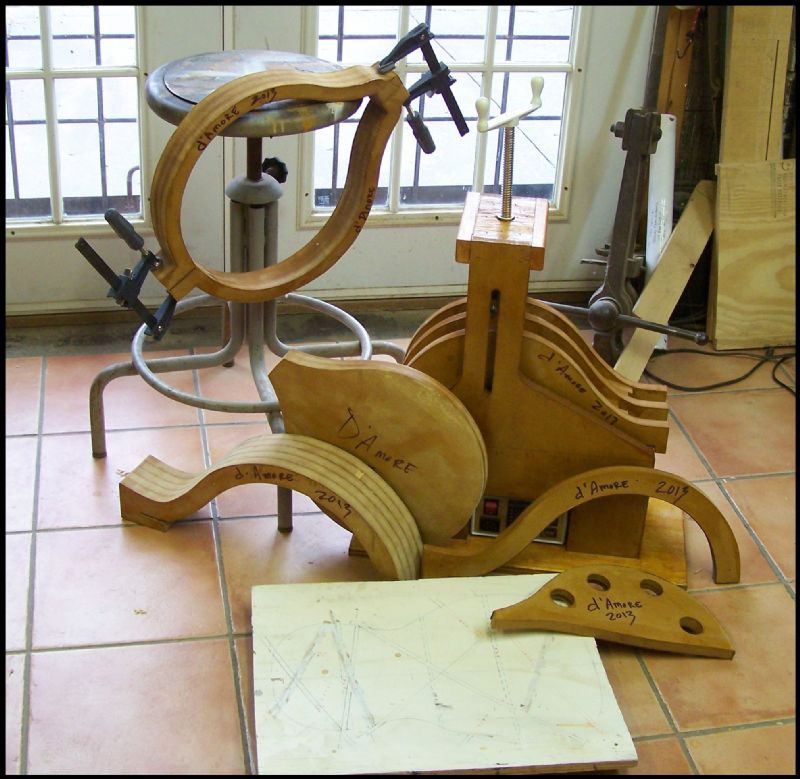
Here most of the d'amore jigs are in a group.
1. The pattern
2.the two halves of the lining form.
3. Side bending machine with the d'Amore mold.
4. Laminating mold.
5. Barrel form.
Be back real soon!
Will1717 - Posted - 01/11/2013: 21:05:02
Dan:
A beautiful tune and well played. To bad that Tommy was up to joining in.
Look in your inbox shortly as I'm just forwarding you some photos.
Bill Rickard
Dan Knowles - Posted - 01/11/2013: 21:10:51
Bill,
Thank you. I'll watch expectantly!
...and with baited breath ![]() .
.
Dave1climber - Posted - 01/11/2013: 21:20:41
Dan
It appears that without the jigs building the instrument would be very difficult if not impossible. When your finished what do you do with the jigs?
Dave
Dan Knowles - Posted - 01/11/2013: 21:36:34
Dave,
I save them for the next instrument of the same or similar type. This d'Amore will be a first in instrument history. Being totally unique, it requires a bunch of new jigs.
Dan Knowles - Posted - 01/12/2013: 05:58:05
Dave,
I got to thinking about my last answer of yesterday evening and I realized that a further explanation is in order.
For years I have built guitars (although looking unconventional) used what might loosely be called standard building methods. That would be solid, one piece sides & kirfed linings. For some time I've thought about the methods used by 18th. and 19th century luthiers.
One, why would they approach their craft as was they did?
Second what possible tonal benefit (if any) would there be in these techniques?
The main technique that has fascinated me is the laminating of sides & backs. I own a 1840's German guitar and a 1852 James Ashburn (American) guitar. Both of these instruments have laminated sides & backs. Brazilian rosewood over spruce. Each of these instruments also have solid linings. So then in my opinion (and you know what opinions are worth) what is the benefit of these differences?
This should add stiffness to the rims. And as stiffness has less of a dampening effect this in turn should add clarity and sustain.
All of that is to say that usually only a outside mold is needed, but here I need many more fixtures to laminate both the sides, linings and back. When this instrument is completed we'll see (and hear) if it was worth the extra work.
dbrooks - Posted - 01/12/2013: 06:45:22
Thanks for sharing "The Wind" with us here, Dan. Thoughtful lyrics, lasting melody -- all delivered very convincingly. Yes, the wind will take us there.
David
Dave1climber - Posted - 01/12/2013: 07:00:55
Dan
My first thought was that the only way to know if the linings make a difference in the tone would to build two, one with lining, and one without, from the same wood. I am sure that however they turned out that with the right tuning both would sound good.
Will you be laminating with parallel grain or at some angle? I know from boat building practice, molded plywood, that a relatively small angle imparts considerable strength and rigidity.
Dave
Dave1climber - Posted - 01/12/2013: 08:53:04
Dan
Having thought about your project two things come to mind. The first is that the laminations used for the lining could be veneer that is cut into strips. A source that I have used with satisfaction is here:
The second is for the parts that have curvature you could use a vacuum bag "press", thus needing only one mold, JIG, per part instead of having to make two matching JIGS.
Dave
Ho C Ying - Posted - 01/12/2013: 20:27:23
quote:
Originally posted by DanKnowles
I'll write my regular post here in just a moment.
Last night my band mates came over and we recorded a demo of a tune that was written by my friend Tommy Ogle. It is titled THE WIND. Take a listen and let me know what you think.
I do hope you enjoy it.
banjohangout.org%2Fmyha...ID%3D29180">banjohangout.org%2Fmyha...ID%3D29180" target="_blank">hangoutstorage.com/jukebox.asp...D%3D29180
Very nice song. I enjoyed it. Thanks for sharing, Dan.
Dan Knowles - Posted - 01/13/2013: 07:44:05
David & C Ying,
Thank you, I am truely glad that you enjoyed the tune.
Dave,
Your first thoughts are correct empirically. But with musical instruments few things can be held to that standard. Much of what we do is acquired by tradition, thru others (including others instruments) and experience. So let me deal with each of these.
Tradition: There is a long tradition of solid lined instruments in Europe violins, mandolins, lutes, citterens, early guitars and some Spanish classical guitars. Why was this done? Was it because the lacked the technical expertise to make kirfing? Other than most Spanish classical guitars which use small individual blocks instead of kirfing each of these use solid linings. Many early guitars used laminated sides (and some backs too) These include Stauffer, Martin and Ashburn.
Others: Sinyder, Kasha, Bagdonovitch (I hope I spelled these correctly) and others are advocates of solid linings & lamination of sides.
Experience: I have spent much of the last 30 + years as a Luthier primarily repairing. I've seen that while most major manufactures are concerned with first speed of manufacturing. Quality and sound is almost always of second interest. This is not a criticism this is only logical on their part. Kirfing is a improved version of the small blocks used on many classical guitars. It is quicker to apply and creates a stiffer rim. Also most manufactures including Martin and Gibson have used various tapes & braces to stiffen ribs and/ or stop side cracks. This proper lamination achieves. Does this mean most laminated side and back guitars are superior? Obviously no. Still I own two examples from the mid 19th. century and I have handled many whose backs and sides are laminated and in good condition where their tops have many cracks.
Enough pontificating Dan!
As my friend Bob Valentine says "That's my story and I'm stickin' to it!"
Thanks for the link. I spent a hour of pure enjoyment lusting after fine veneer. The vacuum bag idea is something I have thought about for a good while, but haven't jumped on yet.
Dan Knowles - Posted - 01/13/2013: 08:11:00
STILL MORE JIGS (perhaps this should be called Last Jig)
12 January, 2013
Yesterday....
(yah I know ...all my troubles...)
...was student day at the ole' instrument shop. So not a lot was achieved in the d'Amore project but I was able to complete the last fixture needed for this project.
Friday afternoon I glued up these pieces of MDF for the outside mold.
Here Eric is gluing in his wood binding on his guitar body.
And Jerry is working on his electric...
And Chandan finally glued his electric body.
While they worked I fooled with this fixture...
Jerry played catch!
Here I'm slickin' it on the sander...
Checking the fit... good it works.
The family grouping...
Dave you asked about what happens to the old Jigs.... here is a sample.
More soon.... ... ...
Dave1climber - Posted - 01/13/2013: 12:42:46
Dan
Looks as if you could use a storage locker for all of your different jigs, with a card catalog to keep track of them, sort of like the card catalog that was used in libraries. ![]()
Busy Saturday, its always good to see people making progress on their projects. ![]()
Dave
Dan Knowles - Posted - 01/14/2013: 20:28:16
14 January, 2013
Sampling Stains
Today was another teaching day. Earlier in the AM I did have a few hours to work on some stain samples.
I started off by resawing some sample blocks from a drop piece.
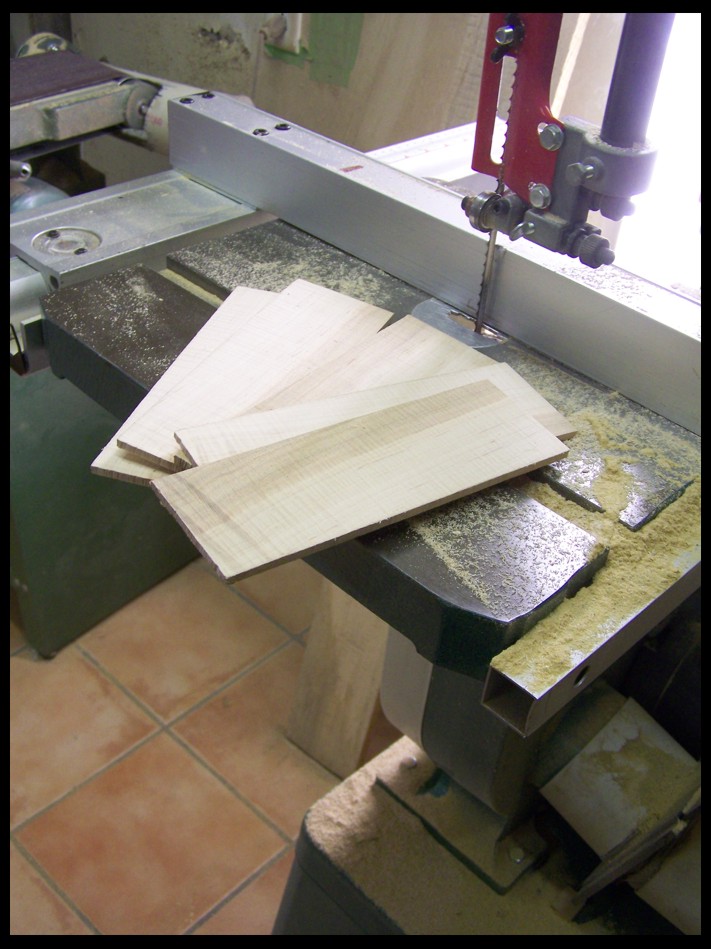
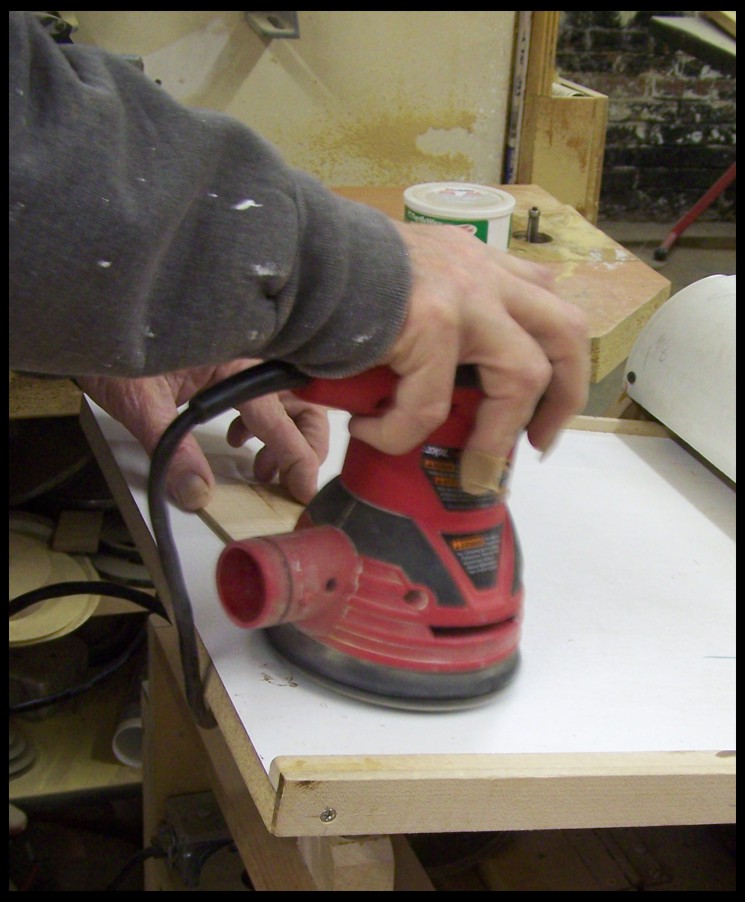
Then I slicked 'um up a bit in the thickness sander...

Then finish sanded them quickly...
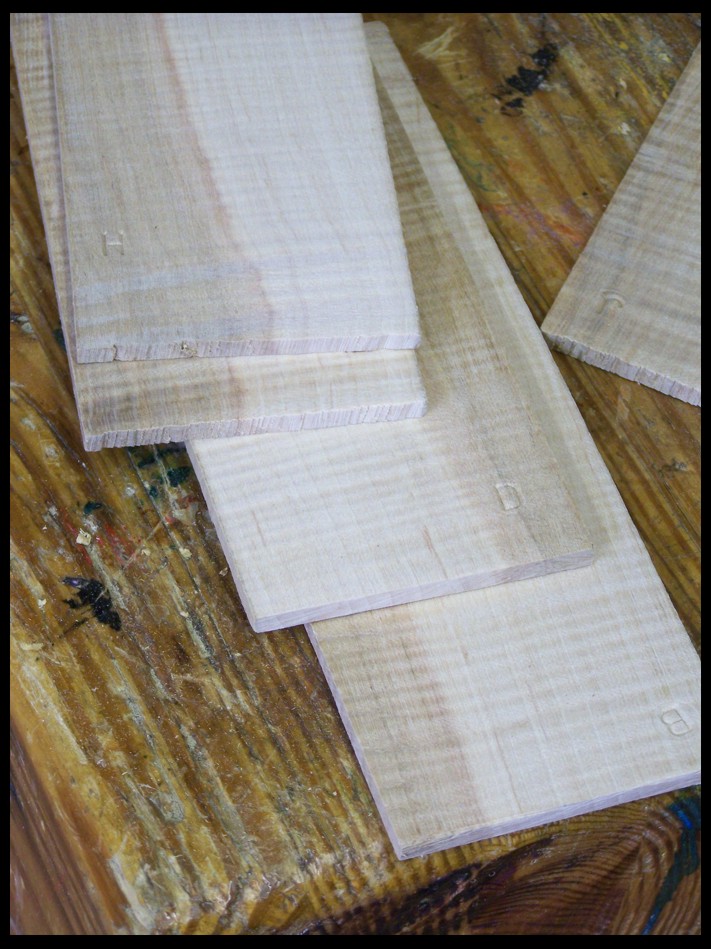
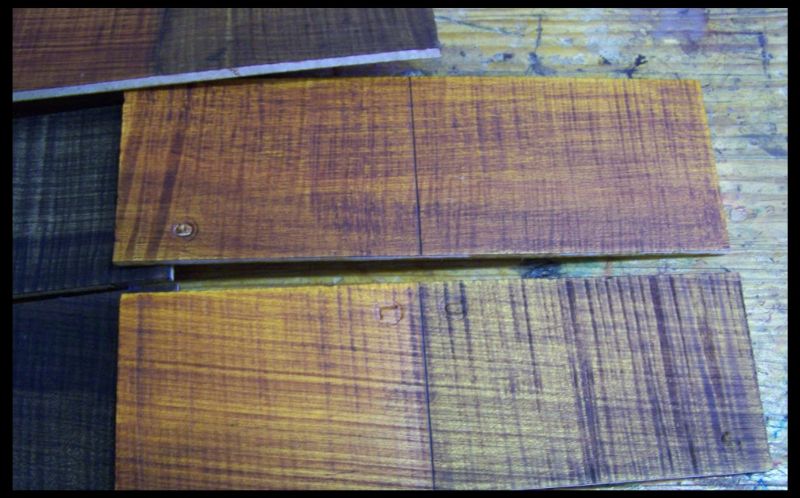
Next I stamped each with an identifying letter and then a U for upper half and a L for lower half.
Next I got out the two stains and prepared to go to town...My goodness but the walnut stain stinks!
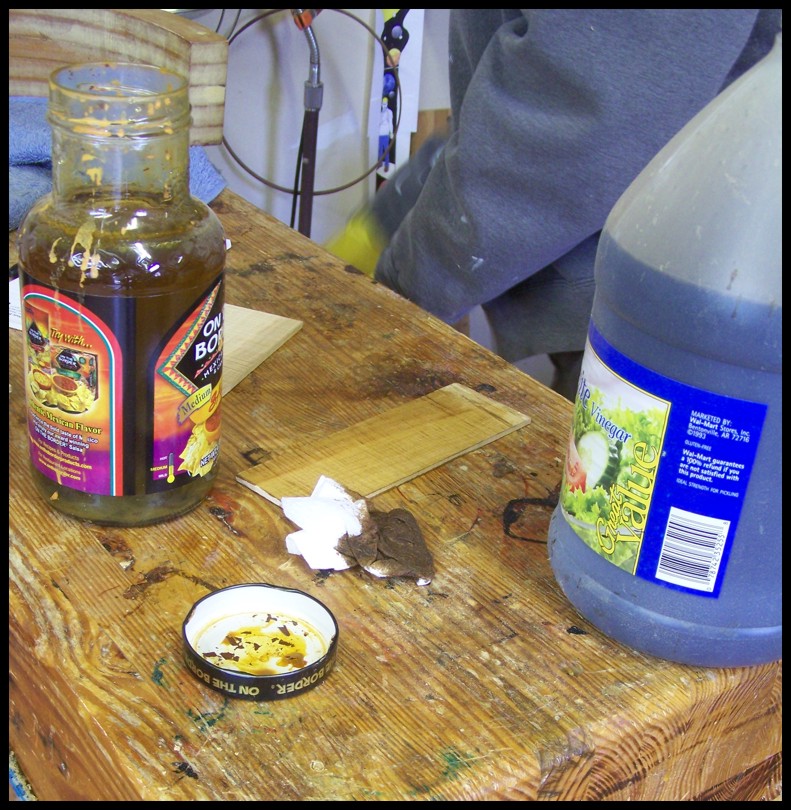
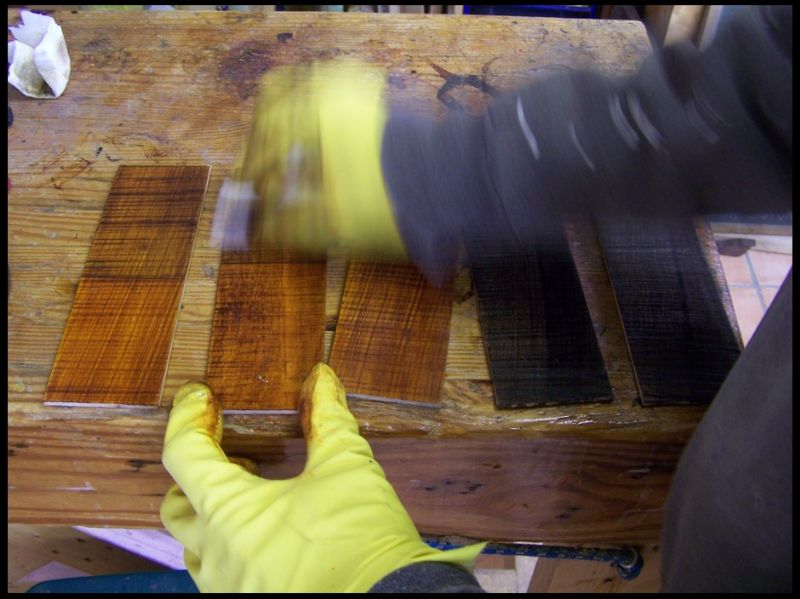
After the stain dried I rubbed on some Tung oil finish, here the are drying.
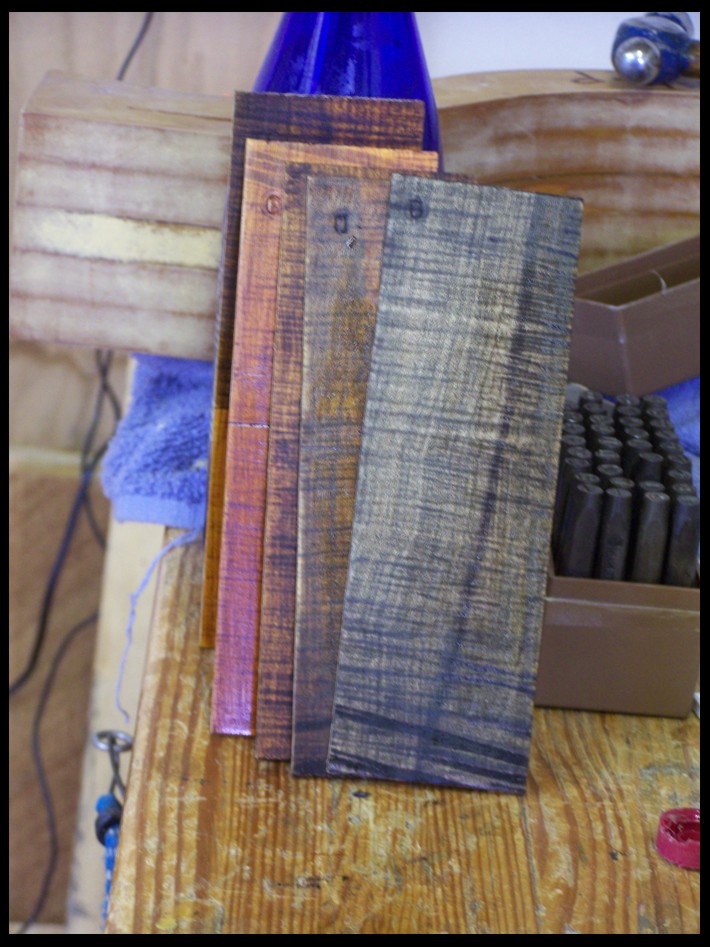
Here is on half of the batch...
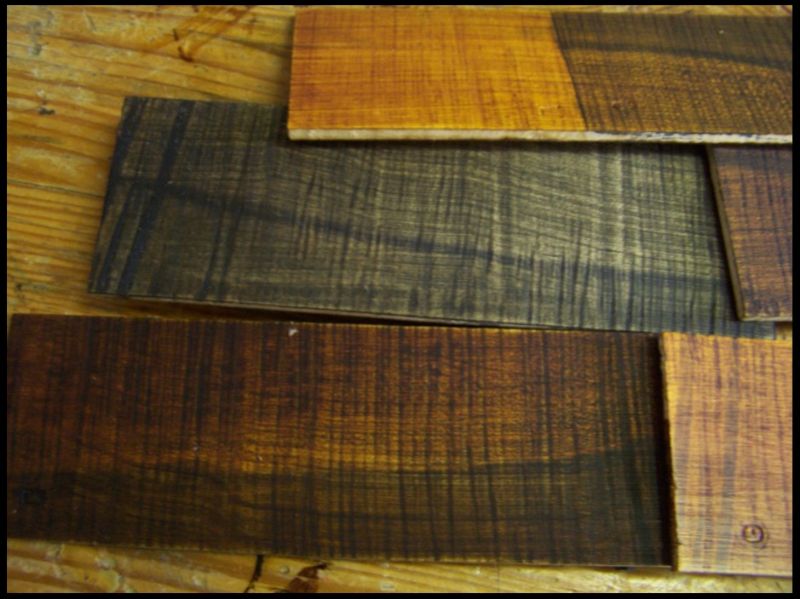
and the other half... Which do you like? And why?
more tomorrow...
Edited by - Dan Knowles on 01/14/2013 20:31:13
DEmery - Posted - 01/15/2013: 03:16:53
Dan when I got up early this morning I saw your note about this post. Of course I popped open BHO to see what you were doing and saw the stain samples. I cannot pick between the two batches. I think the stain delivers a very natural range of tone on the maple. How did you pull the color tone differences from a walnut stain? How does the finish feel after the oil finish cured? I will say my preference is batch one and two; and some of the browner tones in either best for me. David E.
Page: 1 2 3 4 5 6 7 8 9 10 11 12 13 14 15 16 17 18 19 20 21 22 23 24 25 26 27 28 29 30 31 32 33 34 35 36 37 38 39 40 41 42 43 44 45 46 47 48 49 50 51 52 53 54 55 56 57 58 59 60 61 62 63 64 65 66 67 68 69 70 71 72 73 74 75 76 77 78 79 80 81 82 83 84 85 86 87 88 89 90 91 92 93 94 95 96
Terms of Use | Privacy Policy | Privacy Consent (EU/GDPR Only)
Copyright 2026 Banjo Hangout. All Rights Reserved.


