DVD-quality lessons (including tabs/sheet music) available for immediate viewing on any device.
Take your playing to the next level with the help of a local or online banjo teacher.
Weekly newsletter includes free lessons, favorite member content, banjo news and more.
Premier Sponsors


|
Please note this is an archived topic, so it is locked and unable to be replied to. You may, however, start a new topic and refer to this topic with a link: http://www.banjohangout.org/archive/251124/9
Page: 1 2 3 4 5 6 7 8 9 10 11 12 13 14 15 16 17 18 19 20 21 22 23 24 25 26 27 28 29 30 31 32 33 34 35 36 37 38 39 40 41 42 43 44 45 46 47 48 49 50 51 52 53 54 55 56 57 58 59 60 61 62 63 64 65 66 67 68 69 70 71 72 73 74 75 76 77 78 79 80 81 82 83 84 85 86 87 88 89 90 91 92 93 94 95 96
DEmery - Posted - 02/26/2013: 03:39:05
It is always fun to watch a neck take shape after all that early rough work, gluing, clamping, tunneling, etc. The back strap looks to go way down the neck. It turned our really pretty. David E.
Dan Knowles - Posted - 02/26/2013: 17:48:11
2-25-2013
Today Something different... I mad up a video of the carving of David Emery's banjo neck and posted it here and on Youtube. Although this one goes a bit longer than a minute it is the first of a video series I'm going to try called Luthiers Minute. I hope you enjoy it.
dbrooks - Posted - 02/26/2013: 17:59:56
Another fine piece of work, Dan, in every respect. Wonderful video work. You can see how everything is in the same flow: your hands, the tools, the raw materials. I couldn't believe it when I saw you trim the heel with the bandsaw by holding the neck at angle only with your hands to get a sloped side roughed in. I guess you've done that a time or two before.
David
DEmery - Posted - 02/26/2013: 18:15:22
Well Dan you have done a bunch of necks for me but this is the first time I got to see it happen. I always appreciate the effort you put into your work and doing this was over the top. By the way...that back strap looks really nice. This one goes down in BHO history...at least for me. Thanks, David
Dan Knowles - Posted - 02/26/2013: 18:37:10
David, Dan & David,
Y'all are so welcome. It was fun to do. David I figured since we didn't make PBS on this one that you of all my friends deserved this little bit. I'm glad you liked it.
By the way I wasn't angry... I just MADE the video. Some day I'll learn to check!
jbalch - Posted - 02/26/2013: 19:11:06
Awesome.
You made me nervous free handing that incredible curly maple blank at the band saw.
Dave1climber - Posted - 02/26/2013: 20:32:55
Dan
A great video, showing wondrous work in skilled hands. 
Shawn Hoover - Posted - 02/26/2013: 20:46:46
Dan, the more I follow this thread, the more I develop an appreciation for the economy of space in your shop, in particular the clamping tables, vise stand, and clamp rack. Did you make the vise stand? Several months ago I was fortunate to acquire a pile of tools from a retiring luthier, including a StewMac ShopStand. Somehow I managed to carve a neck with it bolted to a plywood base, but after admiring your setup I'm finally getting the nerve to bolt it down to the basement floor.
manomusic - Posted - 02/26/2013: 21:03:16
Thanks for the video Dan, I'm really enjoying this thread. 
Dan Knowles - Posted - 02/27/2013: 04:40:45
John,
You think that made you nervous...
Actually that is how I remove a great bulk of waste wood. I know a lot of guys use a router table, maybe the results are quicker and more consistent, but I've done it this way for 30+years and it works for me.
Dave,
As always, Thank you.
Shawn,
I had that vice stand welded up and powder coated about 10 years ago. It is screwed to the floor. Sometimes I wish it was movable or in a different location, but mostly I'm thankful for the stability.
Those workbenches are in response for me being to lazy to pick up my tools as I go. They are too small to have much on them so tools are put up quickly after their use. This saves me all sorts of grief! The clamp rack is a hospital food tray rack. I can move it around the shop at will. It's stainless steel and I got it at the local metal recyclers for little of nothing.
Neil,
Thanks, I'm glad your here!
Dan Knowles - Posted - 03/01/2013: 18:12:42
13-13
It's good to be back on the Hangout tonight. The sickness grabbed ahold and today was my first nearly full day since Monday. It's what I get for being so sure that I was too tough to catch the stuff! I believe it was yesterday that David Emery called me just a bit before I gave up, went home and slept the day away.
That said, this is what I did. Mostly today, but a bit yesterday...
This Alverez guitar needed a setup, I went to hackin'
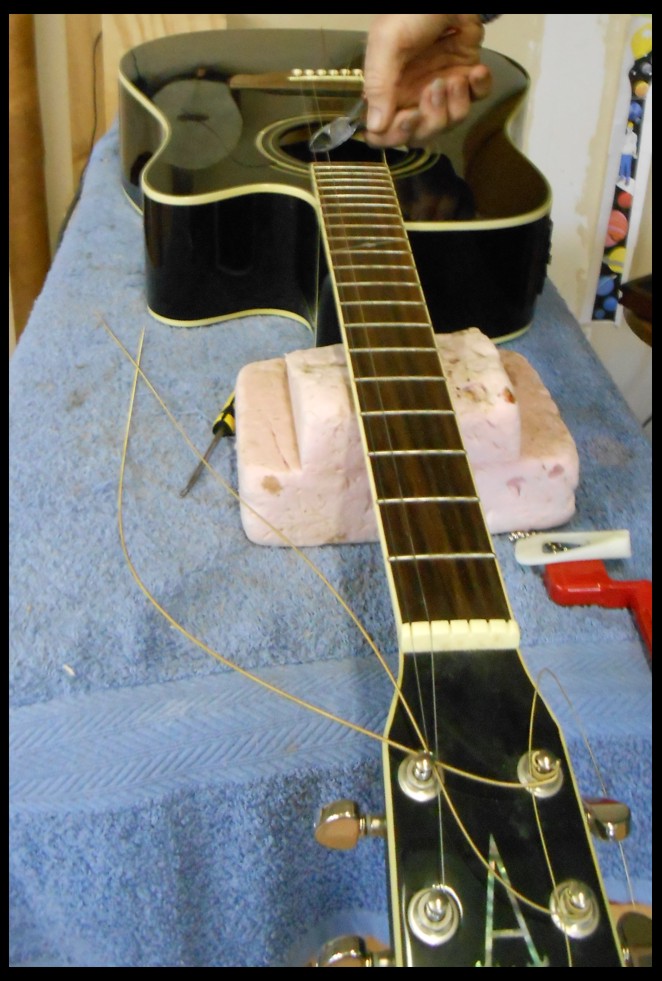
Skip a bit ahead....
The final thing in a setup is cleaning. Sometimes this is the most important thing. As my old art teacher used to say "Presentation, presentation, presentation!"
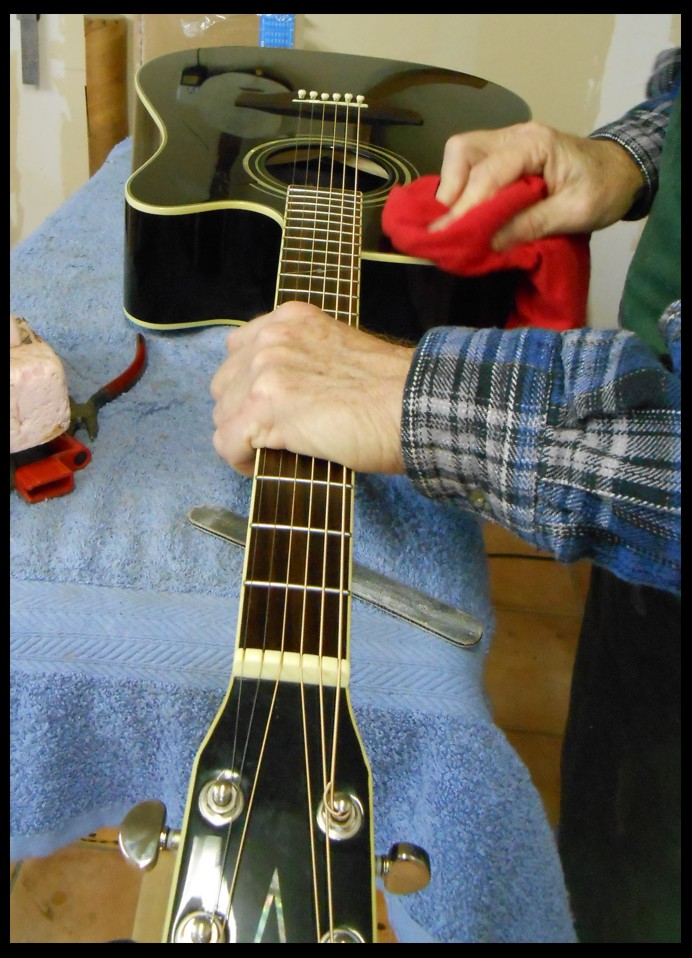
I dove into my departed friend Tommy Ogle's Vega banjo. I'm doing a complete cleaning, new nut, replacing a couple of missing parts and set up in preparation for offering it up for sale. Here I've got the neck off and I'm giving it a good buffing.
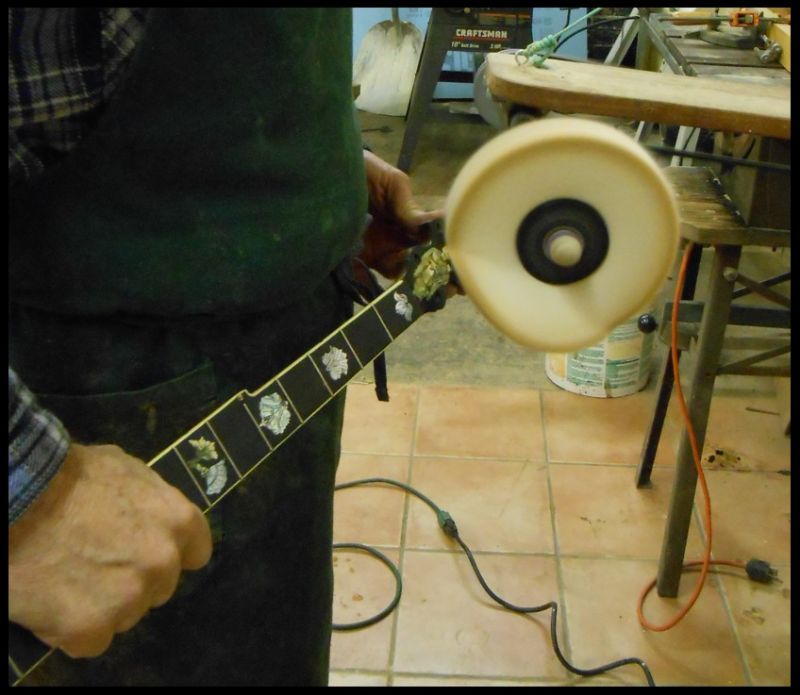
And a little extra red cloth rubbing.
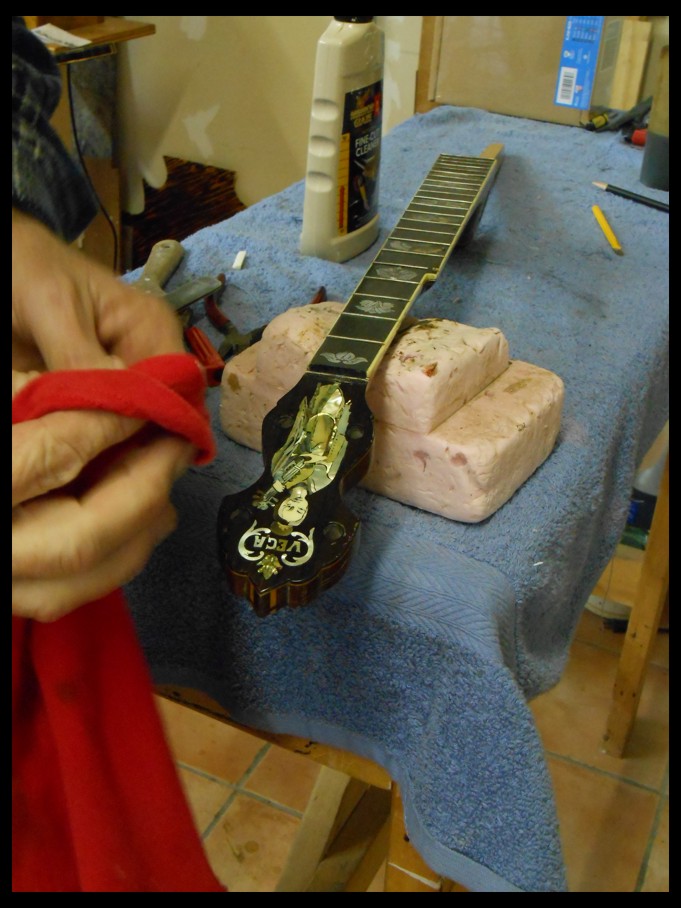
After cleaning and re-filling the engraving I go to treating the fingerboard with a dab of Dan's Secret sauce!
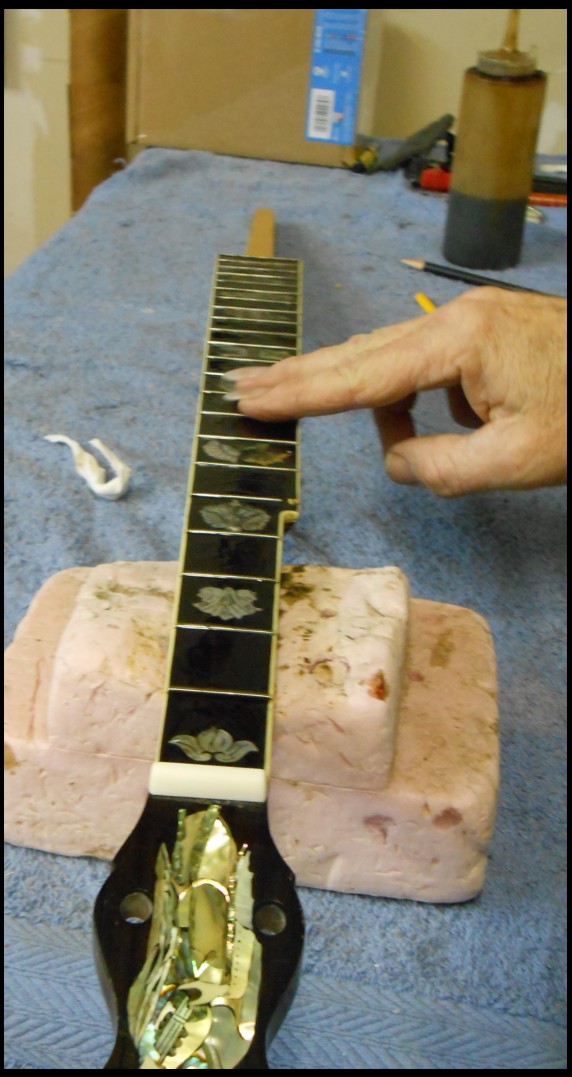
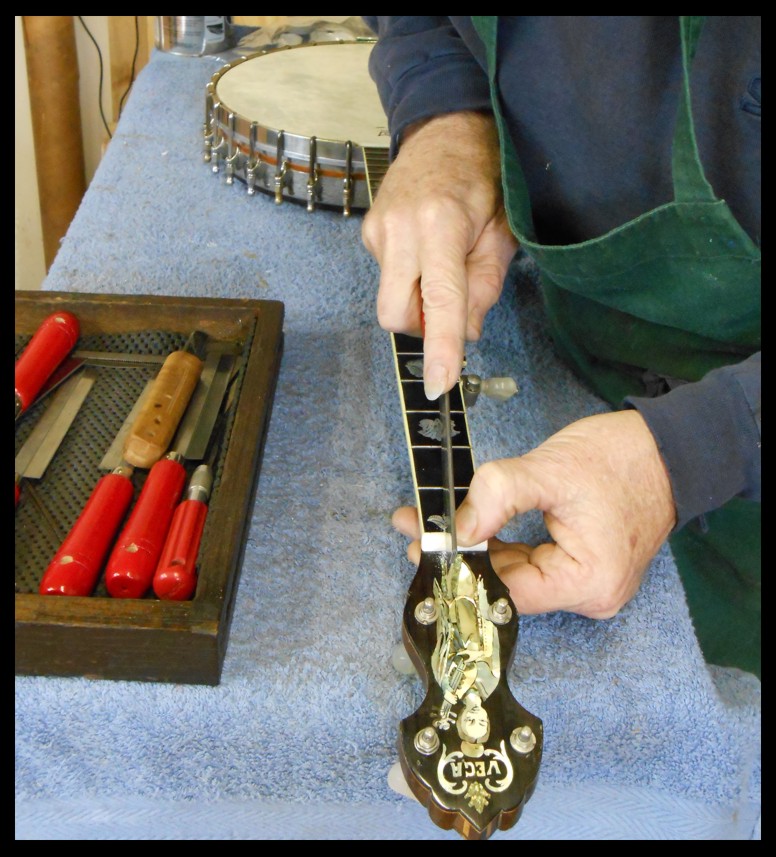
First cuts on the new nut...
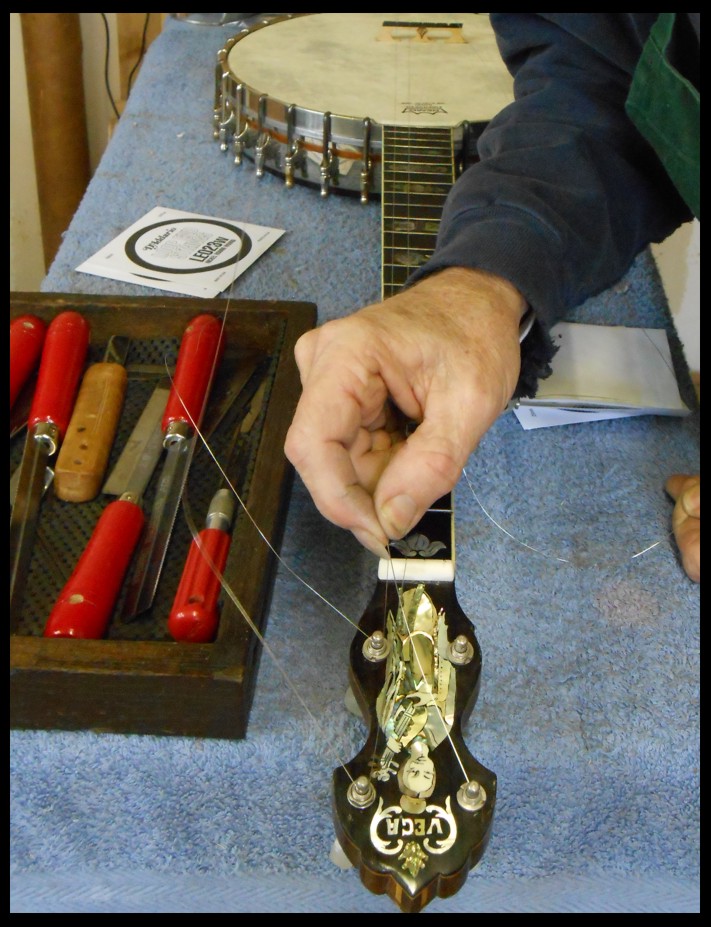
Stringing...
Adjusting the depth of the nut slots...
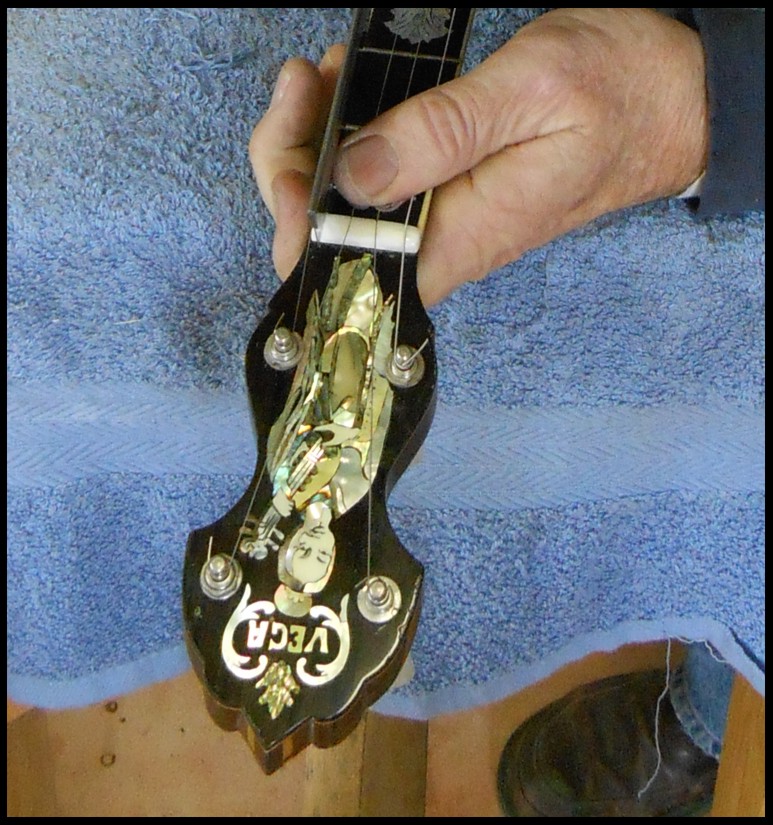
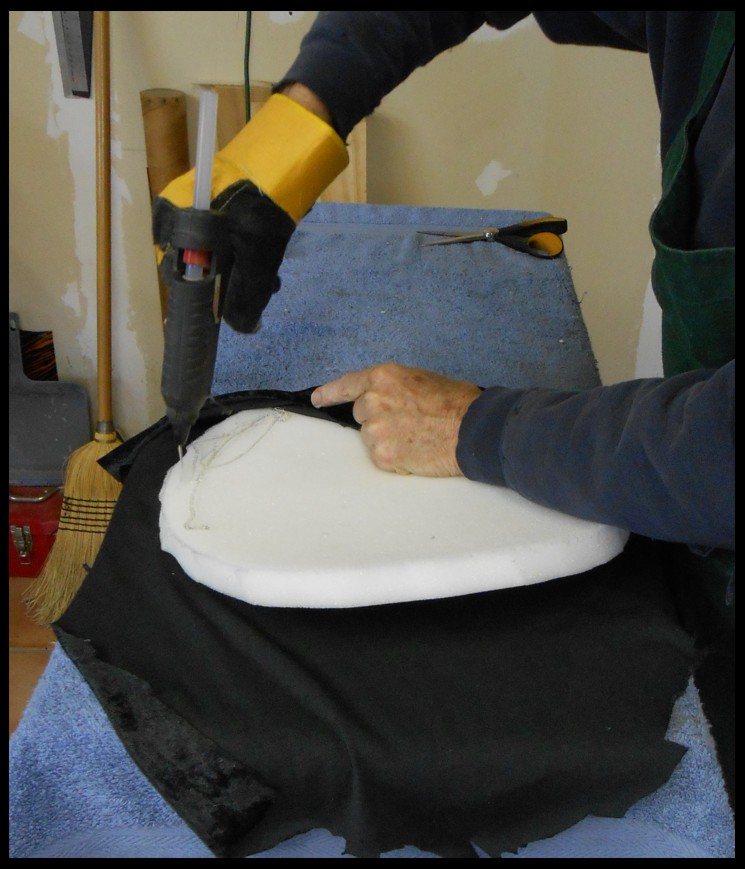
The old case had a sheet placed in it so the banjo rim would fit. I'm replacing it with some foam padding. Here I'm hot gluing the cloth to the pad...
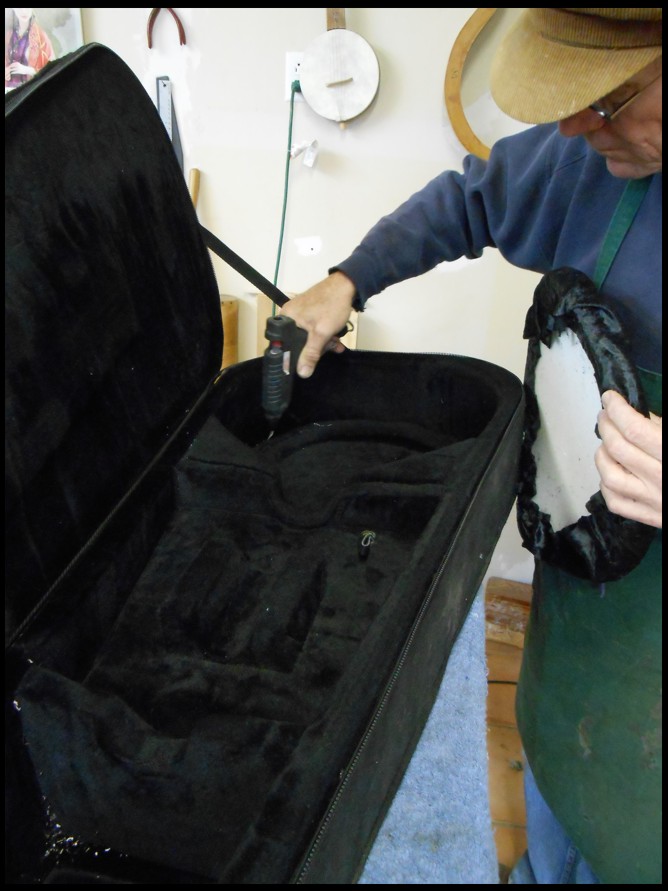
Gluing the pad in the case... it will also get side pads to hold the rim in place.
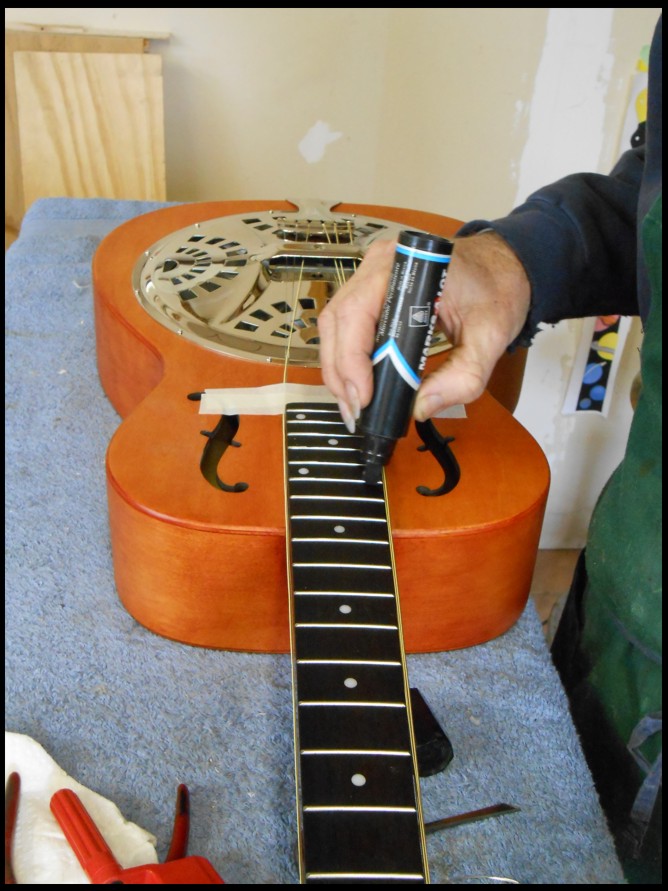
The banjo and case complete it's time to give a couple resonator guitars my attention. This first is a Gibson Dobro it is to be played "Spanish" or guitar style has several upper frets that are high and need to be filed... It is also getting new saddles, so off comes the cover plate. By the way I recently acquired this little Black & Decker electric screwdriver and I really like it. It is small and has just enough torque and speed for most of my work.
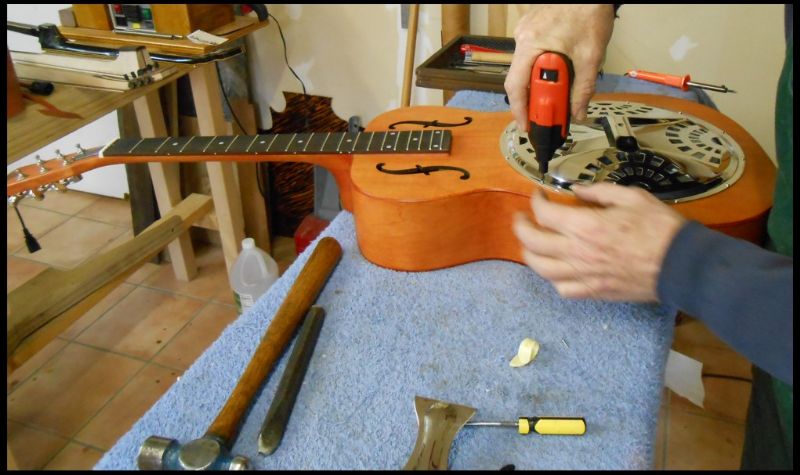
Now I'm marking the frets for filing...
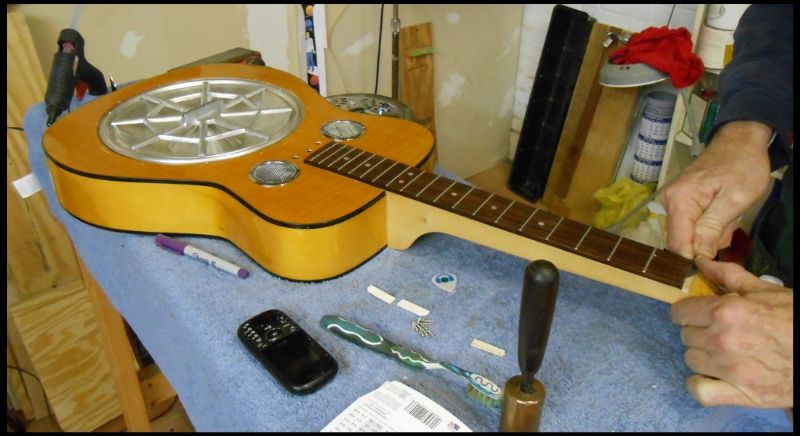
This other one gets a new nut and saddle set...
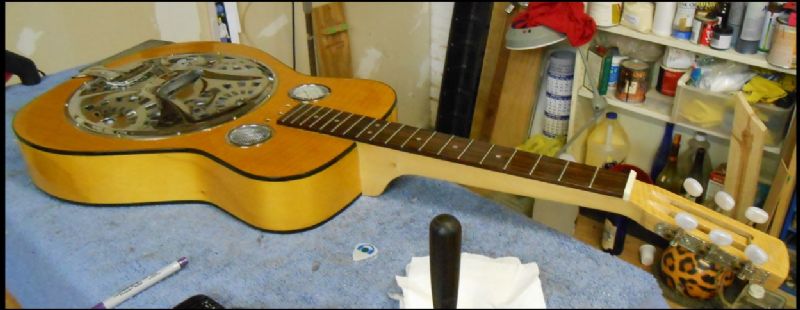
Tomorrow when I get in the shop I'll put strings on this one...
See ya tomorrow!
jbalch - Posted - 03/02/2013: 12:50:01
Dan:
That Gibson Dobro, that you so masterfully fixed for me, now belongs to Jack Pearson (jackpearson.com/). It is finally in the hands of someone who really know how to play. He always liked that instrument and wanted a wood body guitar to complement his famous old red National.
Dan Knowles - Posted - 03/02/2013: 17:28:59
John,
Thanks for the compliment. I'm glad Jack has that one as it worked out well for both of you.
Dan Knowles - Posted - 03/02/2013: 18:10:39
2-3-2013
What a great day!!!
I feel good.
And I made a discovery... one I'm sure many of you other builders already made (and are using every day). But today was my day. And I am just tickled pink!!!
But first the preamble... I know it's easy to skip ahead and see what this fool discovered. But where's the fun in that? Read on.
First the day...
Today started out with my Lutherie class. It was smaller than usual, with only Kevin and Eric attending. We got quite a lot accomplished. There must be quite a bit positive that can be told of small groups.
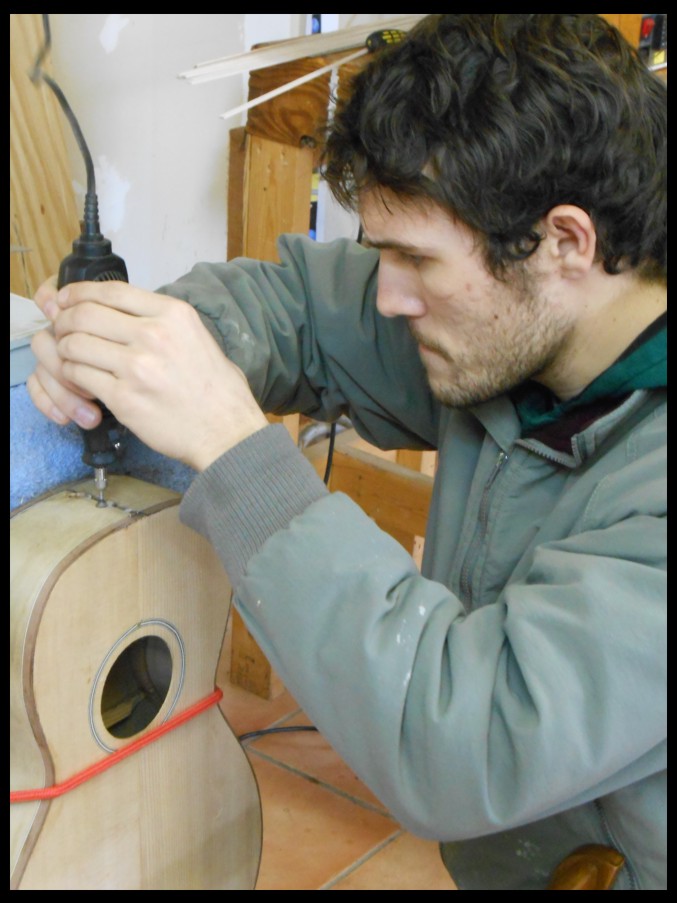
Eric worked on the attaching and fitting of his neck to his box. Here he's preparing to drill...
Kevin bent and installed figured maple binding on his guitar body. Here he's bending the bindings in the side bending machine.
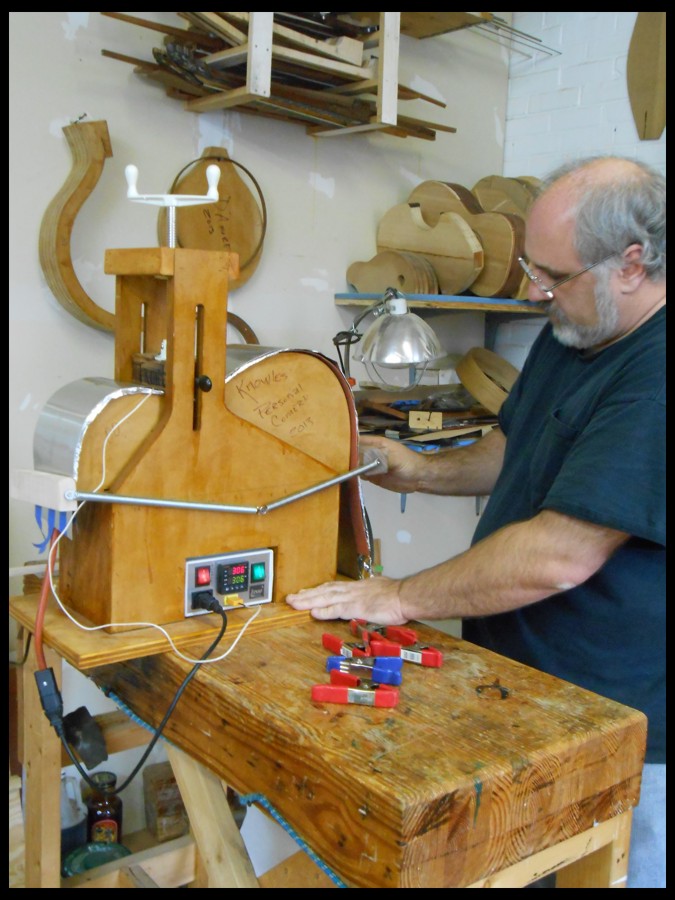
I have dug up a bunch of various saved walnut drops to make fingerboards for the 20 piccolo banjos I'm building. These all have odd edges on then so I put the old Union #6 Jack plane to work!
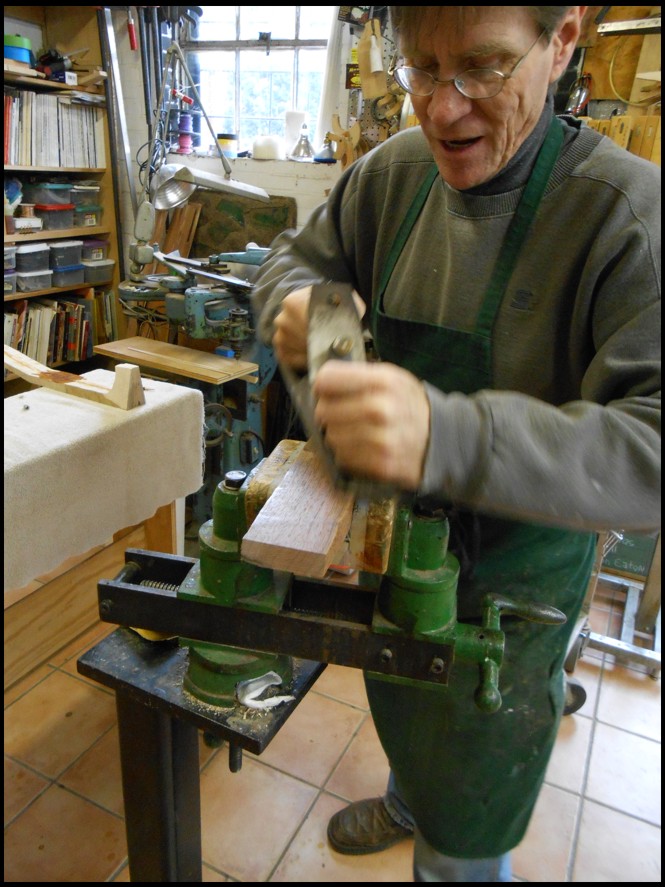
It makes some SWEET shavings!
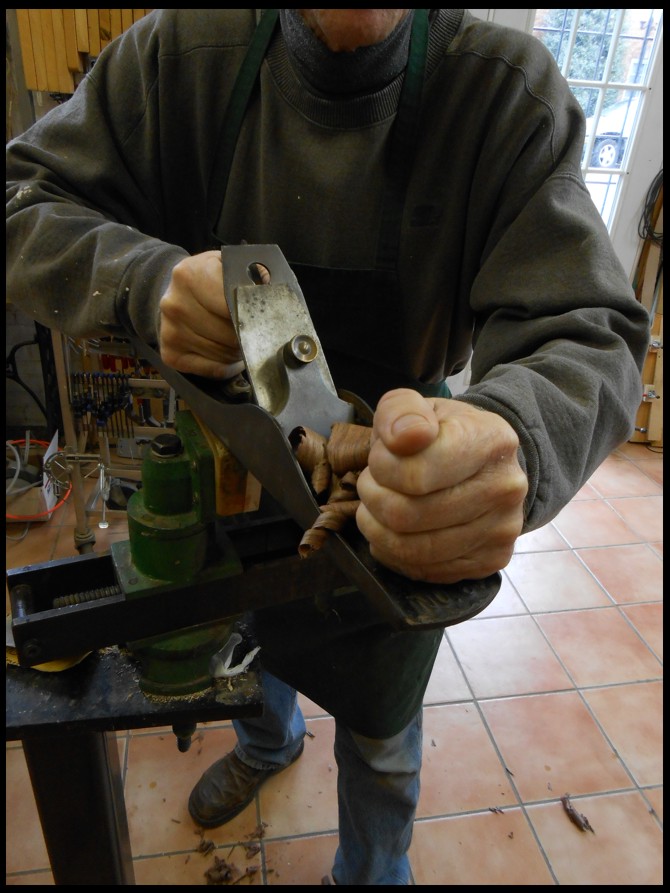
Then off to the bandsaw to rip to rough thickness.
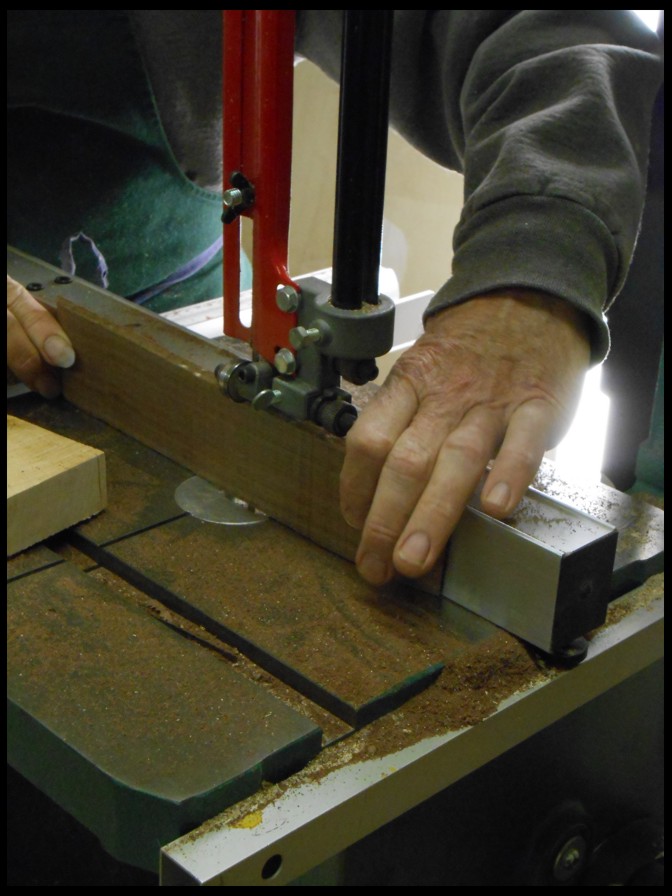
And into the thickness sander for a few truing passes...
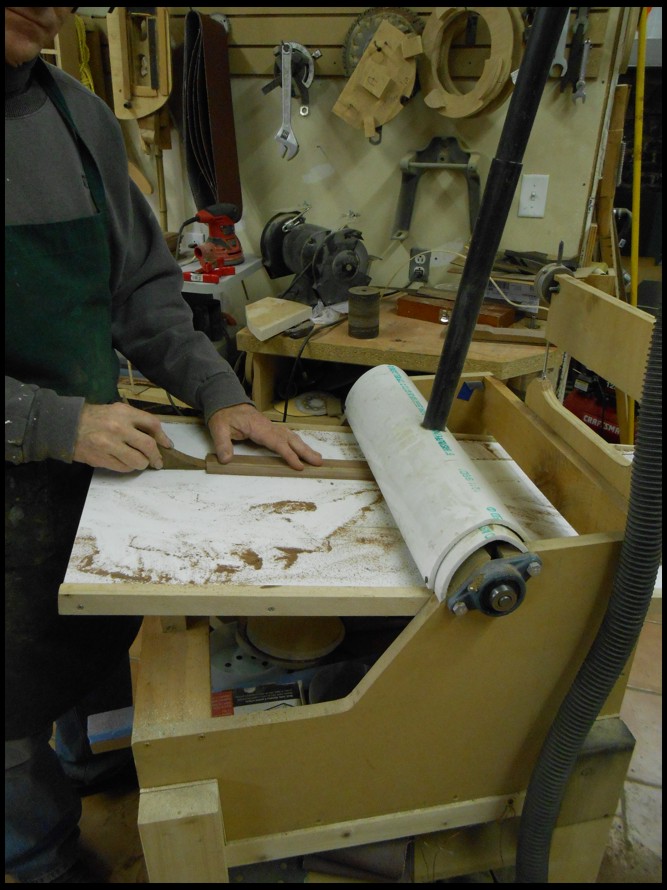
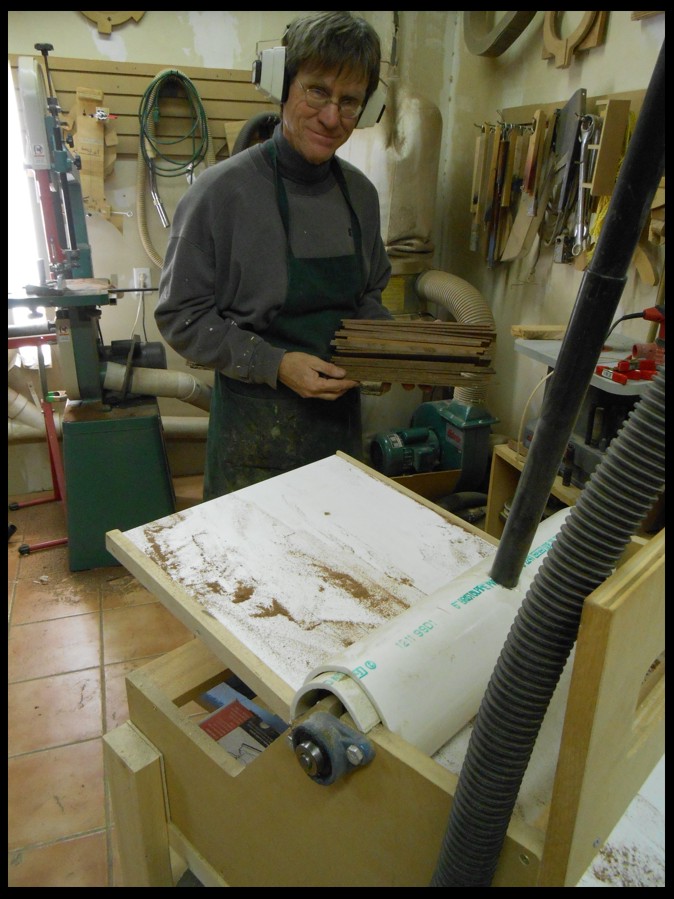
Here's half the stack.
NOW MY DISCOVERY! I've always used double stick tape or carpet tape to adhere patterns (like this fret cutting pattern) to the work piece. Yesterday working on Tommy 's case I thought of this. Why not use Hot Glue to hold the pattern to a fretboard? So today I tried this and it worked wonderful. It held the board onto the pattern during the process and when complete was very easy to make it release. Much easier and so much quicker than double stick or carpet tape.
Here it is in action. First on with the glue from the hot glue gun. I use a high temp. gun. These photos are of several fretboards as this has to be done very quickly.
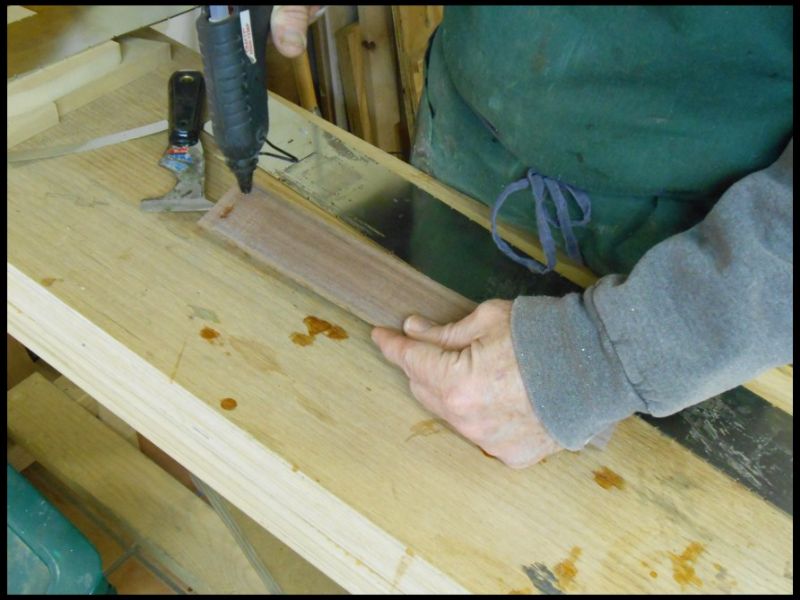
After applying the glue, quickly mate the two together. The glue sets almost instantly.
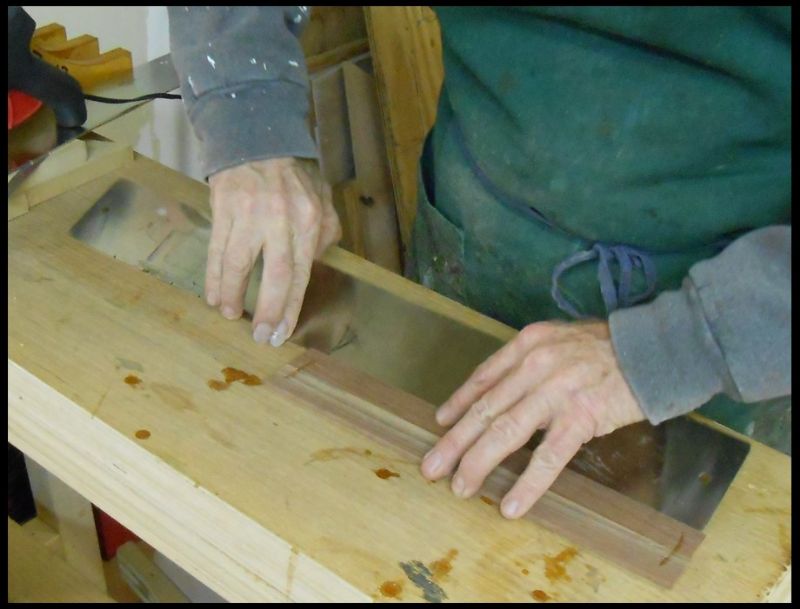
In to the table saw to cut the fret slots.
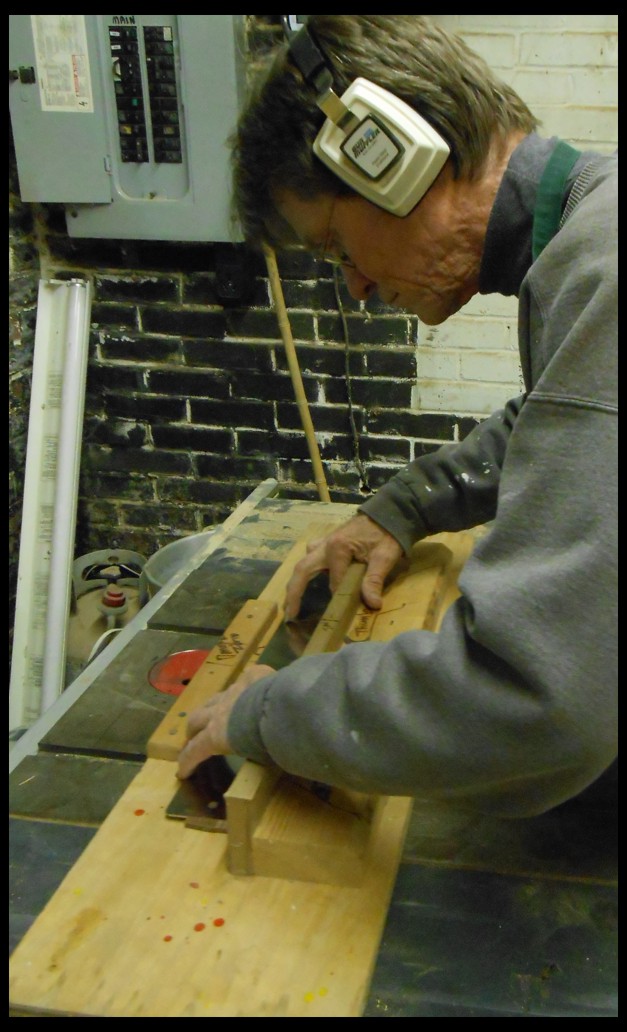
Cut...
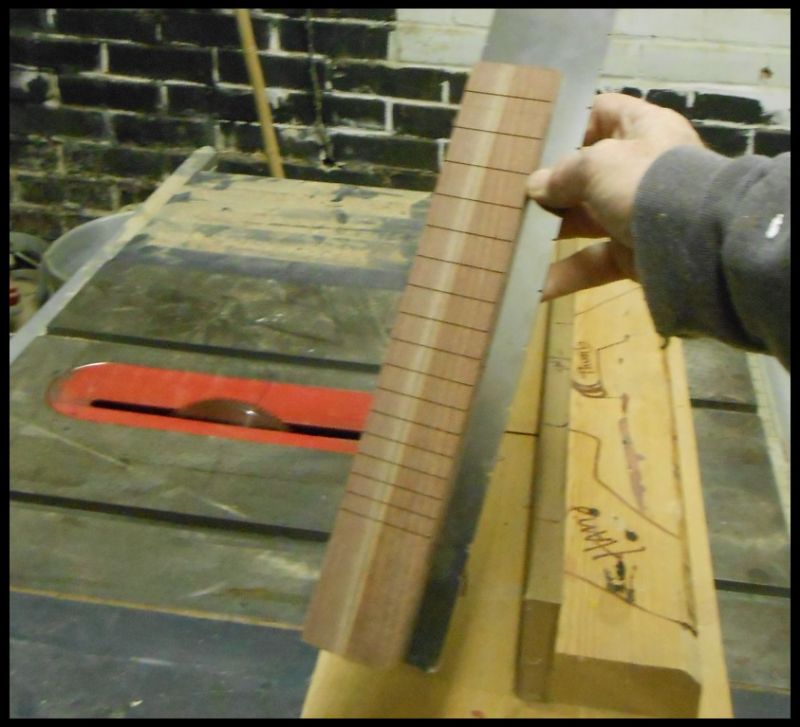
Stick the flat knife in between the pattern and the fret board and it painlessly pops off. A couple swipes of a chisel and the glue is gone. I slotted these 24 fingerboards in about an hour, A record for me. All thanks to this amazingly weak glue.
I can see using this for all types of pattern routing and for many other uses.
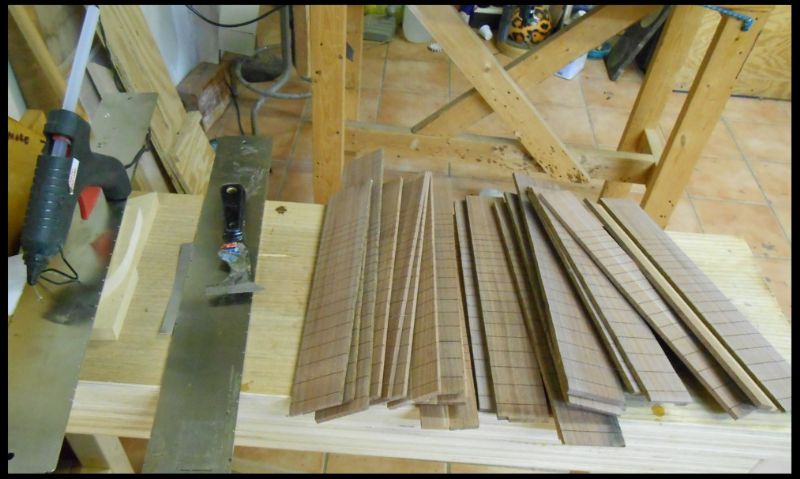
See you soon!
Thanks for looking!
Dan Knowles - Posted - 03/02/2013: 18:14:03
GREAT DAY IN THE MORNING!
We've hit twenty thousand reads!
Thanks for lookin' in.
Yours,
Dan Knowles
kwl - Posted - 03/02/2013: 18:47:11
Dan, I have never used that hot glue idea. Thanks for sharing it. It think it will make things easier. I really appreciate this discussion thread.
banjeaux bob - Posted - 03/03/2013: 00:39:02
Dan,20,000 reads? I'm hoping you will offer up more material so that there will at least that many more.Honestly,this is the only thread on the BHO that I have followed with any regularity.
BanjeauX Bob
Tylerb1 - Posted - 03/03/2013: 05:38:49
Dan, 20,000 is great. It is do only to the fact you do excellent work. Tommy's Banjo looks wonderful. I will take a l1st hand look on Tuesday if it is gone. I know real reason for lesson changes now after all the great postings from this weekend. Someone needs Monday as a rest day. Bob
Dan Knowles - Posted - 03/03/2013: 06:30:15
Kenneth, Bob, Dave & Bob,
Thanks so much. If it wasn't for folks like you I wouldn't be here.
Joe Connor - Posted - 03/03/2013: 06:51:33
Dan, please keep your posts coming. They are fascinating. I am in awe of anyone who can do the things that you do. Sometimes, I think the people who have the kind of talent that you have don't fully appreciate just how remarkable that talent is.
Dan Knowles - Posted - 03/03/2013: 07:12:27
SUNDAY...THE ARCHIVE...
This morning I got up late (for me that is), 8:06 AM. I couldn't believe it. What's more it felt GOOD. So decadent. House so quiet. Deborah out in the kitchen reading and drinking coffee. I got some of that black gold for myself and looked on here. I always enjoy looking in on the Hangout, Anyhow I started thinkin' (always a dangerous occupation for me) that it might be fun to go trottin' down memory lane and look at some of the earlier projects. So I looked into the heel carving on Othello, the ebony riverboat themed banjo. If you enjoy this and find it worthwhile let me know and on days away from the shop I'll continue to post some of these.
At the point this post takes up Othello's neck has been assembled, basically carved and inlayed. I remember looking at the heel for some time thinking about an appropriate design. We have the Great Steamboat Race of 1870 taking place on the fingerboard with lots of folks watching from the peghead. On the back of the peghead is a fleur-de-lis reminiscent of the Farland Artist Grand that river man John Hartford used to play. What would fit? I wanted some leaf type images, but not the usual Victorian leaves carved on many banjos. Then I thought of the Paw Paw. It grows along the Mississippi river bottoms. Although not as common as it once was, it provided food for humans and other animals. There are many poems and songs that speak of the Paw Paw tree. So I got out my trusty tree book and began to draw...

More leaves...

And more...

Oops, away with that one!
. 
Now starting to carve. I'm using a knife here to get things going. First the lines are established.

After quite a bit of carving some leaves are beginning to appear...

Here using a graver I'm carving down to the background. By the way, I really like using gravers for carving like this. They are small, easy to control, make very precise cuts and just feel good in my hand...

Sit back and take a look time, maybe back rest time... I can begin to see things taking shape.

Back to work on the leaf details, another graver is being used.

Now I'm using an 1/8 inch Japanese chisel to clear out background waste..

Another of my favorite carving tools is a gunstock checkering tool. These neat little files make nice single or multiple lines. Here I'm using a single line tool to open and define a leaf.

And here it is after a couple of days work, basically carved.


See you tomorrow!
Edited by - Dan Knowles on 03/03/2013 07:16:40
dbrooks - Posted - 03/03/2013: 09:27:03
Only 20,000 views? I think I've been here 2000 myself. And looking for more.
David
Paul Meredith - Posted - 03/03/2013: 11:08:32
Dan, beautiful carving. I got nervous just looking at the pictures - I have a hard enough time shaping a heel, the thought of carving one is very scary! Thanks for this ongoing thread, it is very helpful and inspirational to see how a skilled Luthier/Artist goes about his business.
Dave1climber - Posted - 03/03/2013: 15:05:04
Dan
You make it look so easy, makes me think that I might be able to do such a thing. I would think that I should practice quite a bit before trying a heel or the back of a peghead.
Dave
DEmery - Posted - 03/03/2013: 17:07:31
Dan do you recall carving the original ebony heel. That was a banjo with twists and turns that took us over nearly three years. If my memory is correct...you carved some it on a river boat gig one summer. I recall you giving me a call with the idea of what we would carve and the idea behind it. I see some family resemblance in your ebony banjo but you took it a step further and layed the carving over the maple spline. You have whittled some nice ebony banjos. David E.
Dan Knowles - Posted - 03/03/2013: 19:44:07
Paul, Dave,& Rex,
Thanks. The main thing to remember is SHARP... your tools that is, keep 'um real sharp and it's just not work. Let them get dull and you'll wonder why you ever tried. Mostly remember, don't be afraid. My first instrument carving was back in the late '60s working on '50s LesPauls, Strats & Teles. I was carving all kinds of Hippie stuff. Peace signs, Doves and such. I probably ruined several hundred thousand dollars worth of (now) vintage guitars (if they had been left pristine and in todays market) . But that's what I learned on.
Here's another photo of that heel in progress.

David,
How could I forget that project. What a trip it was. As I recall, at first we were going to recreate one of Uncle Dave Macon's open backed Gibson (nicks and all). And then it just grew into the ebony banjo Sherry Lynn. I remember carving that heel on board the River Explorer (I think going up the Tennessee River) with guests watching me as I worked. My fondest memories though are of all the conversations we had during that one. What a nice trip that build was. I'm glad we went there.
Edited by - Dan Knowles on 03/03/2013 19:46:47
tillygoat - Posted - 03/03/2013: 23:57:13
Hey Dan I might have to try a carving on my long neck project now I got the bug, I am a trained joiner but never done any carving, so I guess I just need to do a sample first take my time and make sure my chisels are real sharp.
Your carving looks stunning, thank you for the inspiration.
Rex
Kaelri - Posted - 03/04/2013: 17:29:24
The carving is beautiful! Still enjoying this thread, glad you are keeping it going. Now my husband is beginning to stop by the computer screen to ask "What's Dan doing today?" 
Edited by - Kaelri on 03/04/2013 17:29:59
Dan Knowles - Posted - 03/04/2013: 19:46:00
Ellen,
I was feeling tired and somewhat lazy and thinking of not posting tonight...
But after that here I go, how could I do otherwise. In fact I think I'll dedicate this post to you!
Dave1climber - Posted - 03/04/2013: 20:02:48
Dan
Great work is tiring, you must have done a lot today.
Dave
Dan Knowles - Posted - 03/04/2013: 20:04:09
A POST FOR ELLEN
I've moved all my instrumental lessons to Tuesday in preparation for the touring season. Today was my first Monday in years to do something other than teach! What a nice change. Some time change is great! It really allowed me to dig in and move ahead on these little banjos. I've got to have 20 of them ready to go in 5 weeks.... No Marvin they won't be anywhere near the quality of those sweet little banjos you build.
Anyway I laid out all of those fingerboards, cut them and glued them to necks, 13 of them...a good day!
Here I'm laying out the fingerboard profile...
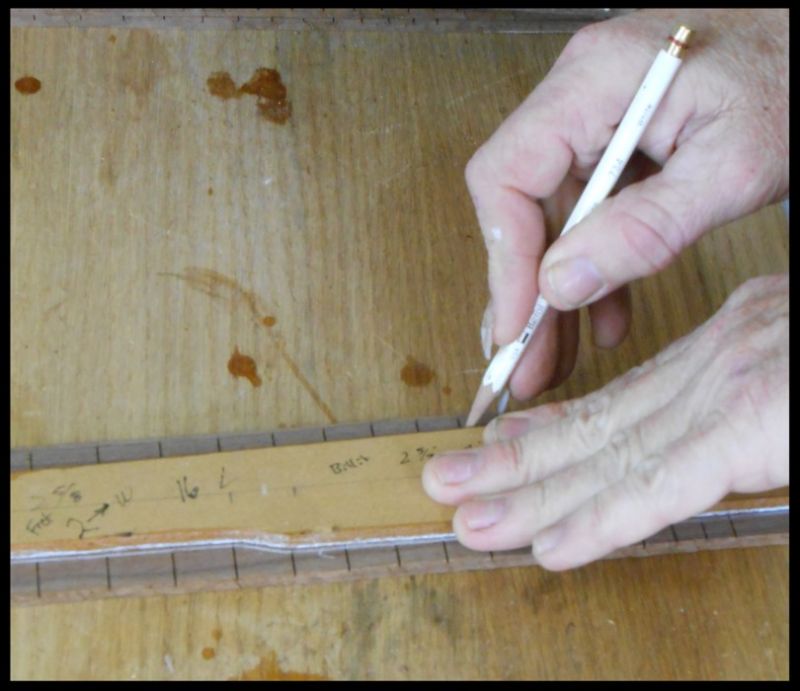
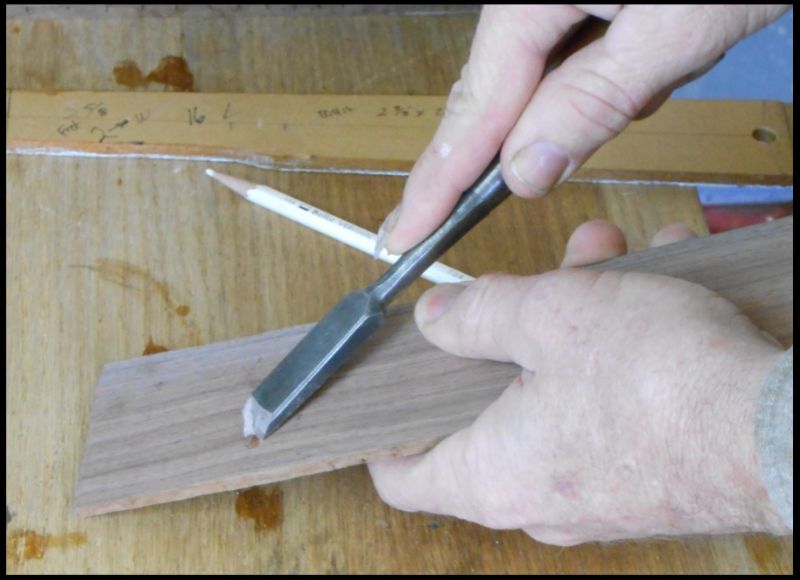
Trimming off a bit of the old Hot Glue...
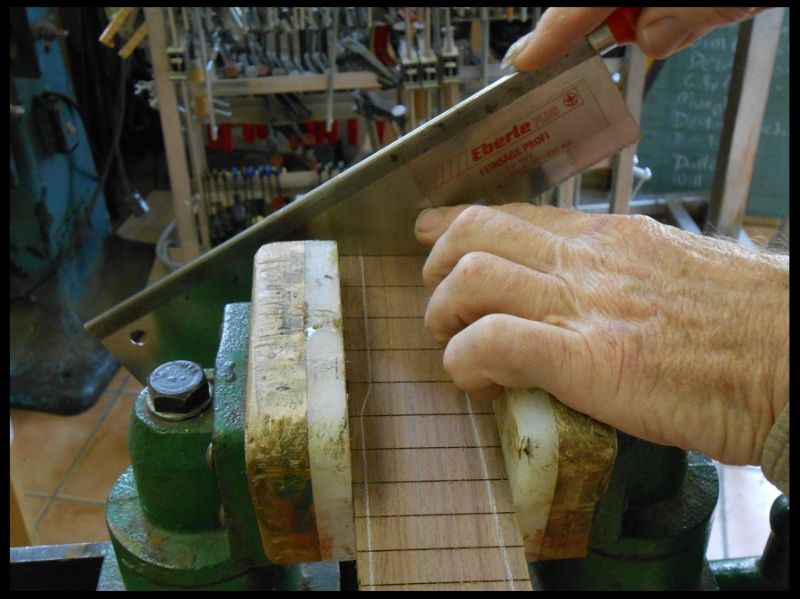
Trimming off the fingerboard excess (remember I did this 24 times. That's how many fingerboards I've made.)
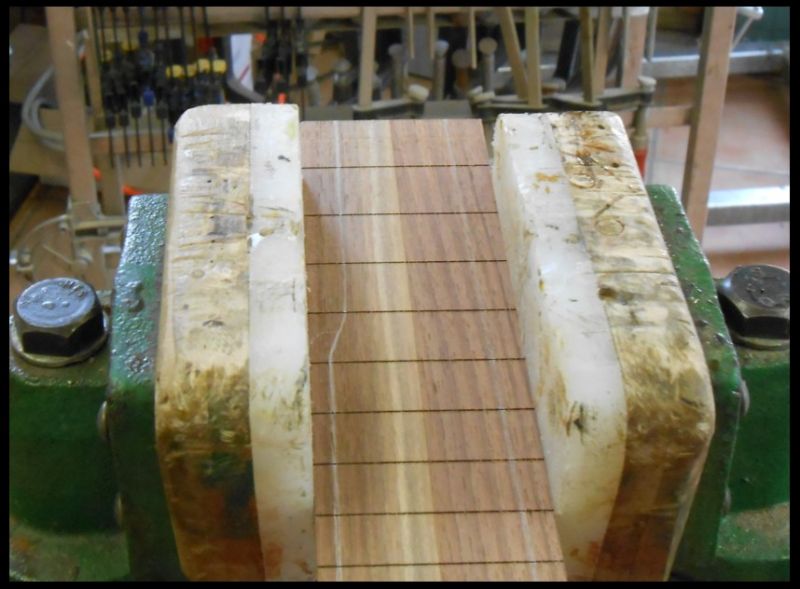
Trimmed...
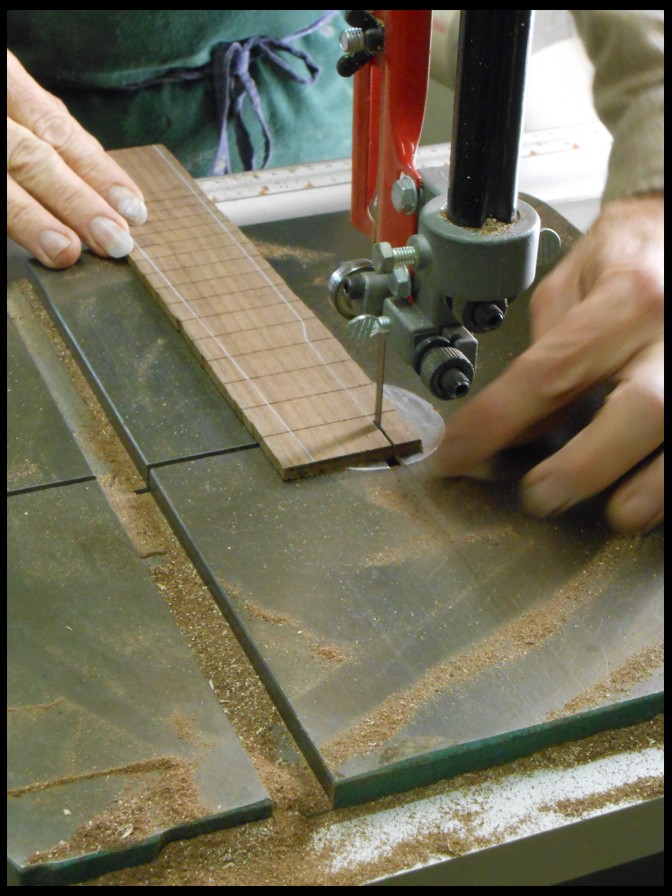
Cutting the profile...

Preparing to glue them up... The neck blanks here came from my good friend Bill Rickard. He has really made my life easier here. Thank You Bill !!!!

The Battery on the camera went dead along about here so the photos stopped. Still I glued up 13 of the 20 necks I'll need. Tomorrow morning perhaps I can get some photos of them and glue some more up.
See ya soon!
Edited by - Dan Knowles on 03/04/2013 20:06:21
Paul R - Posted - 03/04/2013: 22:26:45
What a fantastic thread - still! You make it look so easy - as if a lifetime at your art just sort of happened.
And your compliments to Bill Rickard are certainly justified. On Friday I was at the Twelfth Fret in Toronto and played a couple of his banjos. Amazingly great instruments! ... And you get to work with him! You're both extremely fortunate to have each other to bounce ideas around.
can't wait to see the finished "assembly line" banjos. Model T's?
Dan Knowles - Posted - 03/05/2013: 03:56:32
Paul,
Bill Rickard is one of my best friends in this business. I have a tremendous respect for him personally. I also have a great admeration for not only his banjo parts, but also his banjos. These are some of the finest that have been created since the 1890's. It is one of my great pleasures in this life to call him my friend.
I have tried several times throughout my career to batch out banjos. It has never worked for me. That said, oddly enough this project has been fun so far. Normally I name (or my client names) each instrument. Maybe I should call this my "Model T" and make up a special instrument tag reflecting this and still name them. Perhaps I should toss this out to you my BHO friends and we could name each of them. I may even color each one a bit different (I wasn't planning on this much detail, but what the heck).
kwl - Posted - 03/05/2013: 05:11:18
Dan, this gets more interesting with every post. I really enjoy seeing those little banjos taking shape. Your comment about the batteries going dead reminded me that you were going to buy a new camera. What did you get? The pictures are looking very good. Thanks.
Ken
Dan Knowles - Posted - 03/05/2013: 05:15:08
Ya I got a cheepo Nikon camera about $60. It does distort the images some and is not as handy as my old Kodak Easy Share. I may look for something more like my old one and keep the Nikon as an extra.
BNJOMAKR - Posted - 03/05/2013: 05:46:55
Looking good , Dan! Yeah, Dan, don't make them all look exactly alike. Each one should be unique, as are all of your instruments are! Maybe you have already stated earlier, but what scale are you using for the mini's?
Thanks for taking time for your posting... I know that it eats into your work time!
Kaelri - Posted - 03/05/2013: 05:57:32
A post dedicated to me? Wow! I am honored!  However, I think as busy as you are, you DO deserve to be lazy from time to time! Sometimes you just gotta stop and catch your breath!
My husband, (Richard) and I were talking one day that this interestting thread, if printed out, bound as a slightly over size book, with all the neat pics & text, would be the neatest coffee table book we've ever seen. But of course, there'd be more than one volume.
Ellen
Dave1climber - Posted - 03/05/2013: 07:24:36
Dan
I think Paul's idea of calling the banjos the "Model T's" is brilliant. For the naming of them, I would suggest leaving space on the model plate for the name, and then put the name of the first student that uses it to learn on the plate.
Marvin is correct, each will have it's own "personalty", so each should be ever so slightly different in some small way. Just remember "you can have it in any color that you want, as long as it's black". Perhaps the difference will be the name.
Edited by - Dave1climber on 03/05/2013 07:25:47
Tylerb1 - Posted - 03/05/2013: 16:42:42
Dan;
I was wondering while sitting here and reading some of the postings (since you are an excellent teacher/builder) why don't you just "Skype" the world for all to see what a talent can be found in little Ole Paris Tennessee. Take it to the world.........Bob
Dan Knowles - Posted - 03/05/2013: 19:31:58
Marvin,
These will be each a bit different. They are to be used as a group teaching tool so unique is not a big desire here. The scale is 17".
Ellen,
I've thought about doing that, the coffee table book thing. Maybe there'll be a book in out future...someday.
Dave,
Those are some good ideas. And they give me one... Maybe I'll try and name each of these after all you good folks here on the Hangout. Perhaps even name one of the first Dave1climber!
Bob,
Thanks for asking...I've been teaching private banjo over Skype recently and it is a great time! Soon I'll be opening my time to other students.
Dan Knowles - Posted - 03/05/2013: 20:05:57
THE FIFTH DAY OF MARCH....when are the ides of March? Just wonderin'.
Today was a big teaching day. The first of my moving students to another day and it came with a bit of the expected confusion. Still I was able to get a bit of other projects worked on before I became the instructor!
Y'all will remember the 10 string, Wooden topped d'Amore instrument that was discussed at length on this post some time ago? And perhaps you'll recall the molds being made for it. I have wanted to invest some time again into its creation, so today I did!
I bent and laminated sides and laminated the back pieces...Here we go.
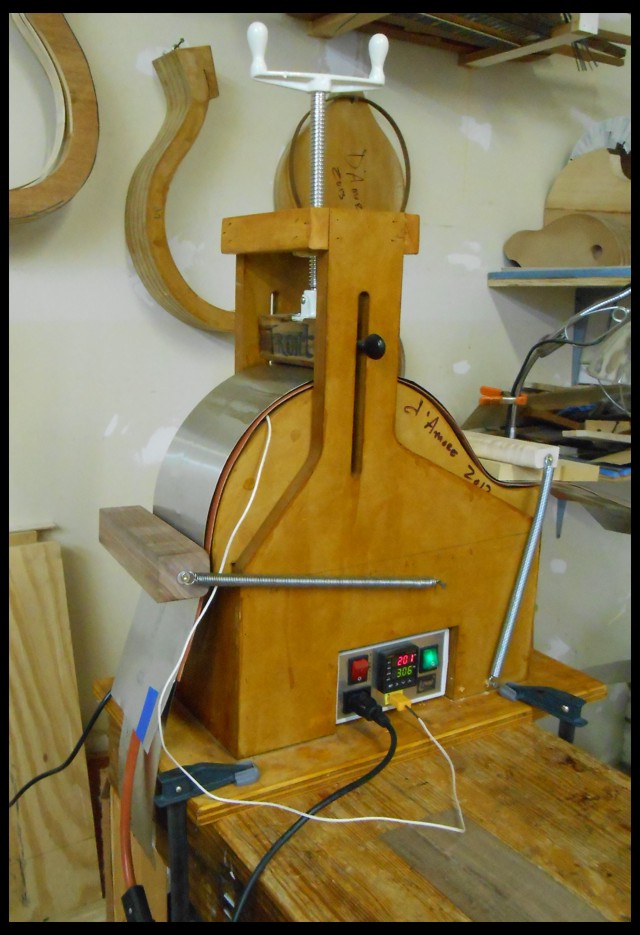
This is my sidebending machine. It was built recently by my student Kevin (Steve) Bailey and myself. Although I can and do bend sides over the traditional hot pipe, I like the consistancy of this toy. It is fired up using a silicon heat blanket. Here it has the d'Amore mold installed.
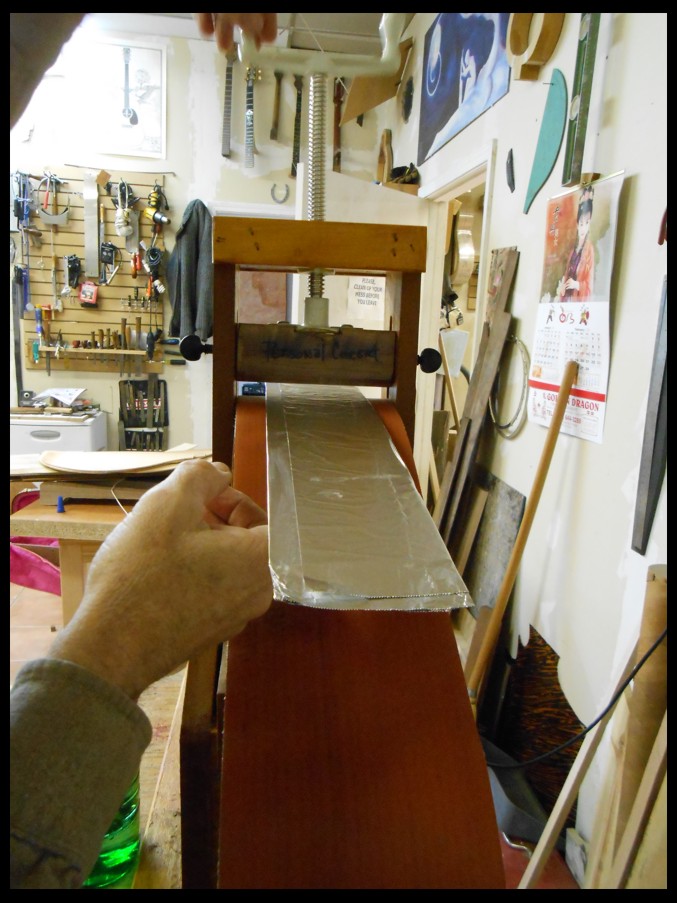
The side is slightly wetted, wrapped in aluminum foil and placed on top of the heat blanket.
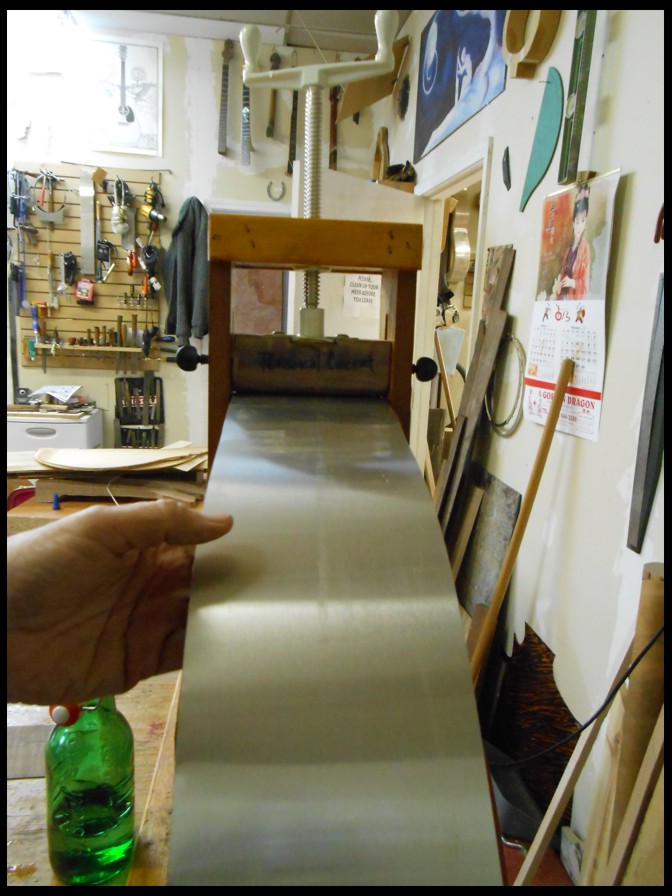
A sheet of stainless steel is placed on top and the center shoe is cranked down.
The blanket controller is turned on and set at 306 degrees. You may ask why 306? Well if you take 37.5 multiply by 47, reduce the remainder to a fraction, place that fraction in a blender and liquefy for one minute you get 306 degrees Fahrenheit.
The wood seams to bend best for me around 300 and I like 306...
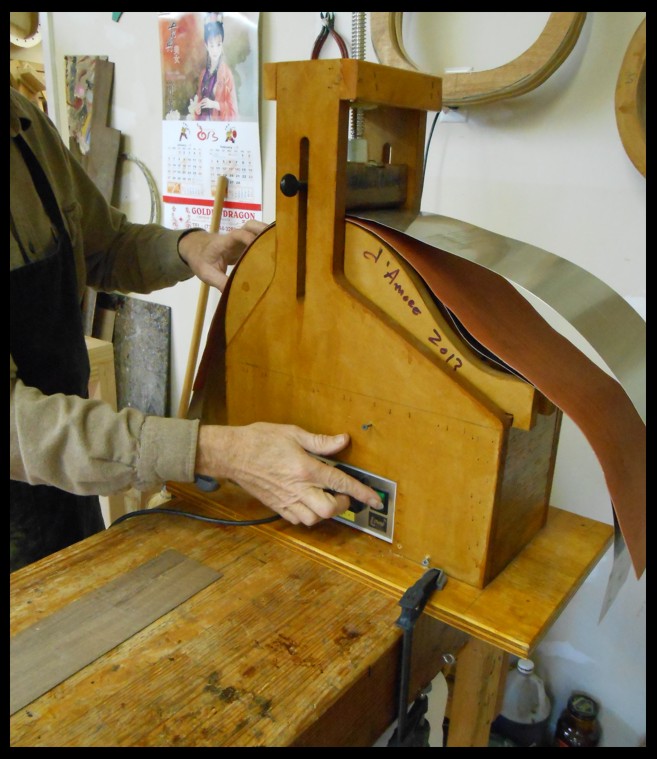
I weit a few minutes for the heat to begin to build. At around 260 it starts to loosen up and go limp. Around 300 it's just a noodle. The spring straps pull everything into a nice shape and hold it all there.
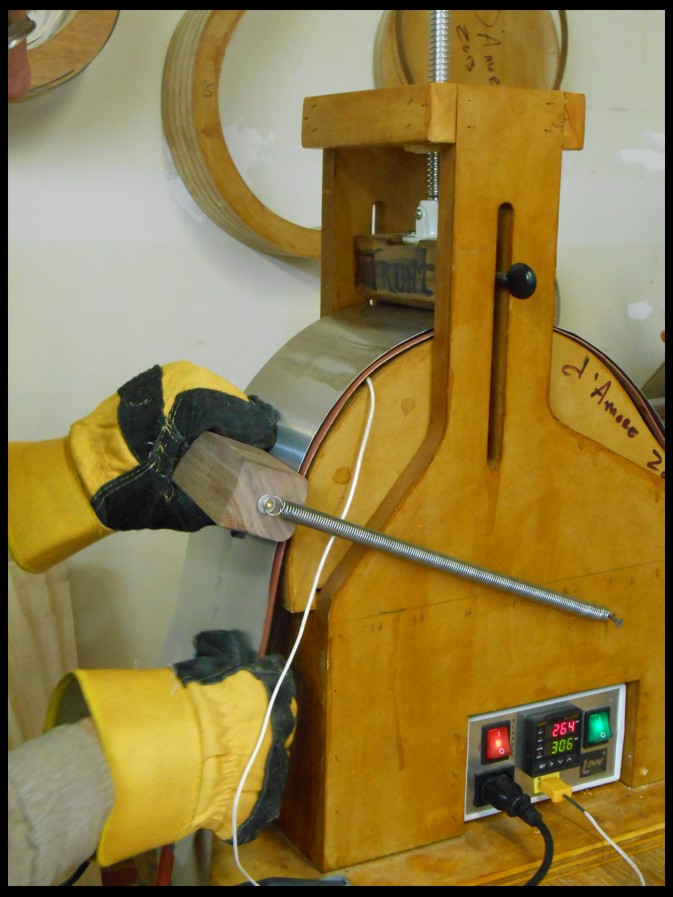
The bent wood it then cooked for a few minutes and the blanket is turned off to cool...
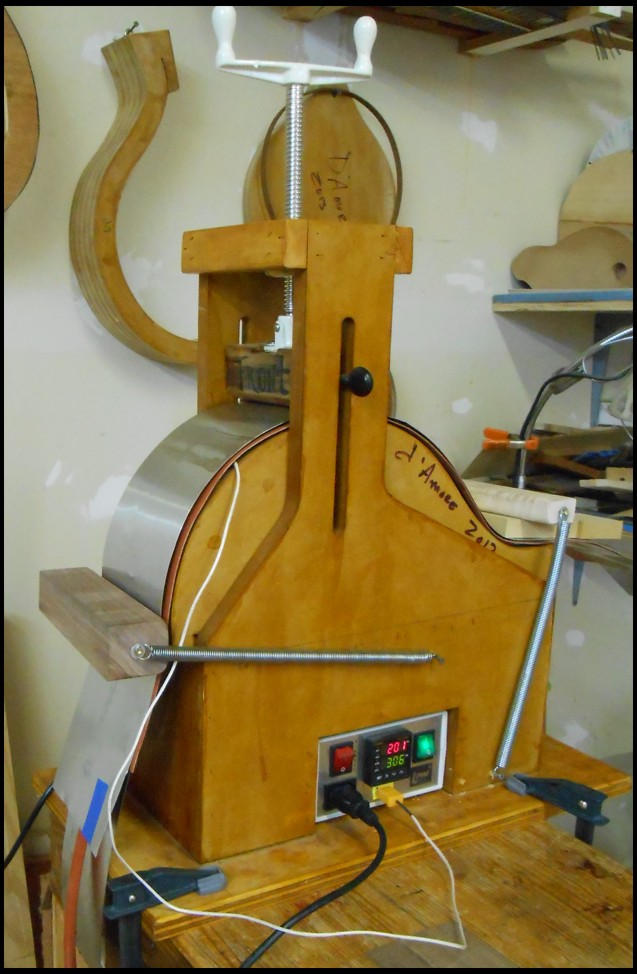
After it has cooled to near 100 the whole sandwich is dis-assembled.
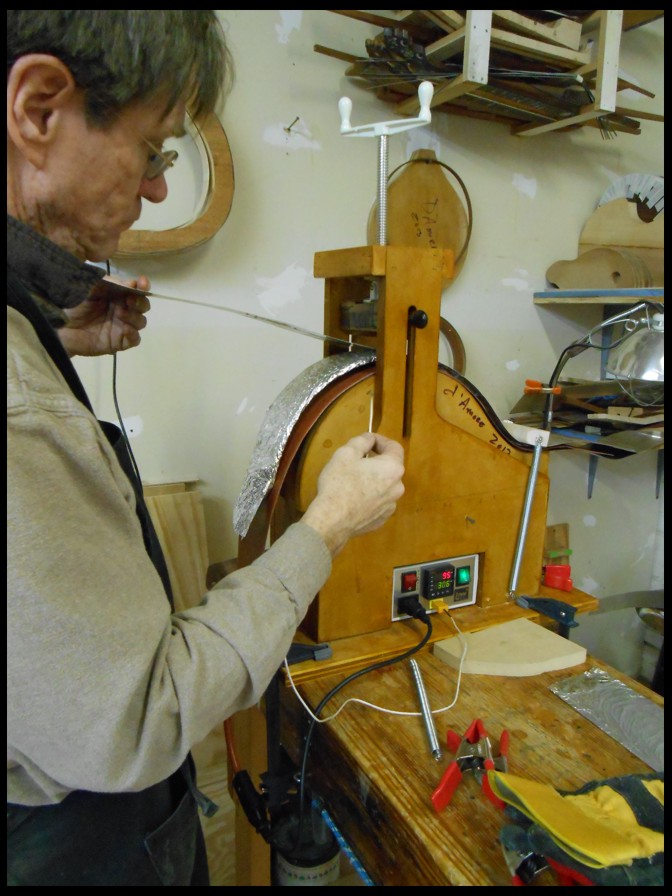
And the wood is removed from its metal wrapping...
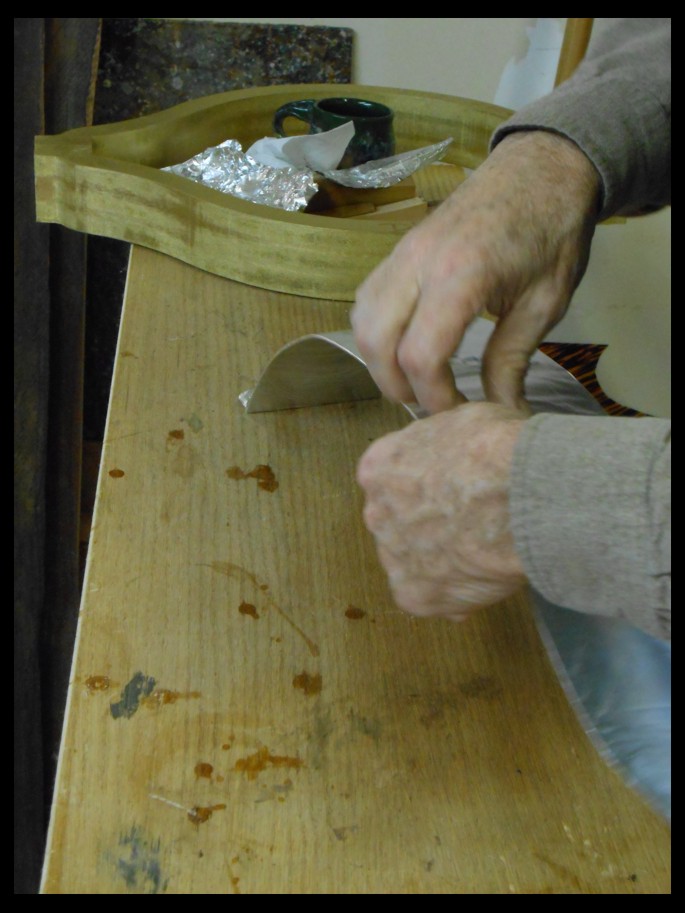
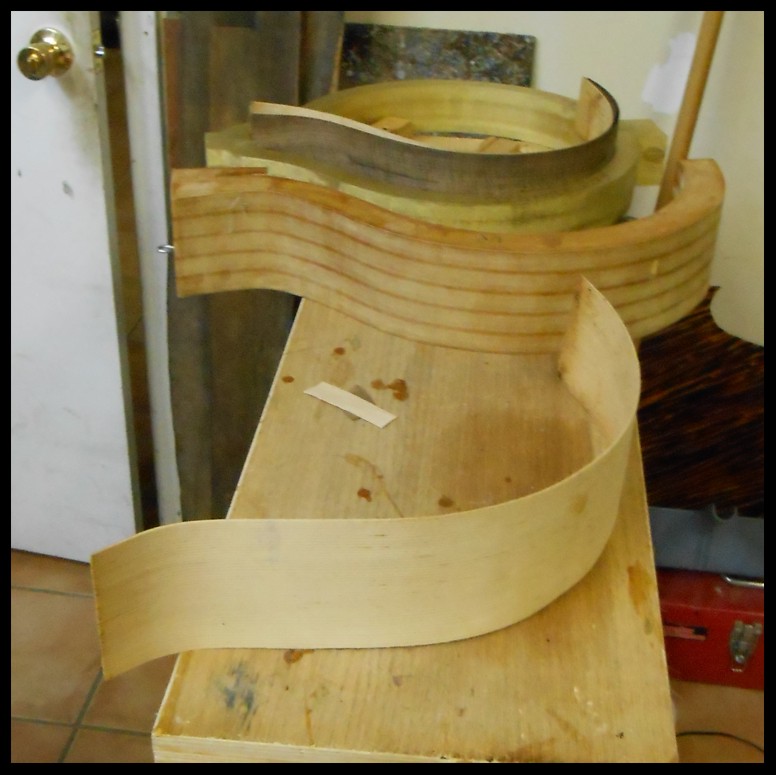
Next the back pieces are laminated together. The wood is very figured Claro Walnut and Sitka Spruce.
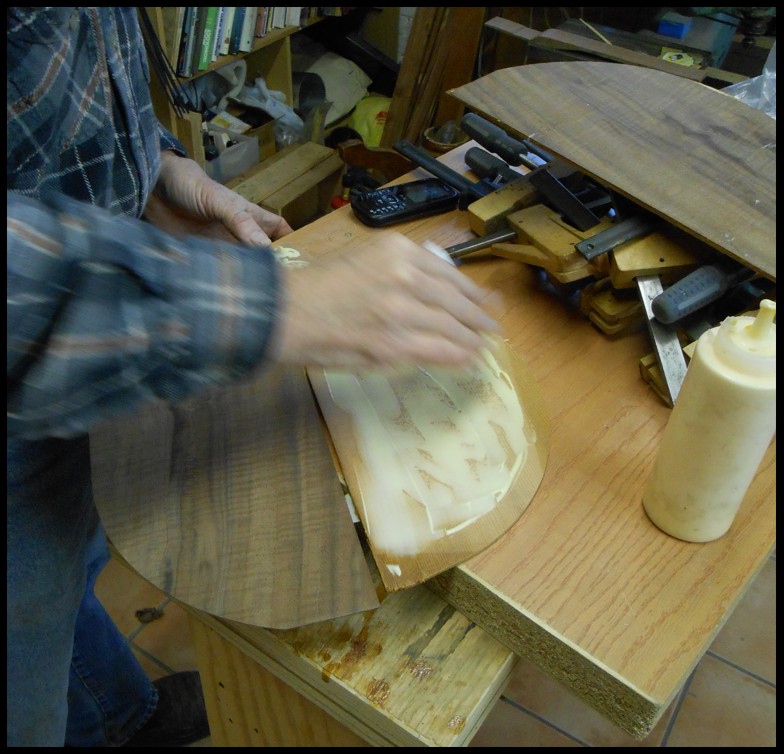
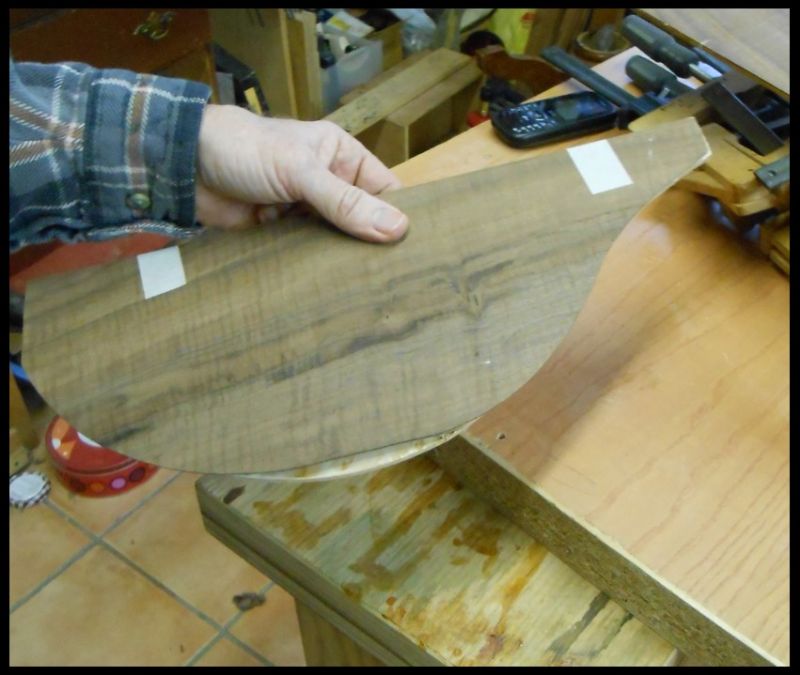
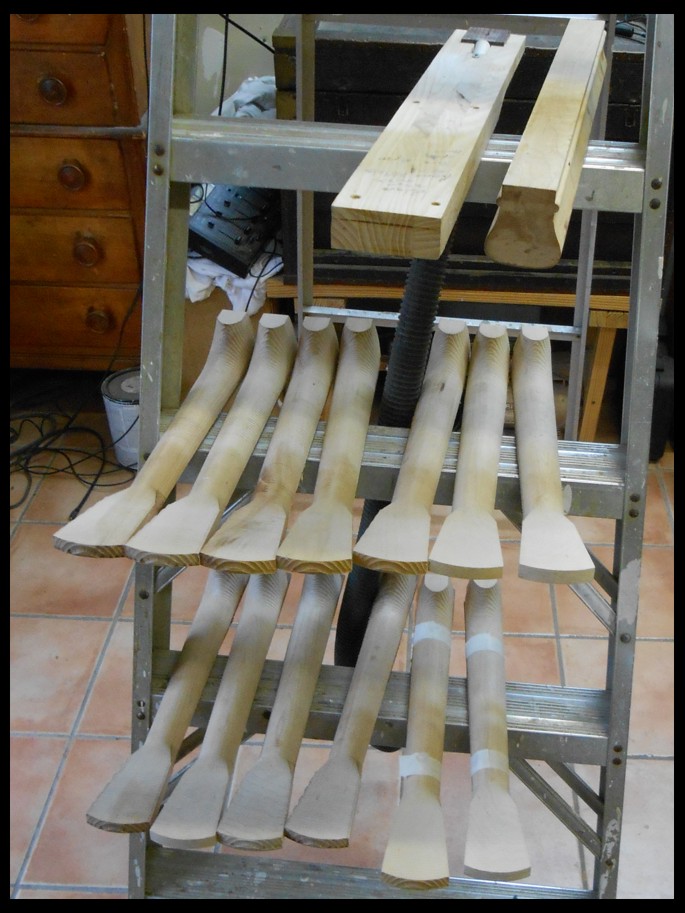
Oh yah, almost forgot a photo of the piccolo banjo necks... oh and the these pieces got clamped.
More tomorrow....
Edited by - Dan Knowles on 03/05/2013 20:11:09
kwl - Posted - 03/05/2013: 20:38:43
Dan, March 15 is the ides. Just a week and a half away. I enjoyed the bending pictures. It's a good way to maintain consistency and do multiple instruments at a time.
Ken
Dave1climber - Posted - 03/05/2013: 21:07:11
Dan
Builders do all sorts of crazy things to bend wood, your set up looks like the sanest that I have seen or heard of. 
I would think that Bill Rickard is much more worthy of having a instrument named for him than me.
Dave
Paul R - Posted - 03/05/2013: 22:27:42
Dan,
I remember, back in the seventies, Grit Laskin explaining his homemade blowtorch and metal cyclinder side bender. Now you have your new machine. How times have changed! You constantly show how ingenuity in developing the tools of the trade is integral to making fine instruments. It seems to be a trait you share with Bill Rickard.
Paul
Page: 1 2 3 4 5 6 7 8 9 10 11 12 13 14 15 16 17 18 19 20 21 22 23 24 25 26 27 28 29 30 31 32 33 34 35 36 37 38 39 40 41 42 43 44 45 46 47 48 49 50 51 52 53 54 55 56 57 58 59 60 61 62 63 64 65 66 67 68 69 70 71 72 73 74 75 76 77 78 79 80 81 82 83 84 85 86 87 88 89 90 91 92 93 94 95 96
Terms of Use | Privacy Policy | Privacy Consent (EU/GDPR Only)
Copyright 2026 Banjo Hangout. All Rights Reserved.