Banjo Hangout Logo
Banjo Hangout Logo

Premier Sponsors


 All Forums
 Other Banjo-Related Topics
 Banjo Building, Setup, and Repair
 ARCHIVED TOPIC: I installed my first skin head


Please note this is an archived topic, so it is locked and unable to be replied to. You may, however, start a new topic and refer to this topic with a link: http://www.banjohangout.org/archive/261865

Uncle Brad - Posted - 05/01/2013:  09:10:22


I upgraded my banjo with a goat skin head (I chose goat skin solely for bragging rights).  I conducted several experiments and had several failures in the process.


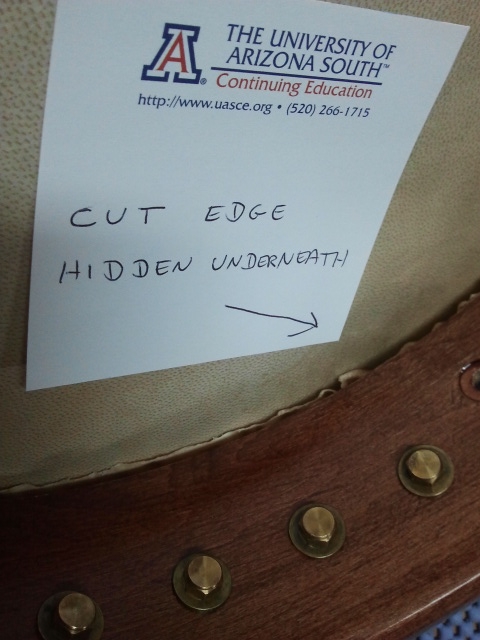
Initially I was determined to install the head as recommended by StewMac’s Dan Levenson.  While this is a commendable method, I had two reservations.  1) I did not like the possibility of scoring the inside of the tension hoop (as another reader also expressed), and 2) I did not like the unsightly raged cut edge of the skin facing outward.  While searching YouTube I found an opposite method by Gold Tone’s Wayne Rogers: 


   youtube.com/watch?v=b9r2VGZf--0


I successfully used this method and found it to work easily 100 percent. 


My lessons learned.
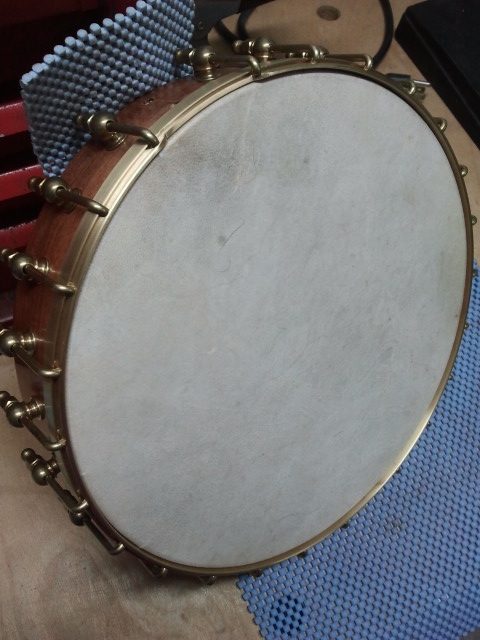


  1. Do not soak the head in hot water.  That only shrank the skin by four inches in diameter (from 18 to 12 inches), and increased the thickness from 0.02 mm to 0.9 mm).  It remains useless.  Cold water is the only solution.  Soak the head in cold water for 15 minutes.

  2. My first time through I was panicking about getting the head mounted as quickly as possible while it was still pliable.  Stop the panic!  Soaking the head for 15 minutes in cold water gives you way more time than necessary to get it mounted.  Instead of panicking, enjoy the process.

  3. When pulling wrinkles out, I probably went about the rim 20 times total during different stages of nut tightening.  I enjoyed the process of perfecting the wrinkle elimination (no panic!!).

  4. I used an 18” skin for an 11” rim.  It gave me the right about of skin to pull on as I pulled out wrinkles.  The dollar to two extra for 18” was well worth it. 

  5. I bought a 1/8” x 3’ round brass rod from Ace Hardware for the stretcher band (I’m trying to maintain all brass metal parts).  It was easily shaped and worked well.  On my first attempt I tried soldering the ends together.  No…that made it too fixed.  On my second attempt I cut one end slightly (shorter in circular length) for flexibility, and then put them together with clear heat shrink tubing (shrunk on one end only to allow movement as the skin tightens).  No…the tubing got in the way and only smashed up when the skin was tightened up.  On my third try I ended up cutting the end (a little more) to leave a small gap where the two ends meet and left them free to move – no masking tape or anything.  This gave it flexibility to work with the skin stretching process and the thickness of the skin around the circumference of the rim.  I could not calculate that spacing accurately ahead of time (I may have over engineered this part!).  I put the very small gap under the tailpiece so it doesn’t even show.  In the end the stretcher band stretched on its own just the right amount.

  6. Be cautious if you decide to stain the head with Rit fabric dye.  It did not work for me.  The color was lousy, and it easily rubbed off when dry.

  7. Do not use Minwax water-based paint stain to stain the head.  It does not work well.  Too much paint buildup and it doesn’t flow evenly.

  8. I tried to stain the head with a weak black tea.  The color of the water was correct, but in the end I think it did very little to change the head color.  My first attempt was using a strong black tea mix.  It resulted in too dark of color (but stained very well), but that’s when I soaked it in hot water.  I think there is a relationship here but didn’t pursue it any further.

  9. I should have given the head more slack when I mounted it (mounting it down further on the tone ring).  After it had dried, the skin was very tight and I still had the task of tightening the tension hoop flush with the head.  The air in Southern Arizona is very dry so that probably didn’t help matters.  The next morning I actually gave the wrench about a quarter turn on each nut, but left it as is after that.  I was afraid of breaking the skin if I tightened it any further. 

  10. Read as many articles and watch as many videos as possible before beginning.


Skin Head Front


Skin Head Back

Fathand - Posted - 05/01/2013:  09:32:41


  1. Use Lukewarm water and wet the head but do not soak it. It will not shrink until it dries . I dip them in warm water for about 30 seconds is plenty.

  2. Since you are not soaking the head you have a little less time but if it starts to dry out you can re-wet with a wet cloth.

  3. Put 4 hooks on to level the head then add others and tighten but not too much. If you keep it even any wrinkles will be removed as it dries/shrinks. Most of the original wrinkles should be removed when pulling the skin through the hoop.

  4. A 14" skin should work fine, this gives you 1.5" all around to pull through.

  5. Round brass rod is fine, square may help keep the head from slipping off the flesh hoop a bit.

  6. $9.00 heads from Elderly are mottled in appearance and I see no reason to stain the head.

  7.   "      "

  8.   "       "

  9. The tension hoop should be levelled while still damp, It does not have to be even with the head. It can easily sit 1/4" higher than the head or slightly lower as long as it does not interfere with the strings.

  10. The Instruction sheet that comes with Elderly $9.00 skins are excellent.


Quartermaster James - Posted - 05/01/2013:  11:32:41


Beautifully done job there!


I only found that video after I had used the other method, and have wondered why it isn't used more. I have seen older banjos on which the head was mounted this way. It seems, to my mind, the more elegant solution.


(PS: linked this thread to the Hide Head group.)


Edited by - Quartermaster James on 05/01/2013 11:33:57

Rizo - Posted - 05/02/2013:  04:58:07


I recomend doing some carefull measuring to make sure the tension hoop has enough clearance. I recently put a goat skin head on a vintage rim and had an awful time with it. I eventually got it, but it's not the best job in the world. Maybe the skin was too thick, I don't know.

I also coated the head once I was done with TruSeal, basically an offbrand Thompson's Water Seal. I've done that on other skin heads and it makes them much more stable, though it does affect the tone some.

Gordy Ohliger - Posted - 05/02/2013:  10:29:13


Nice.
I like to hear "real stories" from the field.

AllanJ - Posted - 05/02/2013:  12:03:07


quote:

Originally posted by Rizo


I recomend doing some carefull measuring to make sure the tension hoop has enough clearance. I recently put a goat skin head on a vintage rim and had an awful time with it. I eventually got it, but it's not the best job in the world. Maybe the skin was too thick, I don't know.


I had this problem recently on a zither banjo.  The new head was just too thick, I tried another head and that was fine - lesson learnt - not all velums are the same thickness.


Lyndon Smith - Posted - 05/03/2013:  00:10:19


Rizo: What would you consider 'enough clearance'  on the tension hoop?


I asked this question in a topic recently and answers ranged from 1/8" to 3/8". I have yet to make my tension hoop so I can build in the 'correct' clearance but so far, I still am unsure what is 'correct'...


Helix - Posted - 05/04/2013:  01:47:04


Arizona congratulates you

Rizo - Posted - 05/04/2013:  05:41:04


quote:

Originally posted by Lyndon Smith


Rizo: What would you consider 'enough clearance'  on the tension hoop?


I asked this question in a topic recently and answers ranged from 1/8" to 3/8". I have yet to make my tension hoop so I can build in the 'correct' clearance but so far, I still am unsure what is 'correct'...


Well that's hard to say, because I didn't actually measure it. I was using a medium-thick head (for a more percussive sound) and there really just wasn't enough clearance. Maybe find a banjo similar to the one you're building that has a skin head and get some rim/hoop measurements from real life? 


Lyndon Smith - Posted - 05/19/2013:  23:35:35


Uncle Brad: I have just mounted my first calfskin head using this method and it has been pointed out that this method puts two layers of skin over the tension ring rather than one layer when using the traditional method. The general consensus is that this will adversely affect the sound of the banjo. Here's the topic: banjohangout.org/topic/262986


How does your banjo sound in comparison to when it had a non-hide head?


Uncle Brad - Posted - 08/20/2013:  22:43:45


Lyndon,

Well I've been playing it mounted this way for a few months now. It seems ok to me, but I don't have a lot to compare to it. I've never mounted a head the other way. It gives me the plunky sound I was looking for so that's good enough for me. I especially like the neat appearance from the "showy" side.

Terms of Use | Privacy Policy | Privacy Consent (EU/GDPR Only)

Copyright 2026 Banjo Hangout. All Rights Reserved.


Hangout Network Help

View All Topics  |  View Categories

0.9570313