DVD-quality lessons (including tabs/sheet music) available for immediate viewing on any device.
Take your playing to the next level with the help of a local or online banjo teacher.
Weekly newsletter includes free lessons, favorite member content, banjo news and more.
Premier Sponsors


|
Please note this is an archived topic, so it is locked and unable to be replied to. You may, however, start a new topic and refer to this topic with a link: http://www.banjohangout.org/archive/283544
rudy - Posted - 04/20/2014: 04:36:50
I've fielded many e-mails asking about how I do tunneled 5th slot head necks as featured in my Workingpersons 11 Construction Guide so I thought folks might get some use from the experience that I've gained through making this type of neck.

A recent topic requesting information about tunneled 5th string designs has prompted me to shoot a few photos to demonstrate what I consider to be good practice when implementing tunneled 5th designs.

You may view that companion topic "Ideas for a head stock design with a tunneled fifth" HERE.

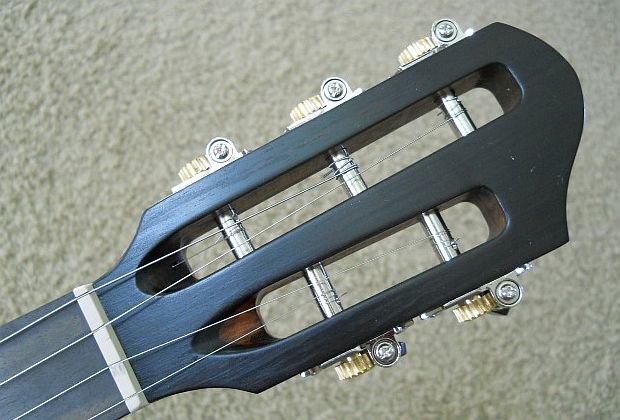
First, there's a reason why tunneled 5ths aren't more commonly seen, and I believe it's because many of the examples have a few basic shortcomings. I've done enough tunnels that I feel that I have a very good tunnel arrangement worked out, especially when combined with a 3+2 slotted peg head design.  When they are done right tuning is easy and stable, and the ergonomics of the neck without the 5th string tuner is truly a liberating experience.  Having played "conventional" banjos for several years I know what I won't be going back to.

A note about material:

There's further information about the tunnel material on my website and here in my Hangout home page photos section, including where I get the stainless micro-tubing, part number, and sizing information. I've used other materials, but the stainless has a very low frictional coefficient and won't form grooves where the sting might contact the tubing inside the tunnel.  Yes, that's important, just think about it if you want to go to all the work of tunneling and then find that your string binds in the tunnel. Speaking of which, you need to carefully plan your tunnel so the string has the straightest possible path to the tuner post. Any excessive bend will hold string tension, and it doesn't take much to make tuning difficult.  Trust me on that. Or don't... it's your banjo!

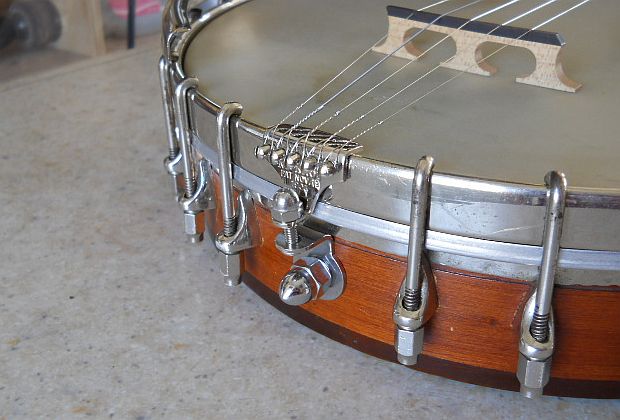
The photos shown here were taken in the course of making a conversion neck for a Vega N, so I'll also have a few detail photos showing how I combine my usual method of neck attachment to a rim which already has a square hole through it for conventional dowel stick attachment.

Due to Banjo Hangout's 15 minute editing window I'll present the ordered text with numbers that correspond to the photo attachments which follow.  It should be easy to view the numbered photo attachments relating to any particular numbered comment, so without further adieu...

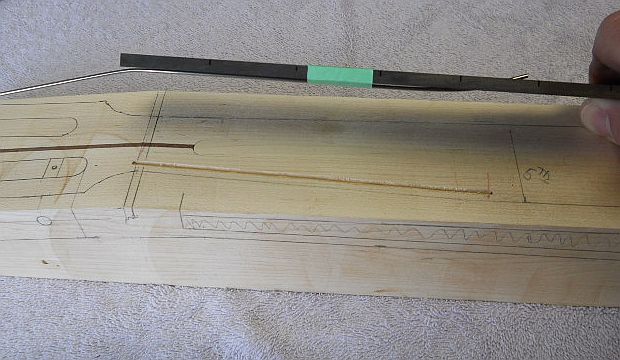
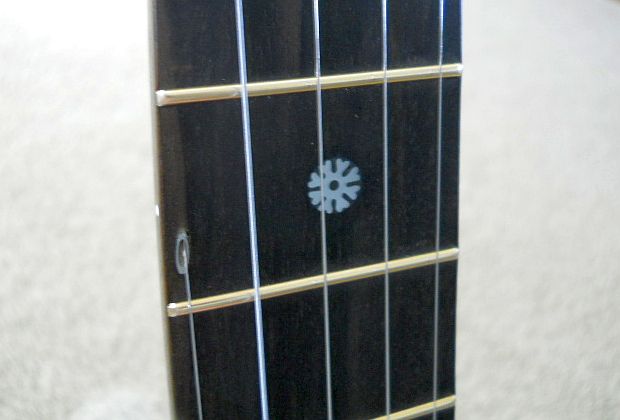
1.  Here's a shot of the stainless steel micro-tubing after it has been bent to conform to the desired string path.  The tunnel tubing enters the fretboard through an angled hole drilled about 1/8" behind the fifth fret location.

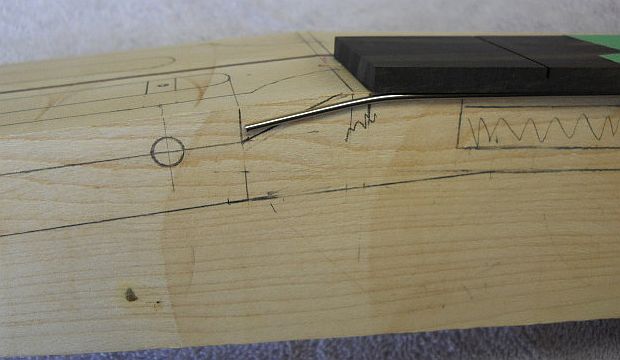
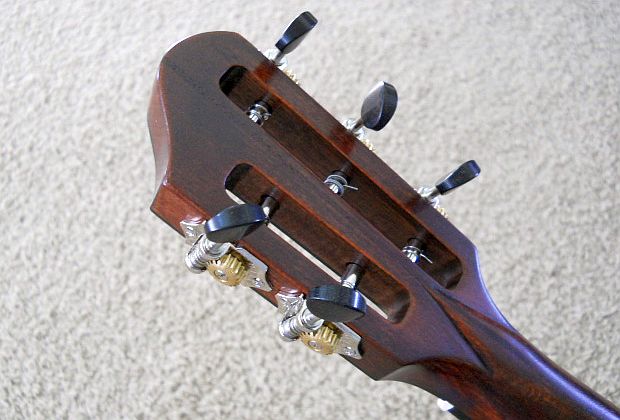
2.  The exit portion of the tube is bent so the string's path will be aligned with the top of the string post of the tuner. A small hole is drilled at the rear of the small tubing channel routed 1/8" inside the edge of the neck blank (visible in photo #5) to house the tube when the fret board is glued to the neck blank. The end of the tube is trimmed so it will exit in the slot ramp, but will not be contacted by the router bit when the vertical portion of the slot is cut.

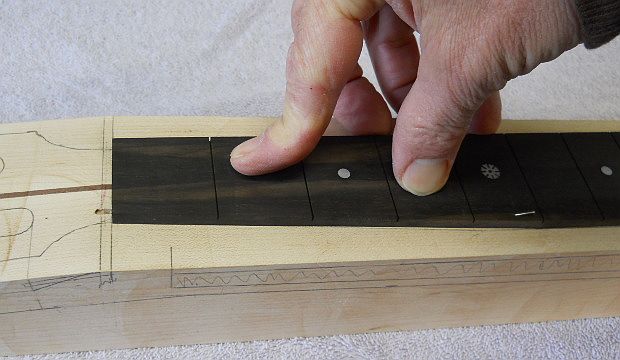
3.  The fret board is positioned to check the fit of the micro-tubing and to ensure that the fret board easily mates to the neck blank without the need to apply excessive force.

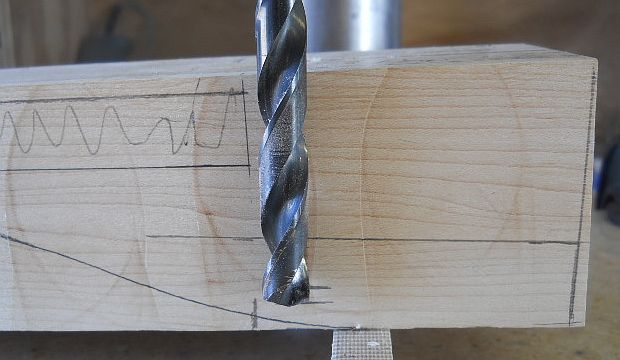
4.  My preferred method of neck attachment utilizes a barrel nut embedded in the neck heel.  Although not part of demonstrating the fifth string tunnel installation, the nut must be embedded BEFORE the fret board is glued in place.  Here the depth is being checked for the drilled hole which will house the barrel nut.

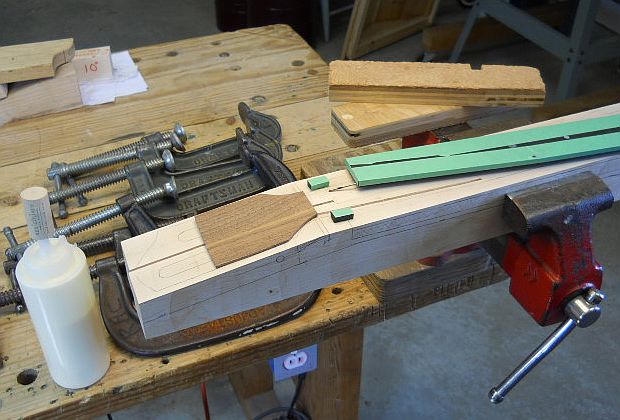
5.  Everything is readied for gluing on the fret board.  small alignment blocks are lightly glued on the neck blank to immobilize the board while it is glued. It's best to push a small  bit of wax into the tube end if you're concerned about glue entering the tube.

6.  The headstock overlay has been glued in place and the nut is removed after the glue has begun to set up.  The fifth string tunnel tubing can be seen if you look carefully.  Prior to the fret board being glued in position the tubing was cut off so the end would fall just short of the slot location for tuners 3, 4, and 5.  The slots will be pattern routed and the tubing end should not fall in the path of the router bit.  The tubing will be exposed when the string ramps are added to the slot ends.

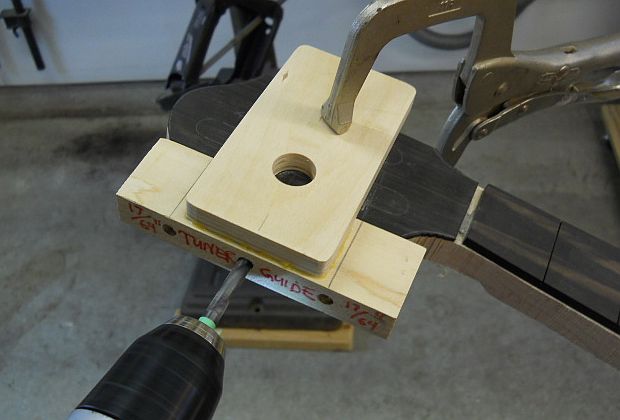
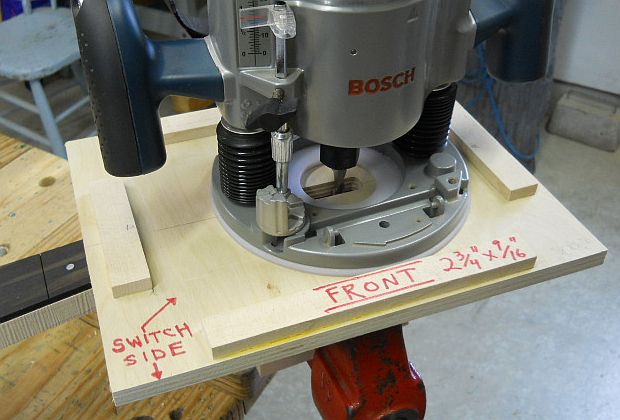
7.  The bottom of the router template has an extension that is clamped to the headstock edge so the routed slots will be at the correct distance and exactly parallel to the headstock sides.  There are separate router guides for the slots since they are different lengths in the 3 + 2 slot head design. The 3/8" spiral carbide plunge bit makes slot routing EASY.  I do the slots an 1/8" at a time.

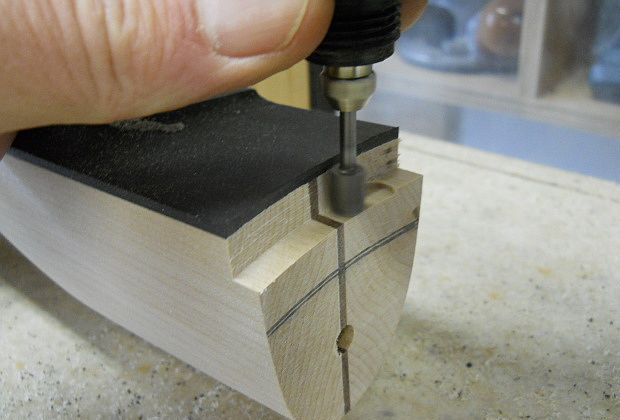
8.  The tension band recess is formed at the neck heel.  The twin flute carbide router bit is mounted in a swinging arm to create the perfect clearance cut for the tension band. Advancing the cut depth 1/16" for each pass makes cutting the tension band notch easy and stress-free.

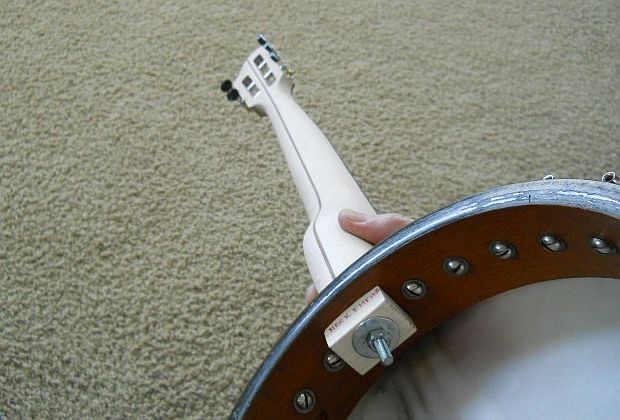
9.  One of the features of the bolted neck attachment is that the neck can be temporarily bolted to the rim to make sure the heel mates perfectly.  The back angle and third string center line can be verified and any corrections made while the neck is still unfinished.

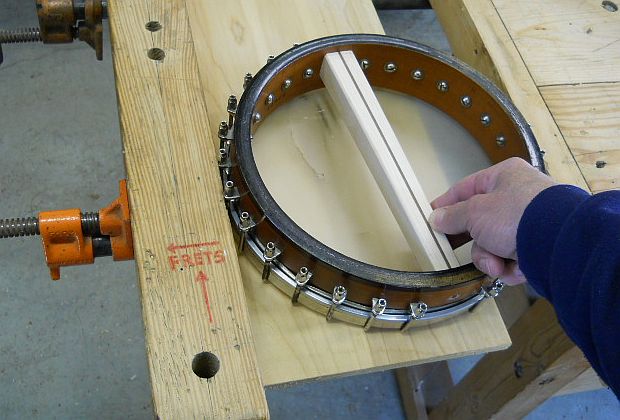
10. The Vega pot has GENTLE pressure applied so the channeled dowel rod can be mated tightly to the inside of the rim.

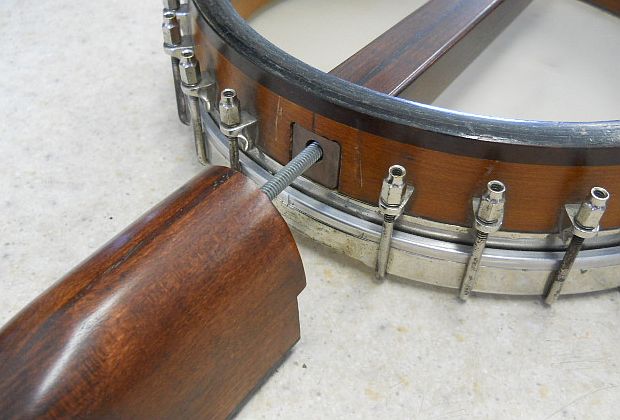
11. A centering block is made and glued lightly in place for the square hole of the Vega rim.  The 9/32" hole is drilled and shaped slightly oval so the neck can be easily adjusted up or down for setting the string clearance height over the upper frets.

12. Here's the business end of the banjo.  Tightening the single acorn nut draws the neck tightly to the rim and solidly anchors the neck to the pot.

13. Entering the tunnel...

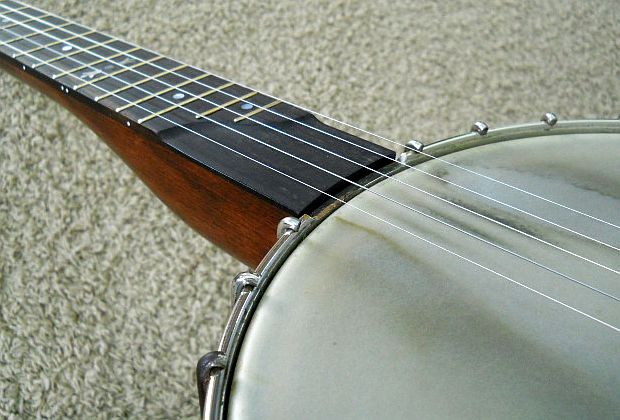
14. Exiting the tunnel...

15. The lovely Ashborn neck dart shown with the Grover Sta-tite tuners.  One of the reasons why I prefer the slot head design is the use of these tuners which tune more precisely than conventional planets.  I pull the metal knobs and add ebony buttons as available from Stu-Mac.  This shaves a few ounces from the total weight and looks totally classy to boot.

16. The ubiquitous double ogee scoop combined with a bit of extra neck height gives lots of room over the head; the preferred setup for the owner of this banjo.
Edited by - rudy on 04/20/2014 04:41:40
Shawn Hoover - Posted - 04/20/2014: 11:00:40
Another dump of excellent free information from Rudy for all to absorb. I don't have much to say about the details because I have the full slothead guide and have studied the heck out of it, but that is one pretty neck there. The squared slot ends and dart look great.
aeroweenie - Posted - 04/20/2014: 11:09:49
Thanks Rudy - very useful information, clearly presented. I will definitely be doing a tunneled 5th in the next year or two, your website will be a big help.
jasper - Posted - 04/20/2014: 12:55:24
Nice job Rudy, I bookmarked this page for future references,thanks.
danieljtb - Posted - 04/20/2014: 16:57:31
thanks Rudy for the further details how would you bend the ss tubing if you didnt have any metal bending equipt hanks Dan
rudy - Posted - 04/20/2014: 17:38:06
quote:
Originally posted by danieljtbthanks Rudy for the further details how would you bend the ss tubing if you didnt have any metal bending equipt hanks Dan
The tubing is easily bent by hand to conform to the gentle bends shown here.
rudy - Posted - 04/22/2014: 06:58:11
quote:
Originally posted by jasperNice job Rudy, I bookmarked this page for future references,thanks.
I have a small collection of Banjo Hangout "important" topics bookmarked on the links page of my website, and I'll be adding this topic next time I update the page.
bluestemstrings.com/pageLynx.html
rudy - Posted - 04/22/2014: 18:15:29
quote:
Originally posted by Shawn HooverAnother dump of excellent free information from Rudy for all to absorb. I don't have much to say about the details because I have the full slothead guide and have studied the heck out of it, but that is one pretty neck there. The squared slot ends and dart look great.
Hi Shawn,
The dart is my first. I have an actual Ashborn-style neck with vertical post guitar tuner at the fifth fret location in progress and looked at this as a warm-up, since it's going to someone else.
I bit the bullet and bought the rather pricey 3/8" long shank solid carbide up spiral bit pretty much to do slotted head stocks with, so hence the new plunge routing setup. I'm totally in love with the slots it produces, as there is absolutely no finish work required when they are done this way.
I've been using the slot routing jig as much as possible to relieve the guilt from dropping $40 on a router bit. I've got a new banjo project that I used it on that I'll be posting here soon that was a bunch of pure fun and quite unique, stand by for that one!
Shawn Hoover - Posted - 04/22/2014: 18:31:22
Yeah, man, the way you've taken to the slots, I'd say that bit's going to get used. Any time you save not fiddling in there manually means more guaranteed payouts in banjos, which is more than any other slot machine operator can boast. I'm definitely look forward to more "pure fun."
Shawn Hoover - Posted - 04/22/2014: 18:34:30
Up spiral, you say. I've read about downcut spiral for fuzz free overhead inlay routing, upcut for the router table. What are the mechanics on up spiral for slot routing?
rudy - Posted - 04/22/2014: 20:00:58
quote:
Originally posted by Shawn HooverUp spiral, you say. I've read about downcut spiral for fuzz free overhead inlay routing, upcut for the router table. What are the mechanics on up spiral for slot routing?
I could have gone either upcut or downcut spiral. Downcut spiral is supposed to be better for a clean top edge like you would prefer for an inlay cavity, but I'm not using it for inlays so I went with upcut because it is supposed to be better for clearing the chips out as you make progressively deeper cuts during the plunge / pattern routing process.
The other advantage in the upcut is leaving a clean edge on the rear with no chipout when the slots penetrate the back side of the head stock.
The net result is beautiful slots with no clean up afterward. I like the squarish slots with the rounded corners as I've always been taught that sharp corners are an invitation for cracks to form in wood structures.
rudy - Posted - 04/23/2014: 03:08:50
Shawn,
Forgot that the spiral upcut was also purchased for use with my new spiffy jig to plunge route the long tapered slot for the neck reenforcement bar, so that factored into the purchase decision.
You can see the channel slot in photo #1 if you look closely. The 2024-T4 is already in place and a maple filler strip is glued over the top and leveled to the surface of the neck blank. The location of the bar and the filler strip are indicated on the side of the neck blank in pencil.
Edited by - rudy on 04/23/2014 03:16:14
Jonnycake White - Posted - 04/23/2014: 09:22:31
quote:
Originally posted by rudyquote:
Originally posted by Shawn HooverUp spiral, you say. I've read about downcut spiral for fuzz free overhead inlay routing, upcut for the router table. What are the mechanics on up spiral for slot routing?
I could have gone either upcut or downcut spiral. Downcut spiral is supposed to be better for a clean top edge like you would prefer for an inlay cavity, but I'm not using it for inlays so I went with upcut because it is supposed to be better for clearing the chips out as you make progressively deeper cuts during the plunge / pattern routing process.
The other advantage in the upcut is leaving a clean edge on the rear with no chipout when the slots penetrate the back side of the head stock.
The net result is beautiful slots with no clean up afterward. I like the squarish slots with the rounded corners as I've always been taught that sharp corners are an invitation for cracks to form in wood structures.
Sounds like I need one of those. My slots are far from perfect.
Thanks for posting this Randy, there's a lot of good info here.
rudy - Posted - 04/23/2014: 18:21:00
quote:
Originally posted by Shawn HooverI just noticed the corked glue bottle. Nice one.
I gotta do something with all those Two Buck Chuck cabernet corks!
rudy - Posted - 05/01/2014: 09:34:50
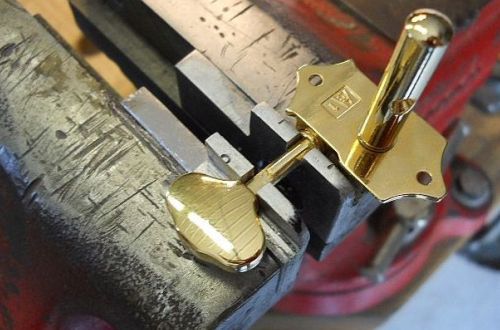
I received a few e-mails about what method I used to remove the cast metal buttons on the Grover Sta-Tite tuners so the ebony buttons could be retrofitted to the worm posts. Here's a quick shot of the temporary replacement vise jaws that I use to easily remove the buttons:
blindsniper - Posted - 05/01/2014: 11:42:59
Rudy,
As usual your posts are relevant, to the point, and full of detail. Lots of information there
Thanks
Ian
Terms of Use | Privacy Policy | Privacy Consent (EU/GDPR Only)
Copyright 2026 Banjo Hangout. All Rights Reserved.