
DVD-quality lessons (including tabs/sheet music) available for immediate viewing on any device.
Take your playing to the next level with the help of a local or online banjo teacher.
Weekly newsletter includes free lessons, favorite member content, banjo news and more.
Premier Sponsors


|
Please note this is an archived topic, so it is locked and unable to be replied to. You may, however, start a new topic and refer to this topic with a link: http://www.banjohangout.org/archive/266536
BobJJ - Posted - 07/09/2013: 18:23:34
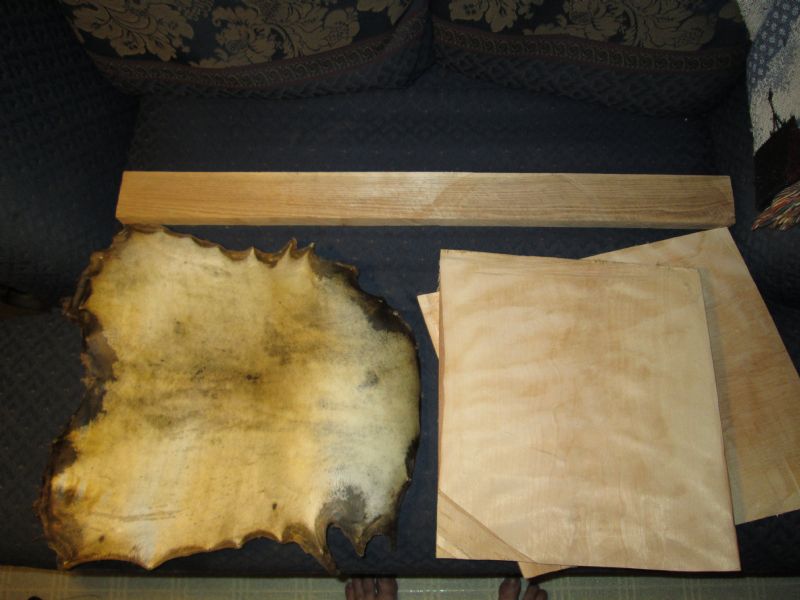
It started with the vegetable garden. A couple rows of greenbeans, some cucumber plants and lettuce were destroyed. I got the woodchuck and ended up with a decent hide and a couple of meals for us.
So now I decided that i will start to work on a mountain style banjo. I printed out Rudy's plans from here: bluestemstrings.com/pageFPMB1.html
I cut a neck blank from butternut and a couple boards of curly Yellow Birch. These were from logs that I pulled out of my firewood pile about 3 or 4 years ago. I split with wedges, rough cut with chainsaw and adze, ant then hand plane. I'll post more picture as I make some progress.
Bob
 Mountain Banjo Parts |
rudy - Posted - 07/09/2013: 18:48:35
Hi, Bob. You're well on the way...
If a varmint has to go, at least it's nice that they can contribute in a way that nourishes you (in more ways than one in this case...) and lets them participate, although unwillingly, in a noble pursuit.
Jim D - Posted - 07/09/2013: 20:04:52
If you haven't already done so, get a copy of Foxfire 3 (your local library might have it). It has quite a section on mountain banjos that will educate you on the old time ways of making mountain banjos.
Jim
Muddy Roads - Posted - 07/09/2013: 21:46:15
I expect you to make the tailpiece using the teeth of the woodchuck.
rudy - Posted - 07/10/2013: 04:12:01
quote:
Originally posted by Muddy Roads
I expect you to make the tailpiece using the teeth of the woodchuck.
A row of teeth epoxied into small holes along the lower edge of the rim would greatly reduce any tendency for the banjo to slide out of playing position.
jduke - Posted - 07/10/2013: 08:29:42
Between tanning the hide and milling the wood, sounds like there will be a lot more mountain in your mountain banjo than the ones most of us have made. Sounds like your off to a good start, have fun with the project.
BobJJ - Posted - 07/16/2013: 16:40:30
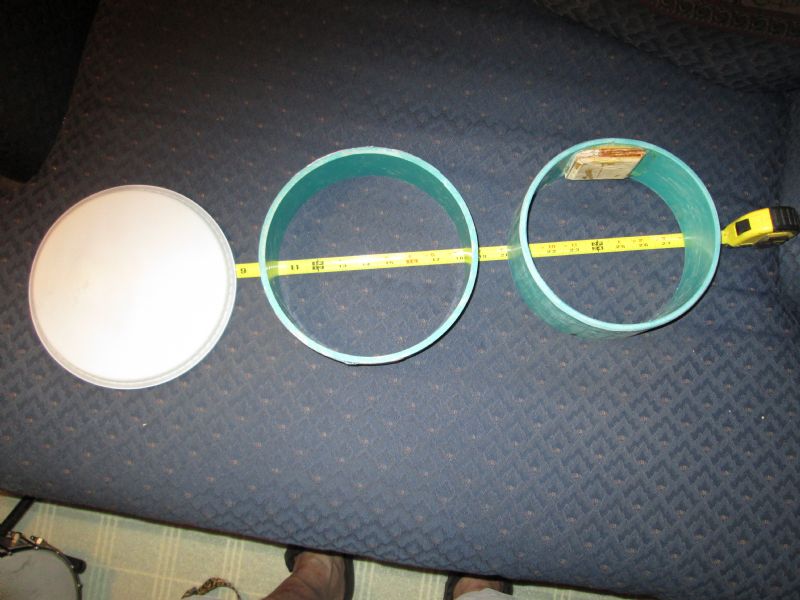
I decided to make an 8" head on this banjo. I also want to make it fit standard 8" heads. I have built a few concert scale banjo ukuleles and discover that PVC pipe is 8" ID (inner dimension) and 8" banjo heads (and drum heads) outer rim matches the approximate size of a piece of PVC pipe. The head will fit over an 8" OD (outer dimension) tube. To make an 8" OD tube, I needed to cut about an 1" and squeeze the tube back together. I made a small block of wood to fit thr inner radius and attached it with epoxy and brass wood screws. The "OD" pipe will be used to tension the head.
8" banjo head on the left, 8" PVC (sdr-35) in the middle, modified PVC (8"OD) pipe on the right.
 8" banjo head and PVC Pipe |
BobJJ - Posted - 07/16/2013: 16:41:41
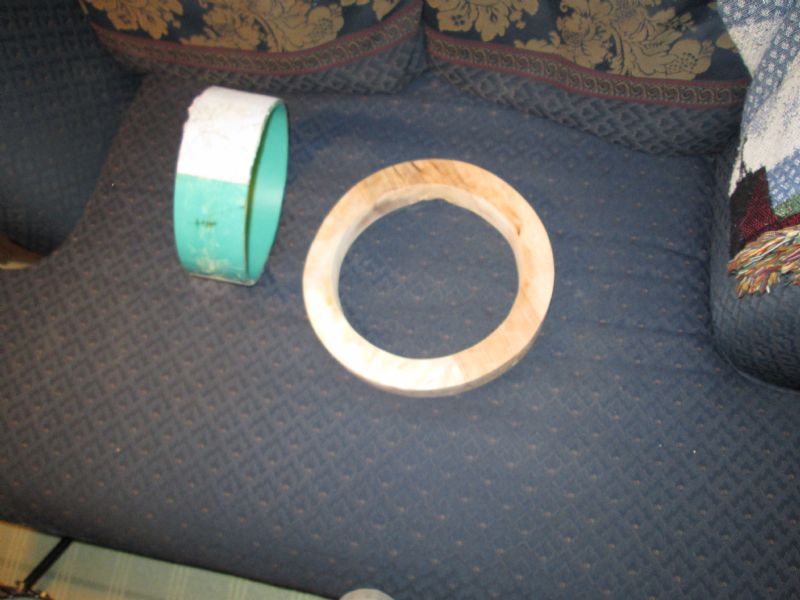
Doughnut
The center section of this banjo I am making is curled yellow birch. It is a slab cut with a chainsaw, and then I tried to make the out side as round as possible with a draw knife and wood rasps. I drilled a few holes in the inside and cut out most of the inner hole with a coping saw. Then a draw knife and wood rasp.
"Always cut downhill"
I am at the point now where I am sanding the inner hole with a piece of PVC pipe that has a few pieces of sandpaper glued on it..
Edited by - BobJJ on 07/16/2013 16:49:52
 8" banjo pot |
BobJJ - Posted - 07/25/2013: 14:47:26
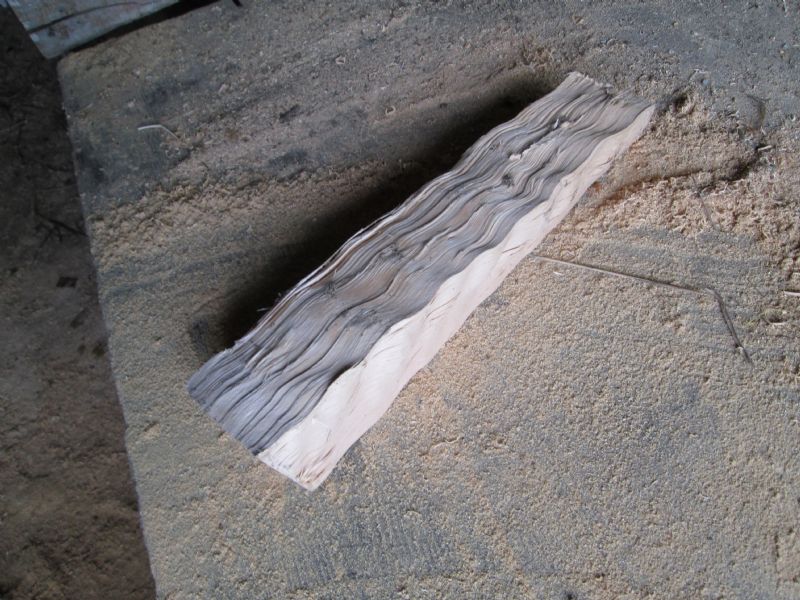
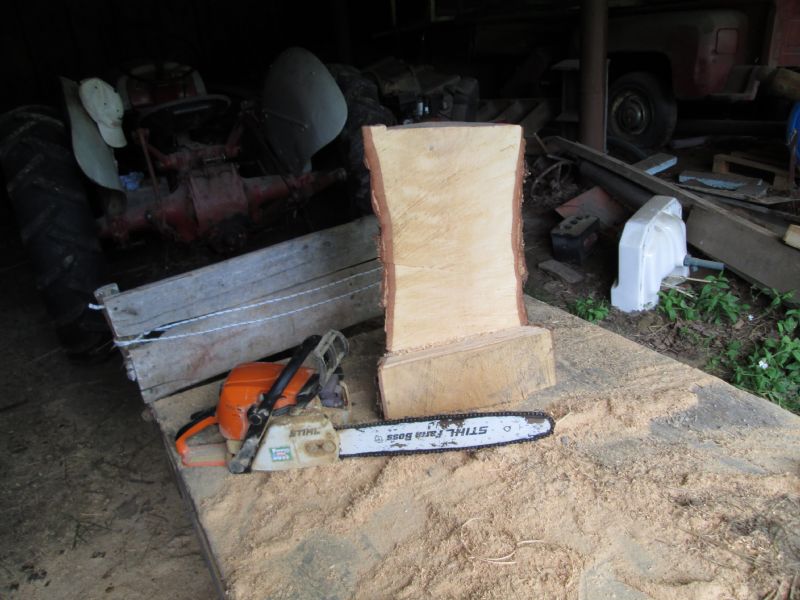
This is how the front, back and middle of the pot was first cut from a Yellow Birch log with lots of curl.
 |  |
BobJJ - Posted - 07/25/2013: 14:53:05
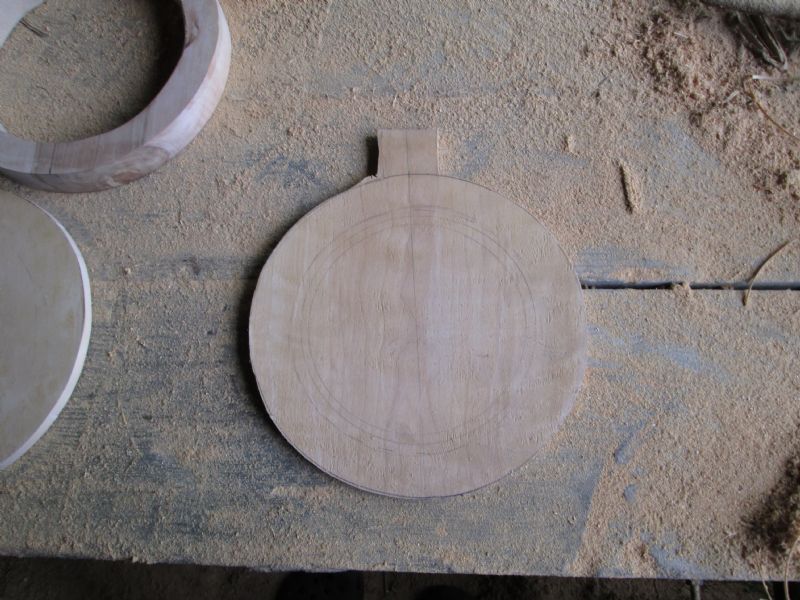
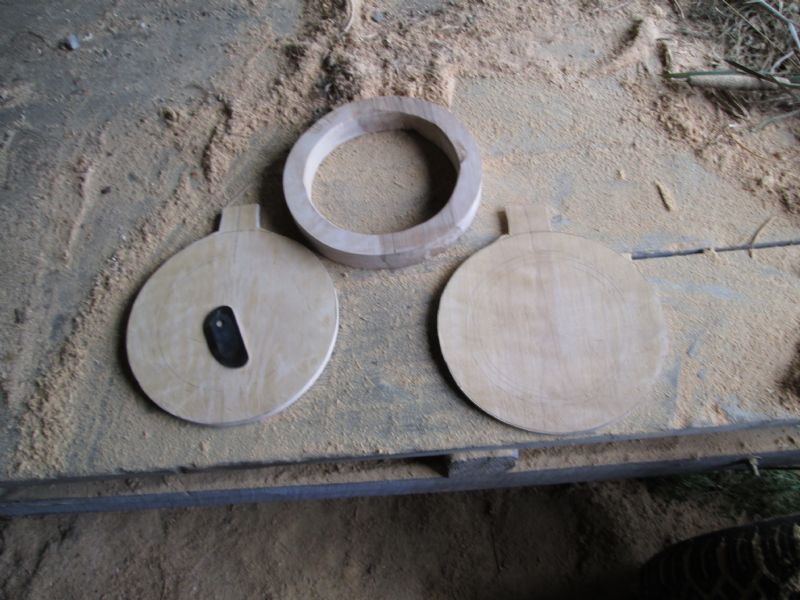
I have now roughly rounded the front and back and have gotten the middle section closer to round. I have marked a center line on the back & front of all the pieces. I am mostly done planing and have started scraping.
 |  |
BobJJ - Posted - 07/25/2013: 15:00:32
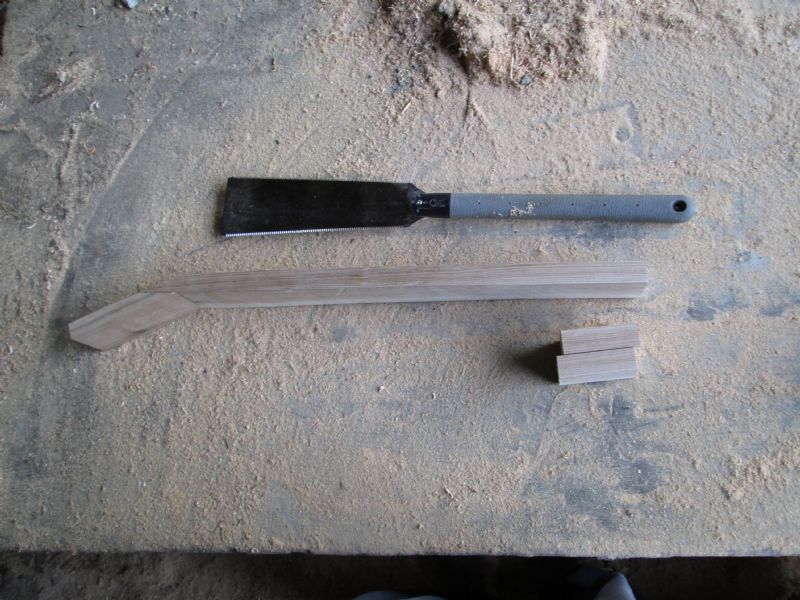
I have started work on the neck. The head joint is glued and I am almost ready to glue up a stacked tailpiece.
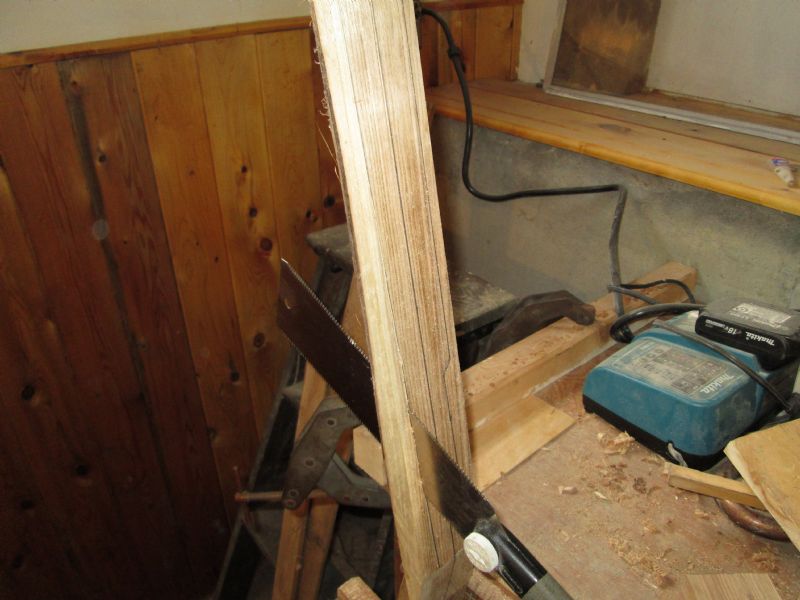
I use a Japanese style saw for most of my saw cuts. This one is a Bear Saw. These saws are easy to learn to use and cut wood amazingly fast:
vaughanmfg.com/shopping/Produc...250D.aspx
 |
C Nyal de Kaye - Posted - 07/25/2013: 15:40:43
I'm very happy to have stumbled across this thread. "It's an ill wind that blows no good" someone said, and the garden being attacked seems to have sparked a great project.
The problem with projects like this is that they are addictive.
I once bought a gourd to make a banjo. I planted the seeds; guess what? I grew a lot more gourds and that led to more gourd banjo's.
The end is not in sight yet.
BobJJ, you're in big trouble mate - you're hooked, and where will it all lead?
Watch this space!
arielslim - Posted - 07/25/2013: 16:09:05
I really enjoy this thread as I am getting ready to start on a mountain banjo soon and like to see the process come together. I got my plans from Dwayne Glanton (Dwayne's This and That). Keep the photos coming. It looks like your on to a good start.
rudy - Posted - 07/25/2013: 19:26:40
quote:
Originally posted by arielslimI really enjoy this thread as I am getting ready to start on a mountain banjo soon and like to see the process come together. I got my plans from Dwayne Glanton (Dwayne's This and That). Keep the photos coming. It looks like your on to a good start.
Here's a free pdf plan for a Proffitt-style mountain banjo:
bluestemstrings.com/pageFPMB1.html
BobJJ - Posted - 07/28/2013: 18:01:59
Thanks for the kind remarks. And thanks to Rudy for sharing his work!
For me,
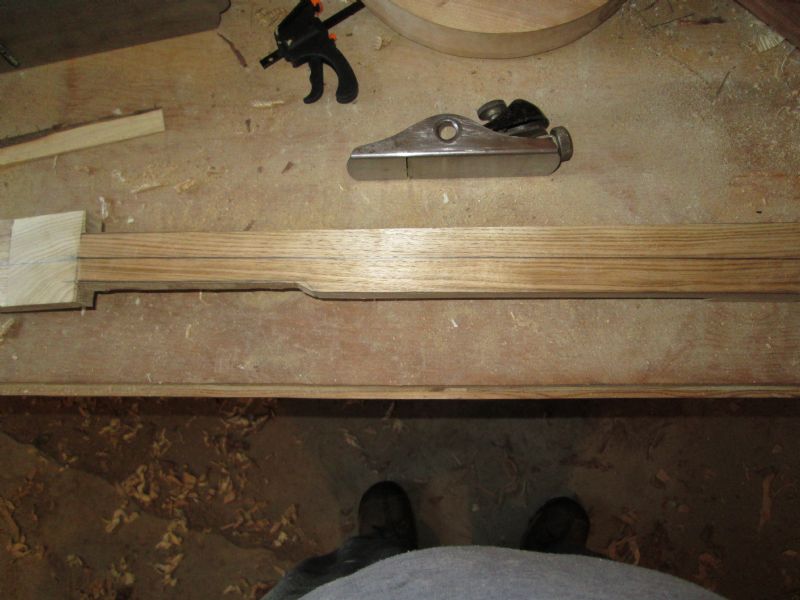
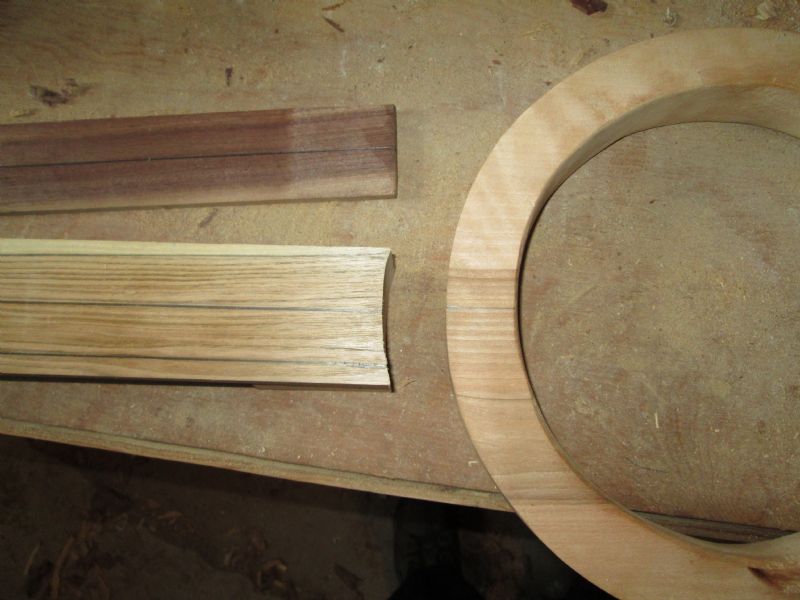
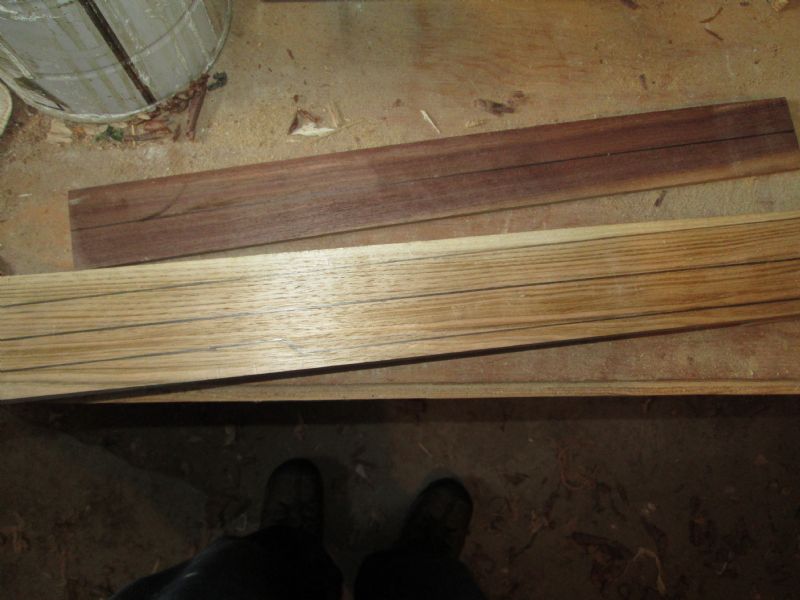
the neck is the easiest part of building a string instrument. And in this case, it is fretless, so there is one less thing to deal with.
The neck starts with a board 3/4 to 1" thick and 3" wide or so.
The important thing is to plane a the surfaces so that they are square to each other. Keep a centerline on all the pieces.
My pictures may be reversed in order.
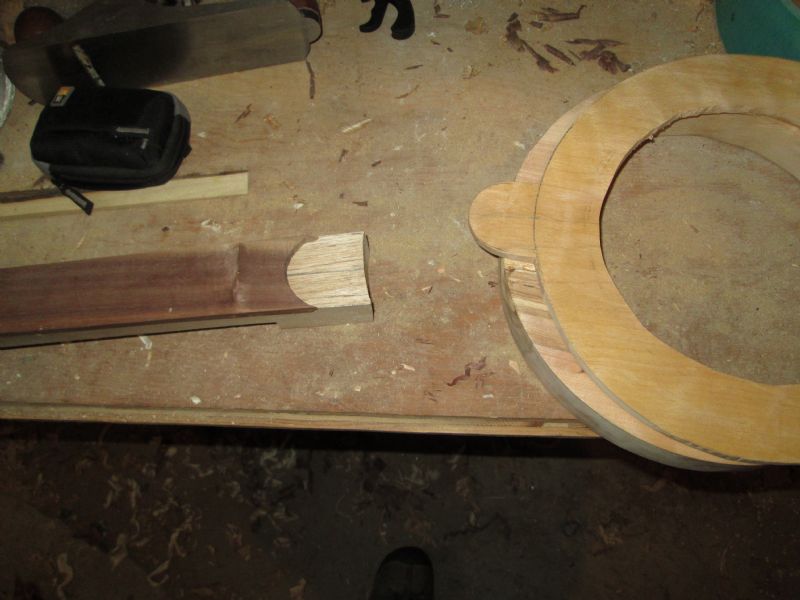
I have a piece of walnut scrap that I will be gluing on the neck for a fingerboard. I have shaped a curve in the tail end of the neck, and then marked out and cut the neck taper. Then it gets planed and scraped smooth.
 |  |  |  |
BobJJ - Posted - 07/28/2013: 18:18:18
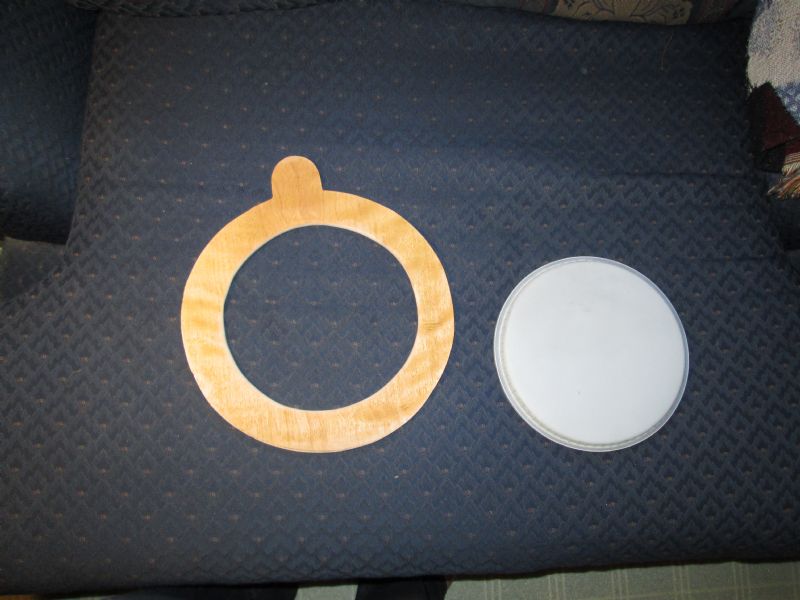
I fit the tab from the front of the banjo into the fingerboard. I cut the top of he banjo so that it will fit a standard 8" head.
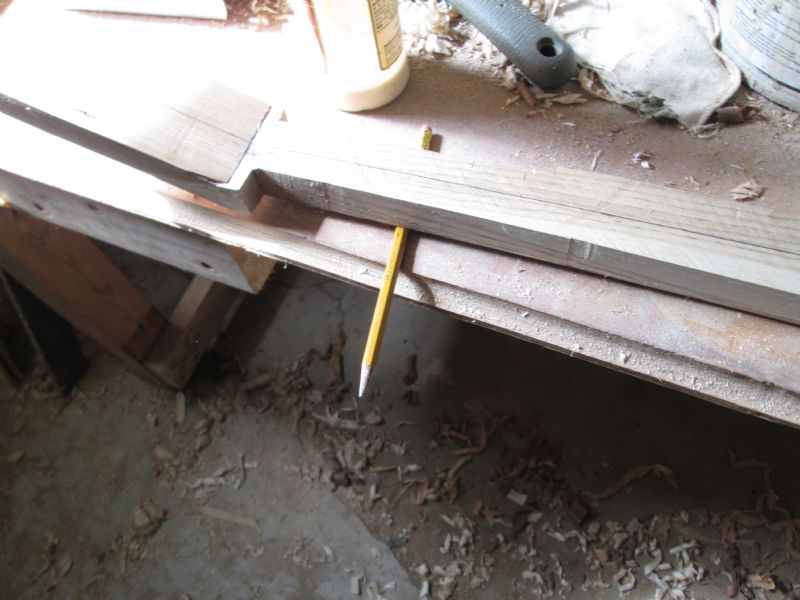
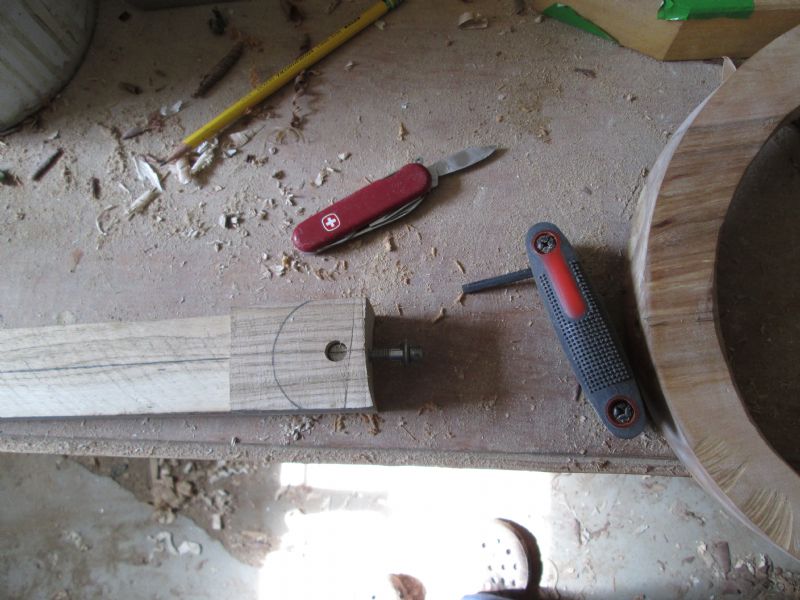
I lined up the neck with the pot with the face down and I am using a pencil for some back angle.
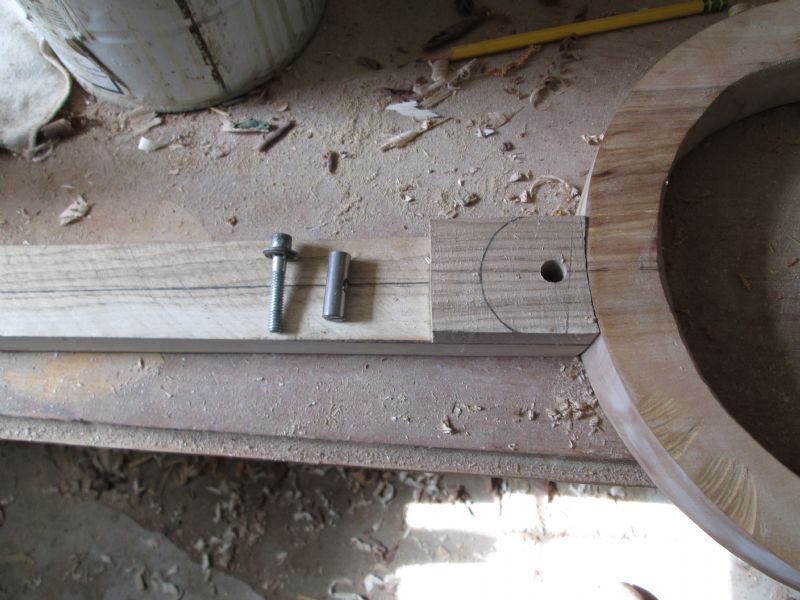
I drilled the neck for a dowel nut and matched up a hole in the pot for a "bolt-on" neck. It is probably the easiest method, because I can keep taking it apart and reassembling it to get a good fit. My favorite tool is the pocket knife and half-round bastard file for fitting the neck.
 |  |  |  |
 |
BobJJ - Posted - 07/28/2013: 18:41:43
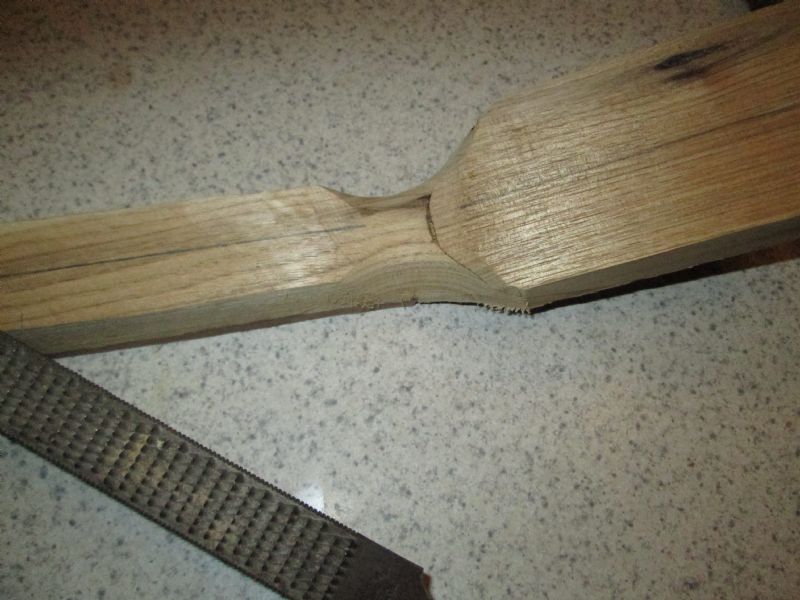
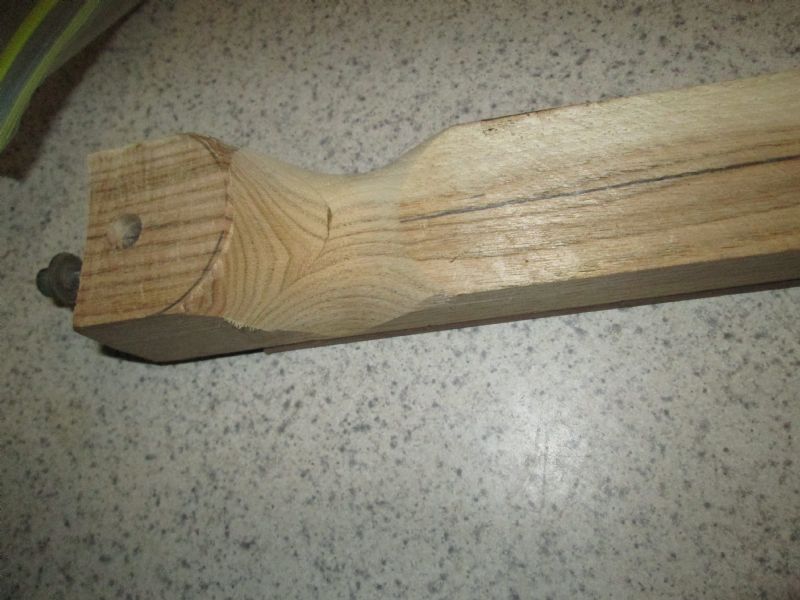
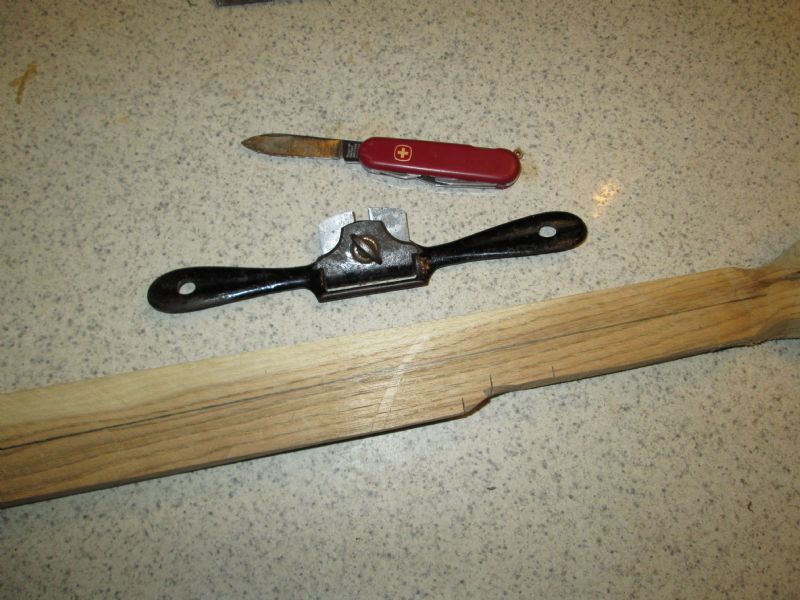
Now the neck is a flat board that has been fitted to the pot and had the side taper cut and planed. The head looks like a Martin guitar. Profiling the neck is the most enjoyable part for me. You can carve the neck so that it fits you. I shape each end of the neck and then carve between them. I use a spokeshave, my knife, and 1/2 round files. This is the 1st 5 string that I am building, so the bump at the 5th string is a bit strange.
Note:
No sandpaper. sandpaper is OK after you are done shaping, carving, planing and fitting. Sandpaper embeds particles of sand in the wood and will dull your tools.
 |  |  |
arielslim - Posted - 07/28/2013: 19:34:14
Great photos,I'm not going to start on mine 'till winter, to busy this summer but you've giving me some ideas. The bolt on neck is a thought I hadn't considered.
BobJJ - Posted - 07/28/2013: 19:39:49
The head.
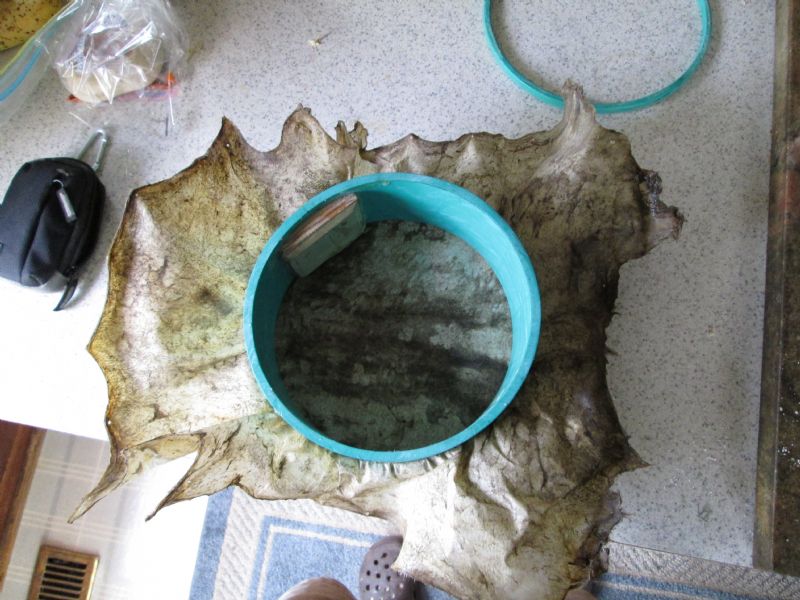
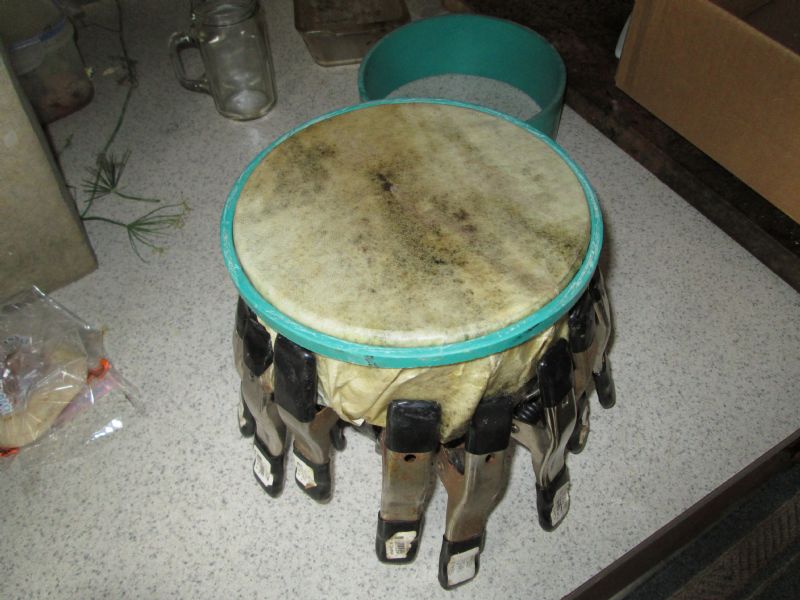
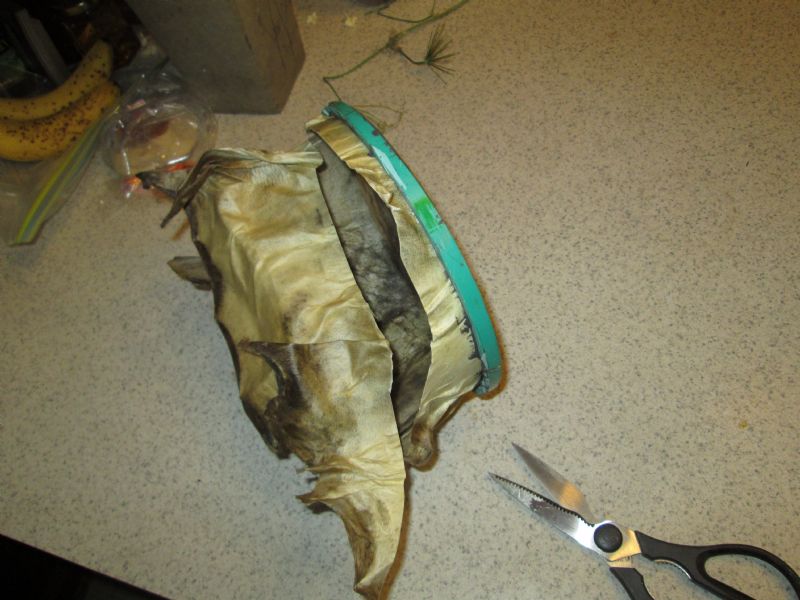
Commercial heads are epoxied to aluminum hoops. I don't know if it will work, but I wet the groundhog hide for a minute or so, and then stretched it on a PVC 8" OD pipe and added a bunch of clamps. I cut a 1/4" piece of 8" ID PVC pipe and glued it on to the hide with JB Weld epoxy. The next day, I trimmed it with scissors.
So far, so good. I might work.
 |  |  |
Jonnycake White - Posted - 07/29/2013: 11:49:01
quote:
Originally posted by BobJJ
The head.
Commercial heads are epoxied to aluminum hoops. I don't know if it will work, but I wet the groundhog hide for a minute or so, and then stretched it on a PVC 8" OD pipe and added a bunch of clamps. I cut a 1/4" piece of 8" ID PVC pipe and glued it on to the hide with JB Weld epoxy. The next day, I trimmed it with scissors.
So far, so good. I might work.
If it doesn't work you'll have to find another groundhog. There are lots of ways to make "flesh hoops" and attach them to hides - mostly you just need to wrap the wet hide around the hoop. For this type of banjo, though, you don't really need a flesh hoop. You can just clamp the hide between two layers of the pot, or tack it onto the inside of the pot and put the tone hoop (your wider PVC hoop) up through it before fastening on the back plate.
I admire your willingness to skin out a groundhog and dehair the hide. I haven't gone that far yet.
Edited by - Jonnycake White on 07/29/2013 11:51:11
BobJJ - Posted - 07/29/2013: 17:32:00
quote:
Originally posted by Jonnycake White
If it doesn't work you'll have to find another groundhog. There are lots of ways to make "flesh hoops" and attach them to hides - mostly you just need to wrap the wet hide around the hoop. For this type of banjo, though, you don't really need a flesh hoop. You can just clamp the hide between two layers of the pot, or tack it onto the inside of the pot and put the tone hoop (your wider PVC hoop) up through it before fastening on the back plate.
I admire your willingness to skin out a groundhog and dehair the hide. I haven't gone that far yet.
I tried to build it so that it would fit a standard 8" head, so I am trying to make my groundhog hide to match a standard 8" head. It looks like it may work OK.
The hide was amazingly easy. I probably spent about 1/2 hour for skinning, scraping, soaking, scraping, washing and stretching.
There are always more groundhogs.
BobJJ - Posted - 07/31/2013: 05:46:03
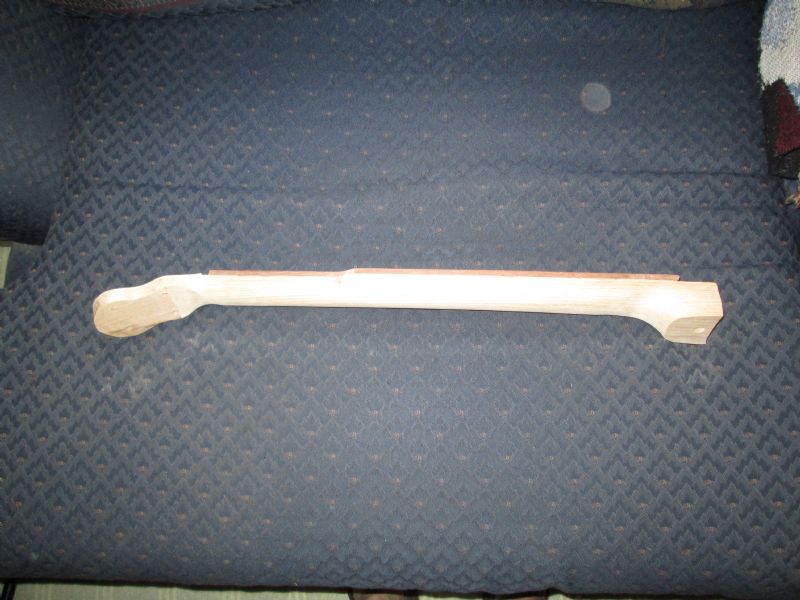
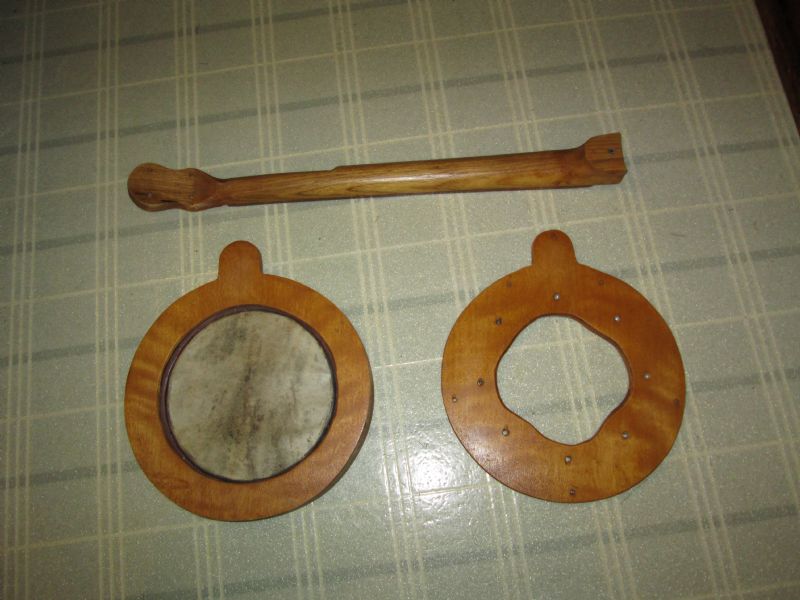
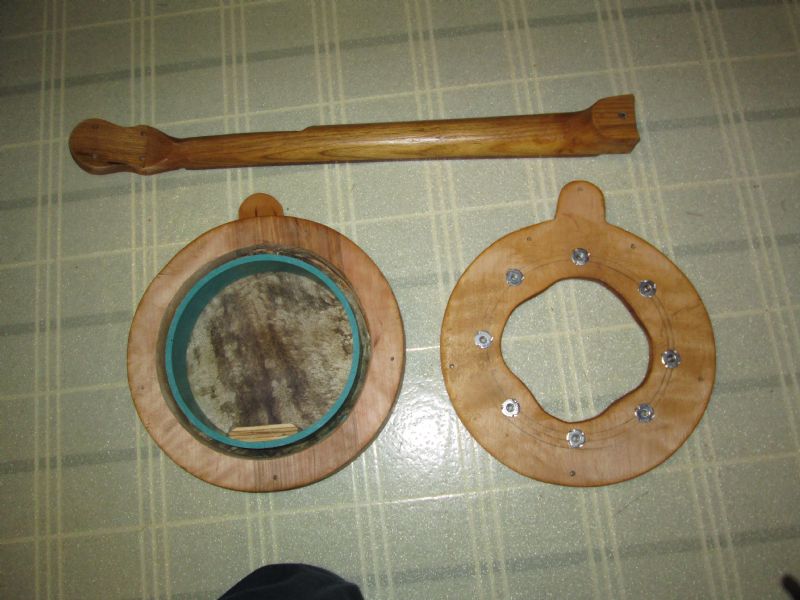
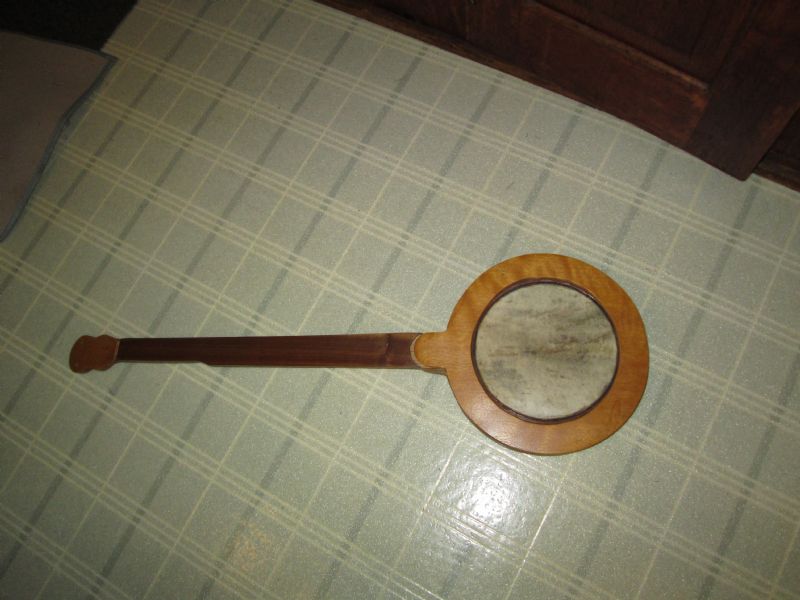
Here are some more pictures. The neck, The body and neck with some shellac, and a picture of everything fitted together. I still need to make a nut and tailpiece and fit tuners.
 |  |  |  |
C Nyal de Kaye - Posted - 07/31/2013: 14:28:15
It's all happening Bob, thanks for keeping us informed.
Terms of Use | Privacy Policy | Privacy Consent (EU/GDPR Only)
Copyright 2026 Banjo Hangout. All Rights Reserved.


