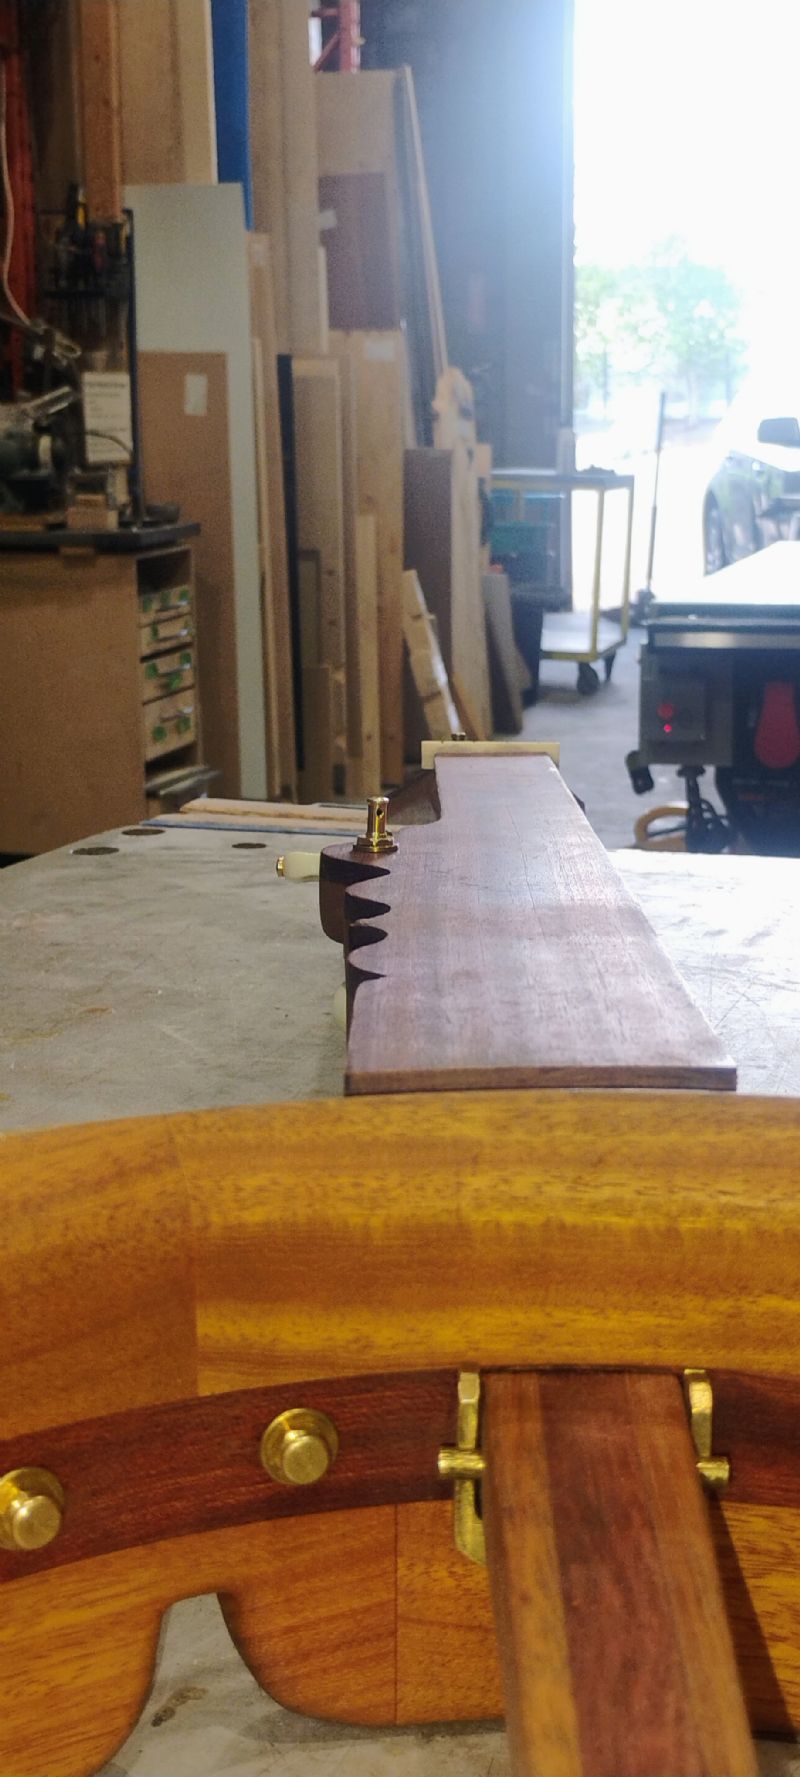
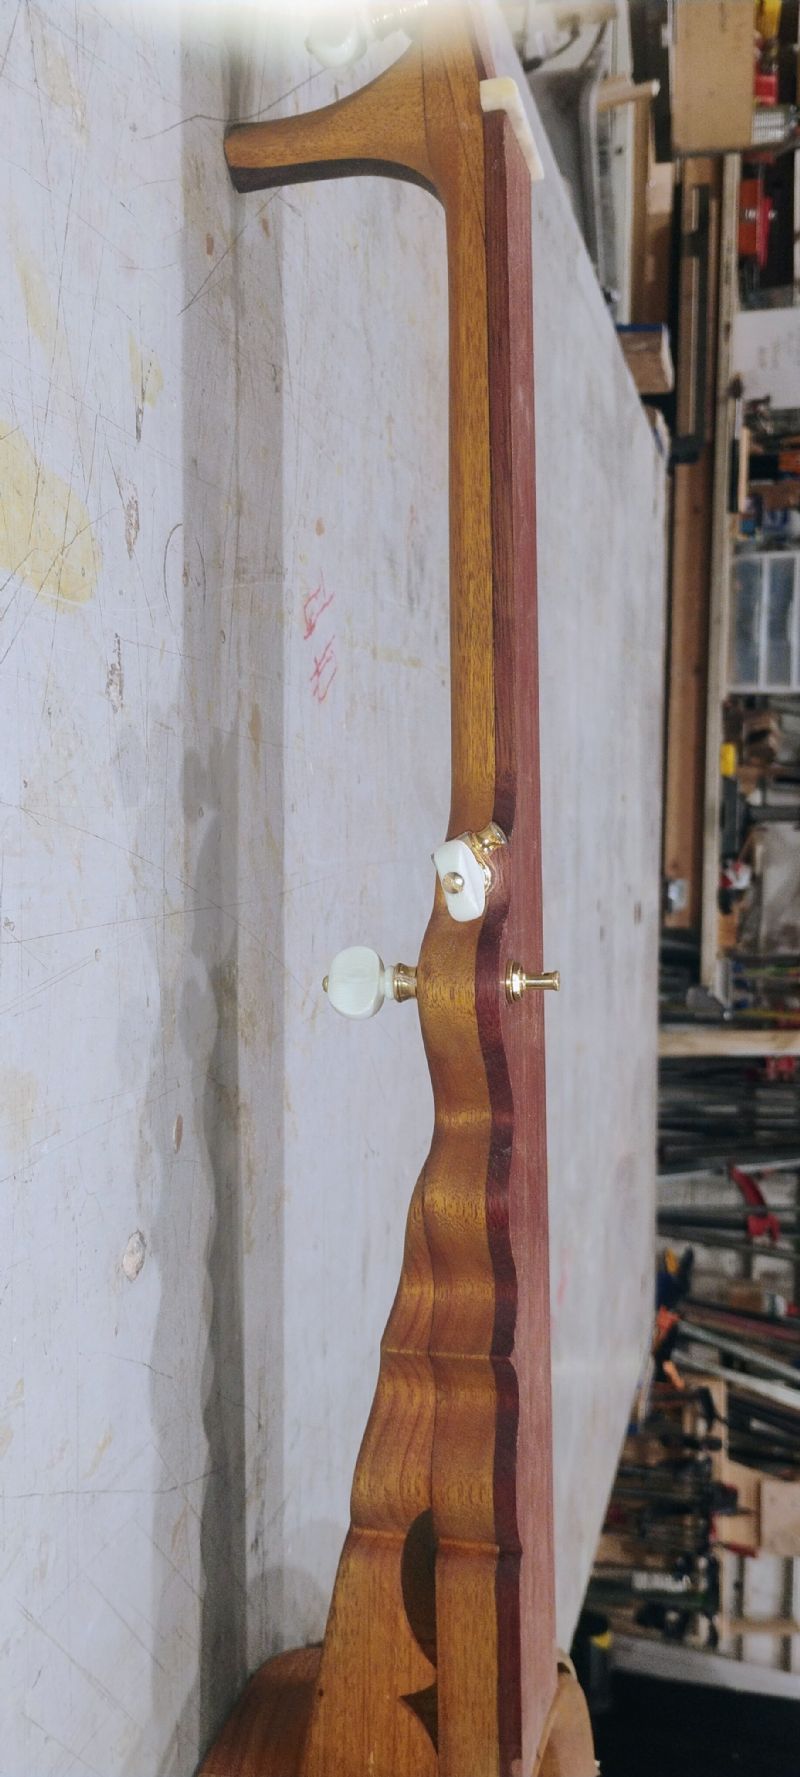
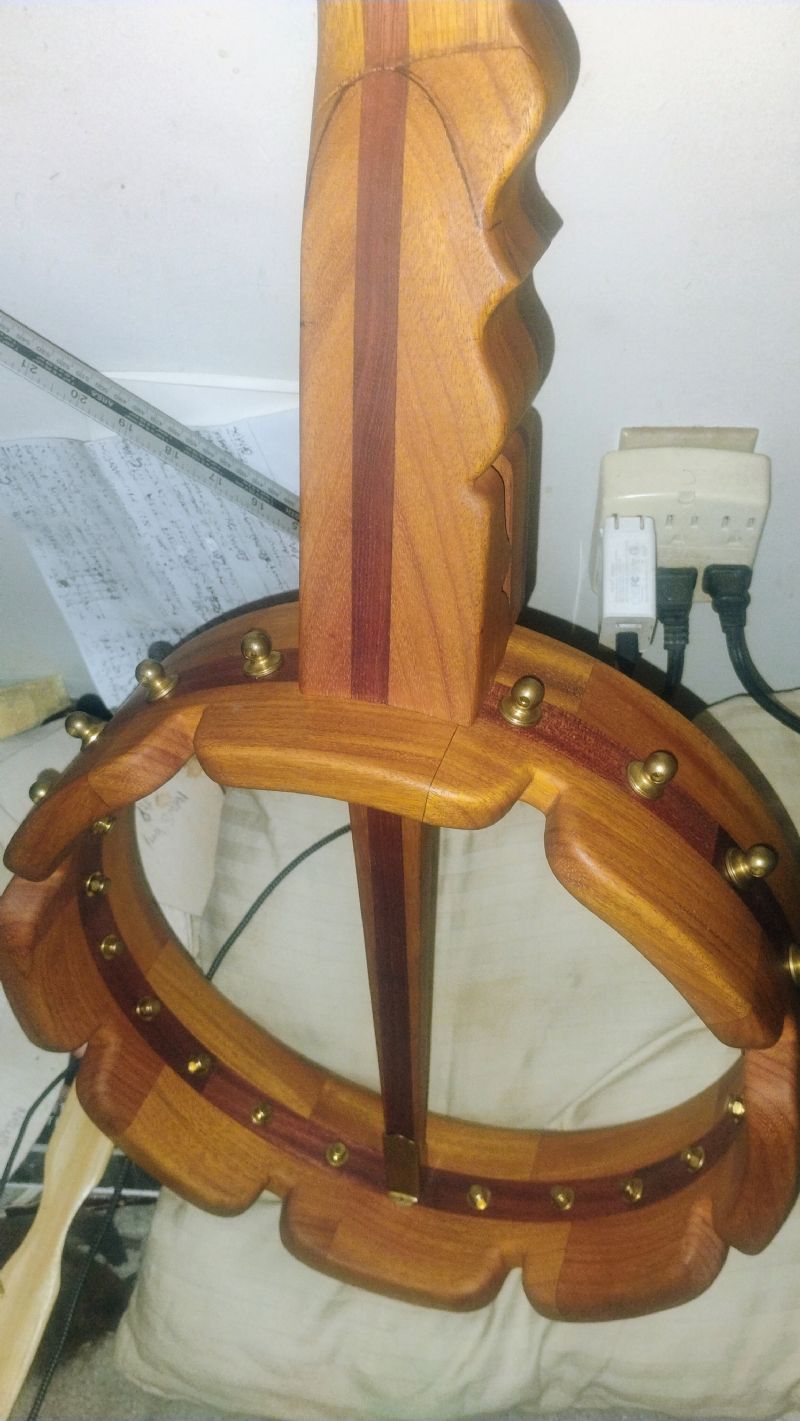
Being a suffering perfectionist, this miss alignment bothers me but on the other hand it's only slightly off. It's straight in one direction and slightly leans towards the fretboard. So I'm tempted to leave it as is. What do you think ?

The alignment is barely noticeable. However, if it bothers you your approach could be fill the hole with a wooden dowel and redrill the hole.

I think "perfectionist" speaks volumes..... but IF there are any other imperfections ... ???
The difference between Craftsman and Master Craftsman is the attention to detail. The problem is knowing that you are entering a rabbit hole and figuring it way out. For example. Some of the glue joins on this banjo are really good. So good that at a glance you wouldn't be able to see the glue line or where one piece of wood stops and another starts, but other glue lines are thicker :5 to 1mm. Where as one perfectionist may unglue a joint and make an attempt to get it better a second time. where as a recovering perfectionist learns to accept imperfections so long as they are not structural and view imperfections as a kind of finger print of the Craftsman. A high percentage of Banjo players are not banjo builders and an even Smaller % of Banjo builders are not banjo players like me. So to go from normal building site carpentry to musical instrument maker, is quite a leap. This is my first open back banjo. The first was a MTN Banjo. So I'm not going to self flagulate and rather be happy with what I achieved. Next attempt will be better but after I have learned how to play the Banjo.
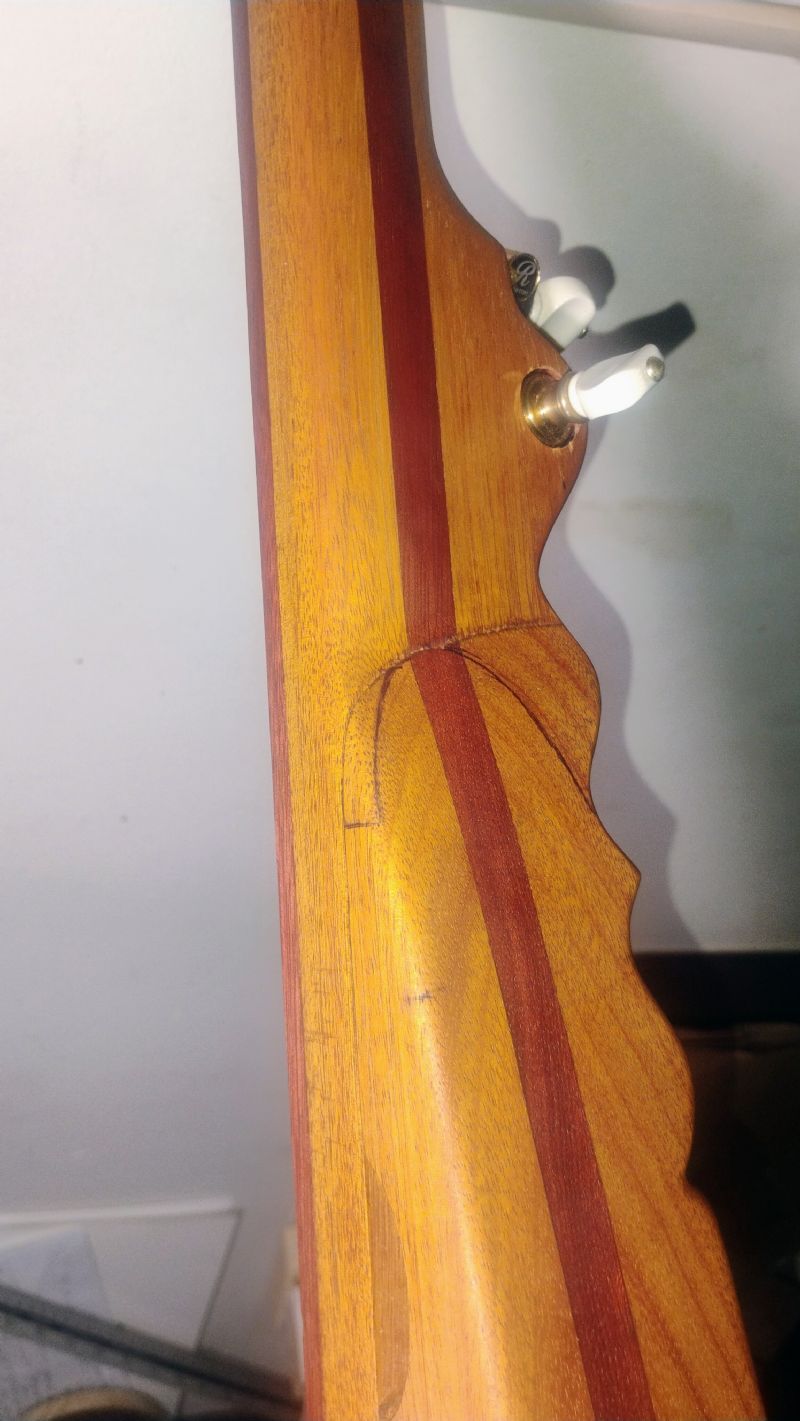
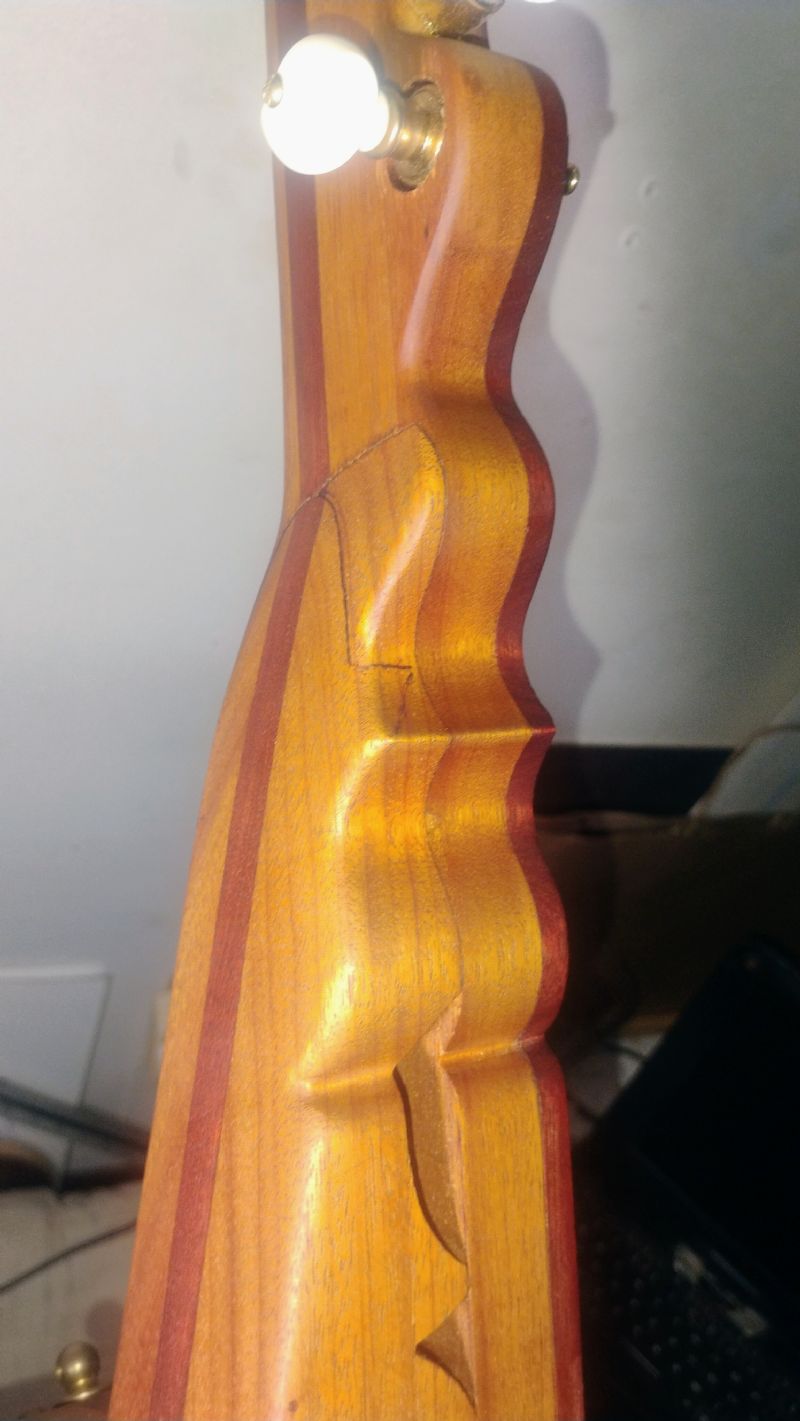
Once the ugly perfectionist head is reared its so hard to smack it away. So case in point, the rear side of the neck and the dowel stick spade to neck joint. Recognizing mistakes and logging them for the future is ok but it still leaves me with ok so how do I fix this. The original inspiration for this joint was an original Boucher banjo, but that banjo neck didn't have the mountain style Ogee carving. So as I started blending the joint it started to creep back towards the rim. At certain point I thought ok I'll stop because I can't get this right and the more I try the more chance for f - ING it up. But perfectionist head would not go away. So I put that problem to one side and continued. Banjo came together really well. Although the custom tension hoop was a challenge. So I covered the banjo with Danish oil and proceeded to wait 6 weeks. I had started months ago with research into what Finnish I was going to use and liked how Clean Armor gives a non plastic feel and also protects the wood from moisture and grime while also giving a UV inhibitor aspect. Which is depending on your likes a problem if you don't want your Osage orange to eventually look chocolate brown. But Clean Armor is damn expensive and the itch to get over the last hurdles is high. Now ugly perfectionist head rears up to poke me and bug me and says but what about the spade to neck joint, it looks odd. So in the attached photos I drew a black line to indicate how this joint could look better. I could if I take out the two 5th string tuners, also reduce the thickness of the neck by 1/16 so that the 6th string tuner doesn't look so sunken. The neck at the tuner is 15/16 thick and the neck at the 1st fret location is 7/8. So even though the final decision is mine, I'm looking for some other perspectives.
Oh and on the Clean Armor, I started thinking about using Tung oil to finish the banjo. Once you open the bottles of clean Armour it has a 6 month shelf life. Not so with Tung oil and repairs are fairly easy.
In these photos because of the camera flash, the Osage shows off its beautiful wood, but in the normal room lighting, the wood is starting to brown up. I didn't find out until recently that it's not just UV light on Osage orange that causes this effect. It's also air. So ! Looking back I should have used a UV inhibiting Finnish a while ago but even with a UV inhibitor the wood will over the years turn Chocolate brown as too with the Bloodwood.
Terms of Use | Privacy Policy | Privacy Consent (EU/GDPR Only)
Copyright 2026 Banjo Hangout. All Rights Reserved.