DVD-quality lessons (including tabs/sheet music) available for immediate viewing on any device.
Take your playing to the next level with the help of a local or online banjo teacher.
Weekly newsletter includes free lessons, favorite member content, banjo news and more.
Premier Sponsors


|
Please note this is an archived topic, so it is locked and unable to be replied to. You may, however, start a new topic and refer to this topic with a link: http://www.banjohangout.org/archive/263015
sunburst - Posted - 05/19/2013: 19:08:31
Here's what I've been doing today. I got to thinking that maybe a set of pictures would be of interest to some here, so here they are.
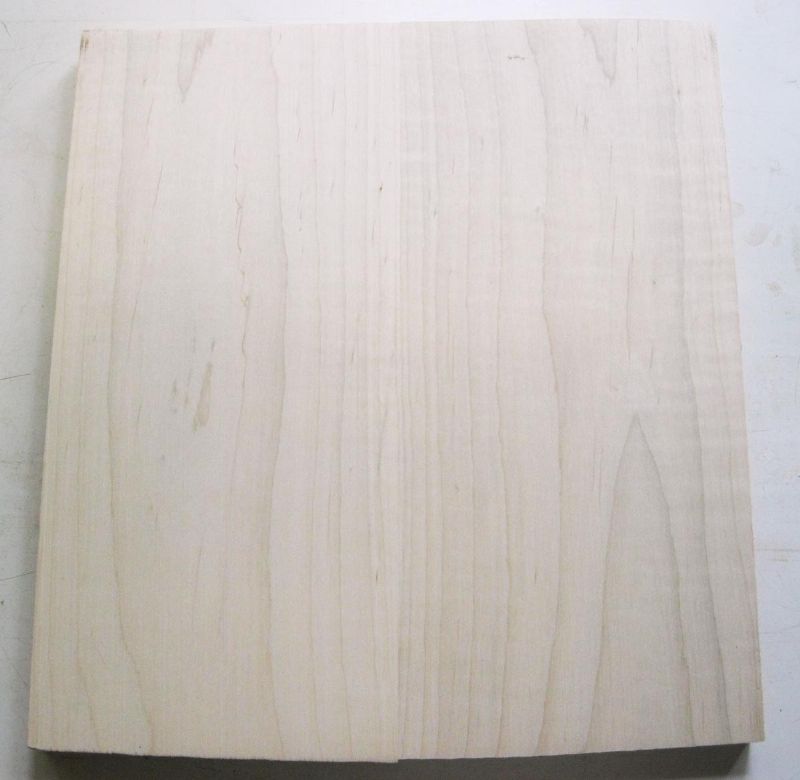
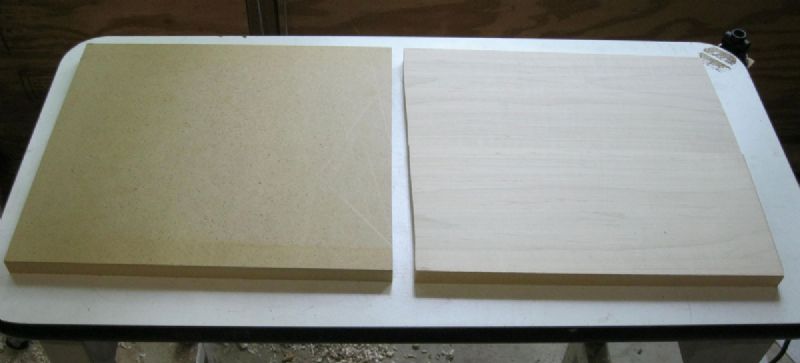
I jointed and glued the center seam of this maple blank yesterday, milled it to the correct thickness today, then got the idea for pictures, so I'll start here.
 |
sunburst - Posted - 05/19/2013: 19:10:19
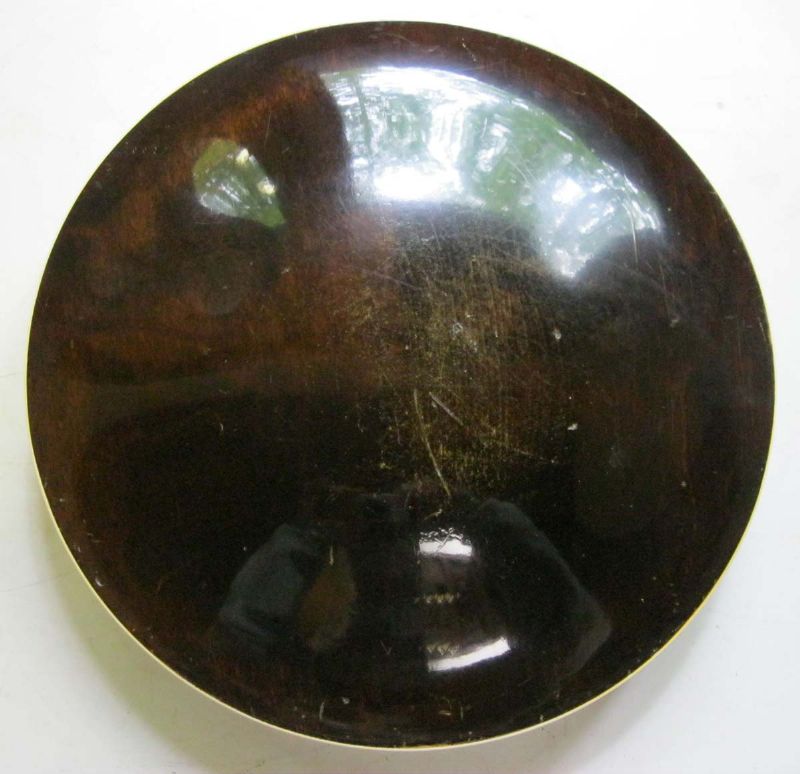
Here's the original style 7 resonator I'll be using to model the new one after.
 |  |
sunburst - Posted - 05/19/2013: 19:12:47
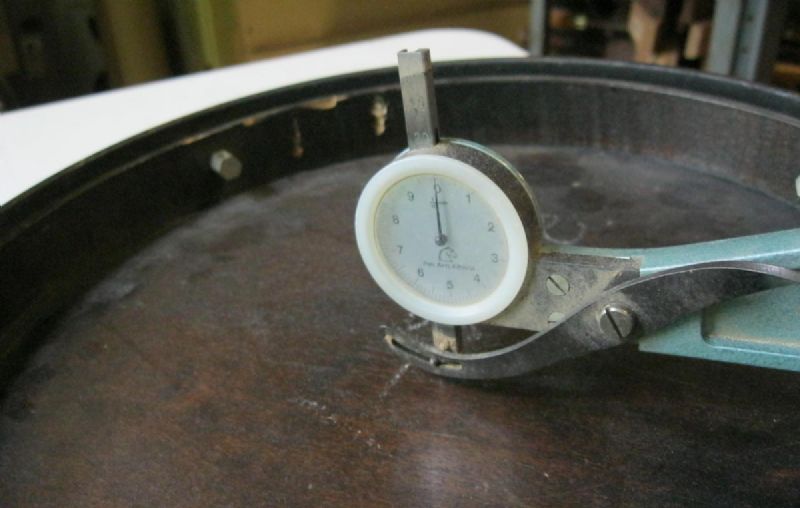
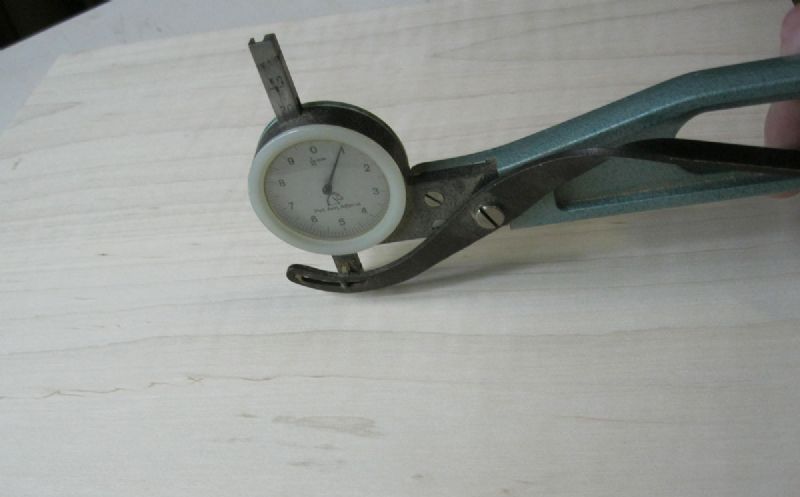
I measured the center thickness with my violin caliper and found it to be 20mm thick. I prepared the blank for the new resonator at 21mm to give myself some room for turning and sanding. i also found the edge thickness to be about 5mm on the original.
 |  |
sunburst - Posted - 05/19/2013: 19:13:56
Since I planned to mount the wood on a face plate for turning, I made the square piece of MDF board to mount the maple blank.
Edited by - sunburst on 05/19/2013 19:14:49
 |
sunburst - Posted - 05/19/2013: 19:16:06
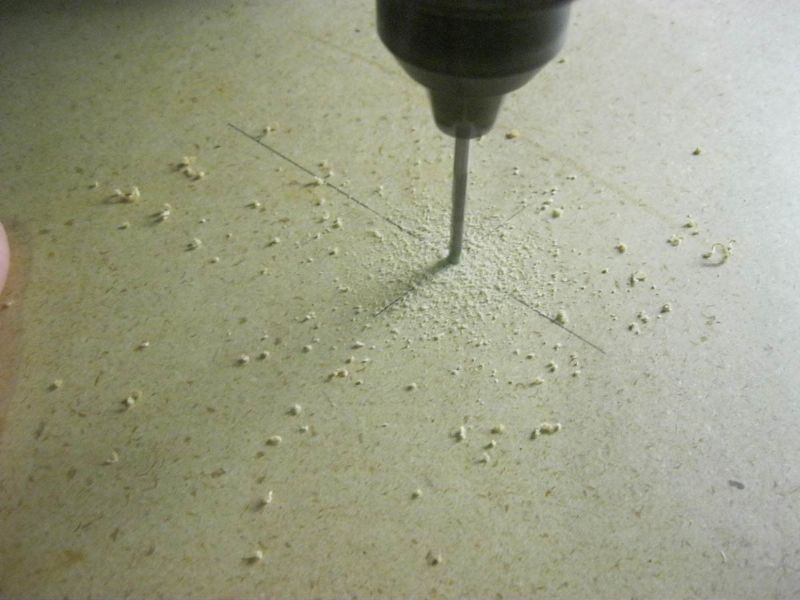
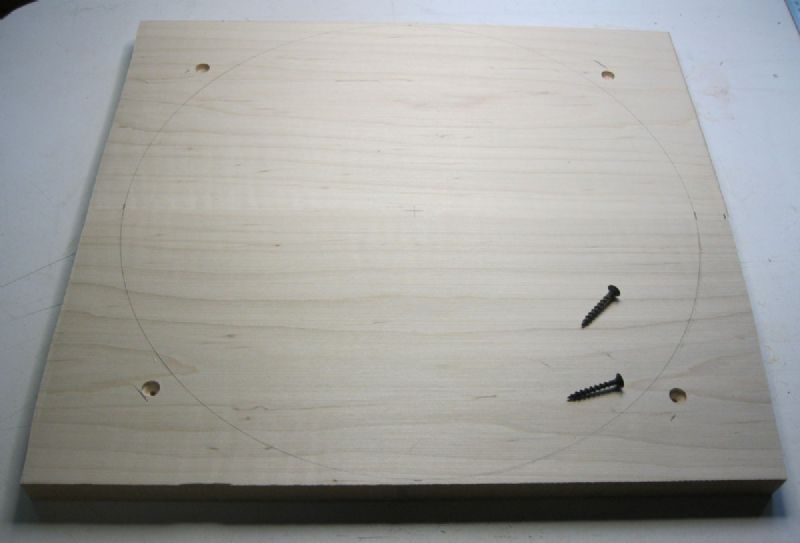
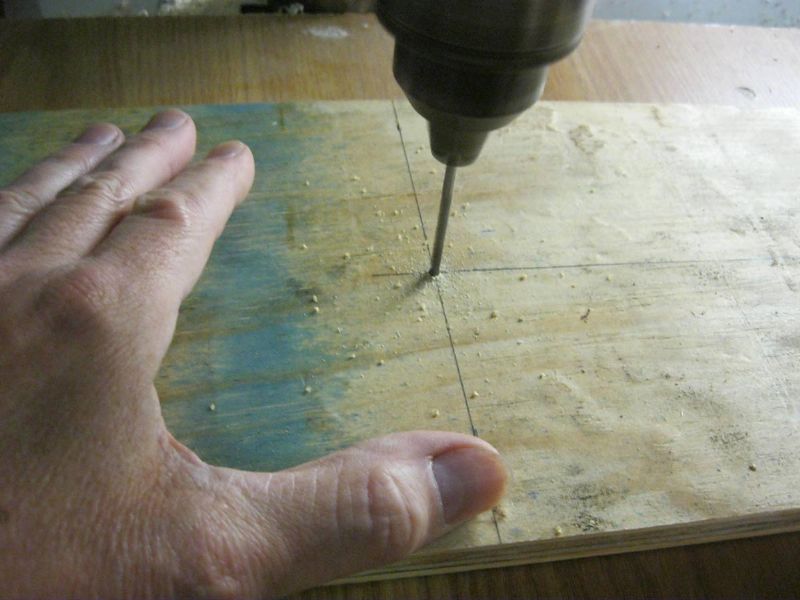
I found the center of the MDF piece and drilled a center hole, then mounted the maple blank to the MDF with wood screws.
Edited by - sunburst on 05/19/2013 19:18:27
 |  |
sunburst - Posted - 05/19/2013: 19:21:53
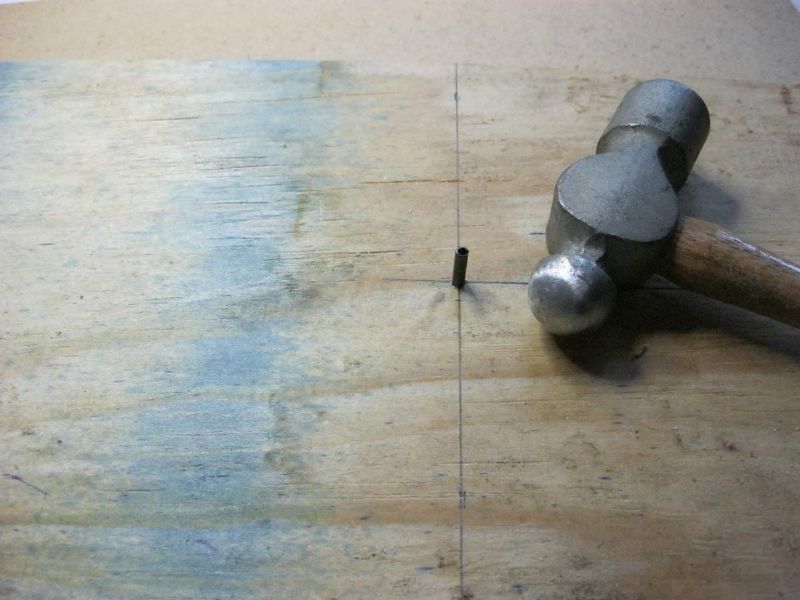
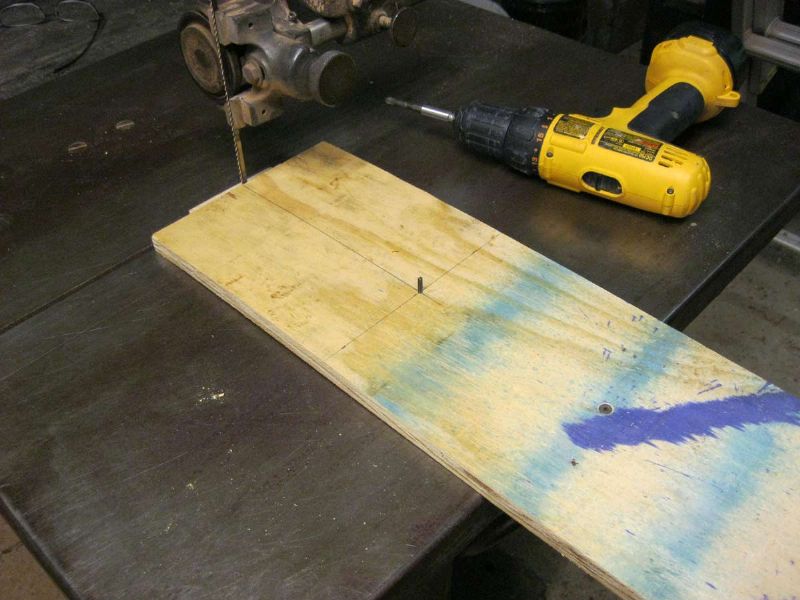
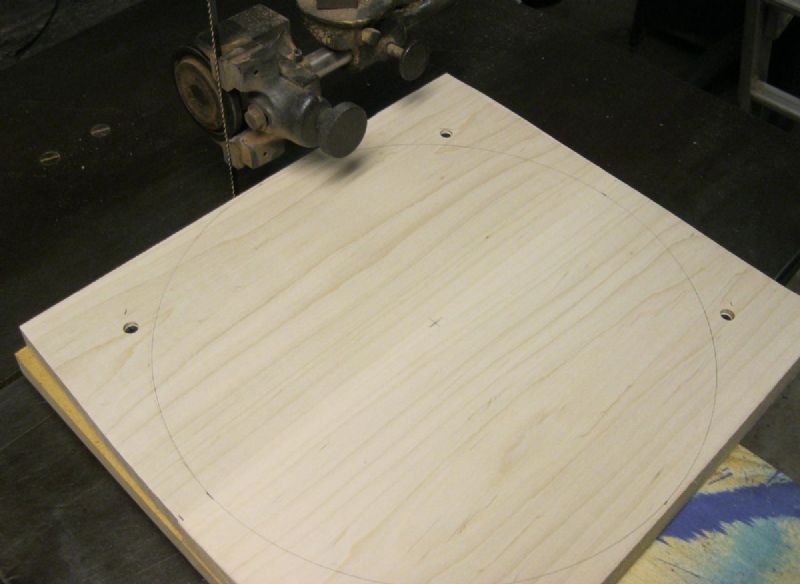
I wanted the blank as round and balanced as I could get it before starting to turn it on the lathe, so I made a bandsaw jig to saw the MDF board and the mounted maple blank round. This is what the center hole in the MDF was for.
Edited by - sunburst on 05/19/2013 19:24:07
 |  |  |
sunburst - Posted - 05/19/2013: 19:25:46
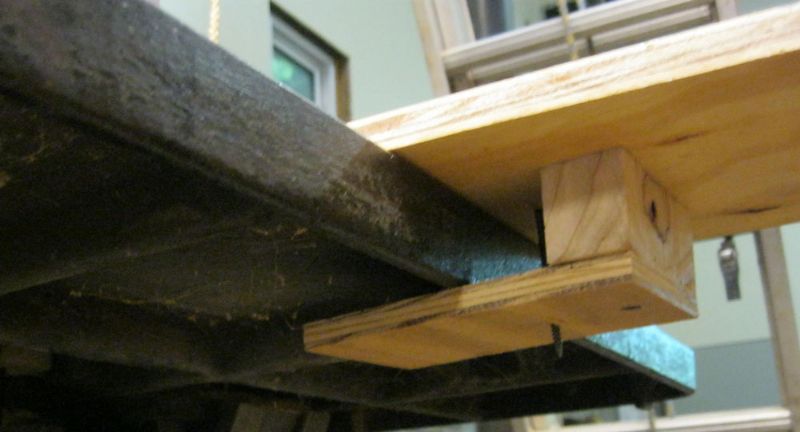
Here's the scrap-wood clamping mechanism to hold the jig to the bandsaw table. The MDF board, with the maple blank mounted to it, pivots around the pin so that I can saw it out round, ready for the lathe.
Edited by - sunburst on 05/19/2013 19:28:57
 |  |
sunburst - Posted - 05/19/2013: 19:31:18
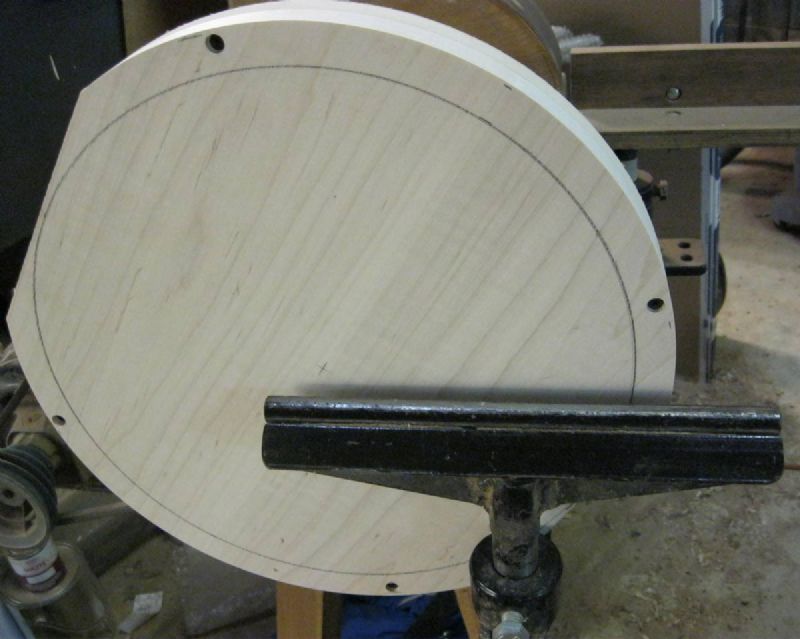
Here it is, sawed out round and mounted to the face plate of the lathe.
 |
sunburst - Posted - 05/19/2013: 19:35:25
I placed the screws so that the bandsaw would not hit them, and i sure don't want my lathe tool to hit them either! I used a parting tool to cut groove to establish the edge of the cut, being sure to stay in from the edge of the wood so there wouldn't be a chance of catching the tool on the corner pieces. The groove also established (by measurement) the limit of the cut at the edge. (The pencil line is just a reference line for the deepest cut.)
 |
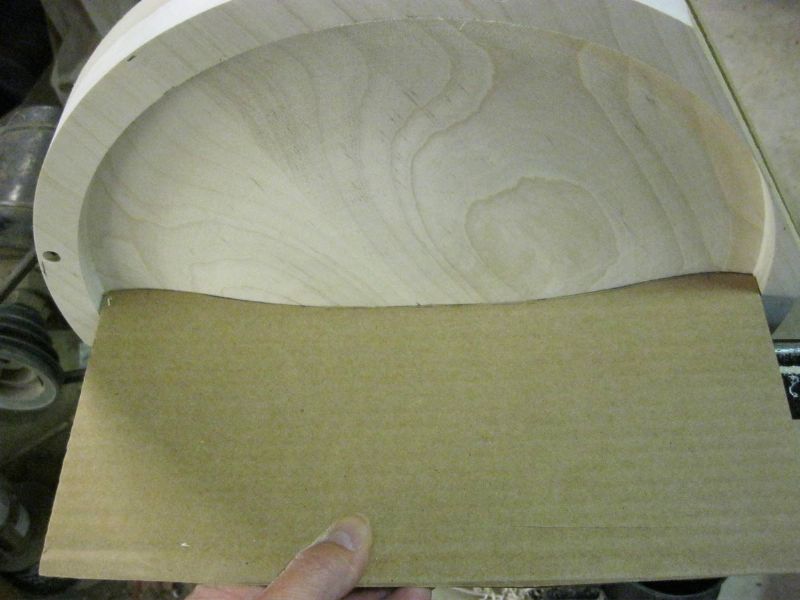
sunburst - Posted - 05/19/2013: 19:38:17
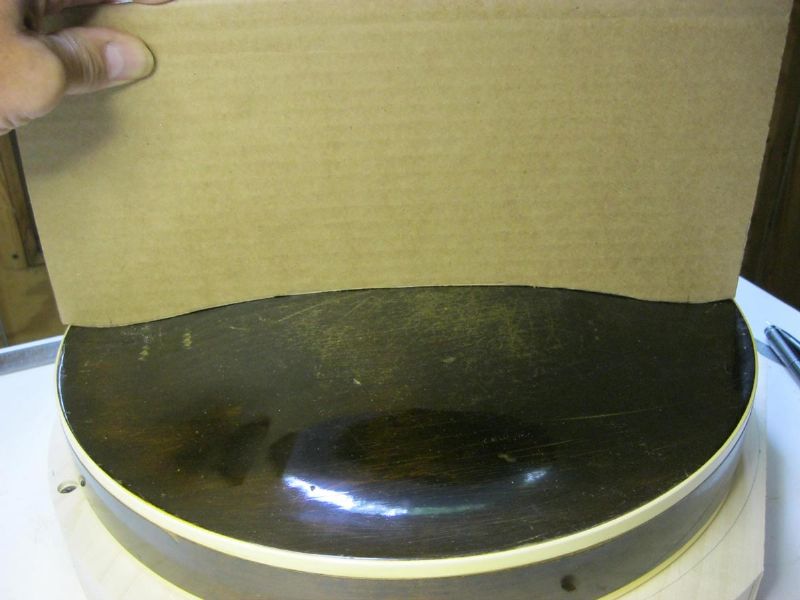
Before starting to turn the new back, I made a cardboard gauge to fit the original resonator, and used it for a guide in turning the new resonator to the original shape. Here is the gauge on the old resonator and on the newly turned one.
(It was too late to edit the above post, it was supposed to say the groove also established the depth of the cut by measurement.)
Edited by - sunburst on 05/19/2013 19:53:17
 |  |
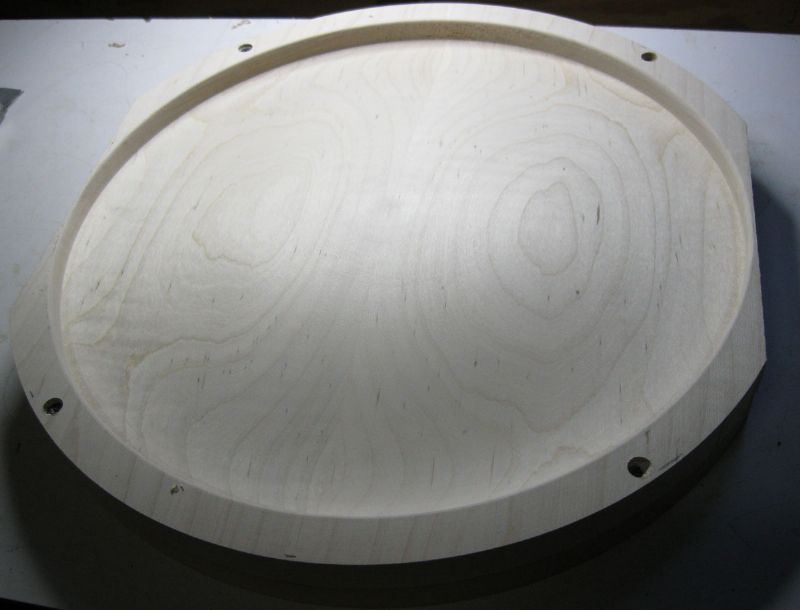
sunburst - Posted - 05/19/2013: 19:39:26
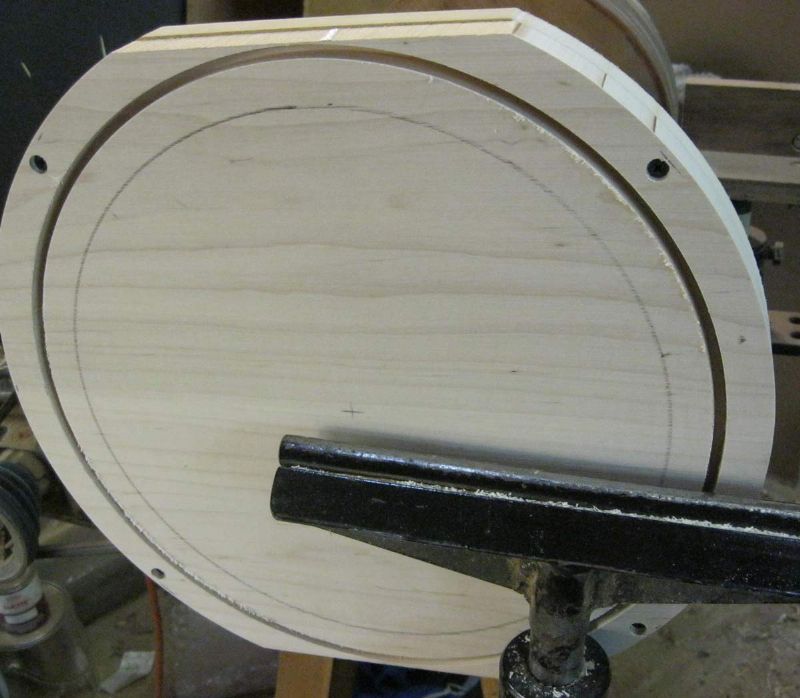
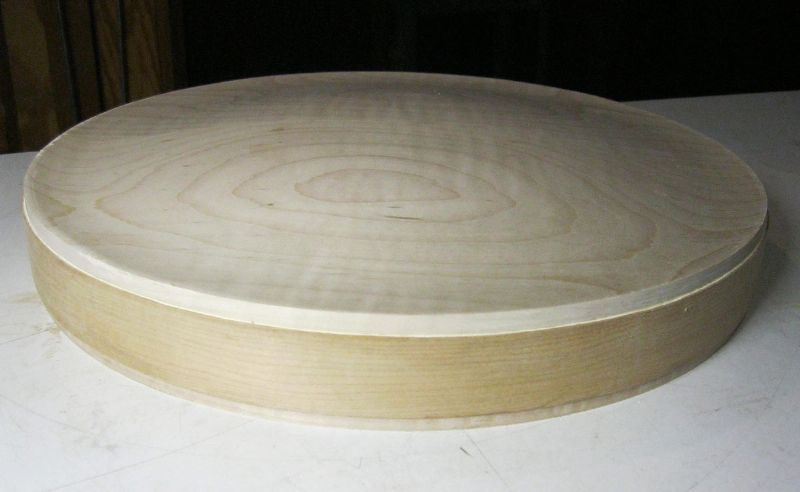
After sanding in the lathe all the way to 220 grit sandpaper, here is the new back. The contour and the thickness match the old resonator very closely.
Edited by - sunburst on 05/19/2013 19:40:03
 |
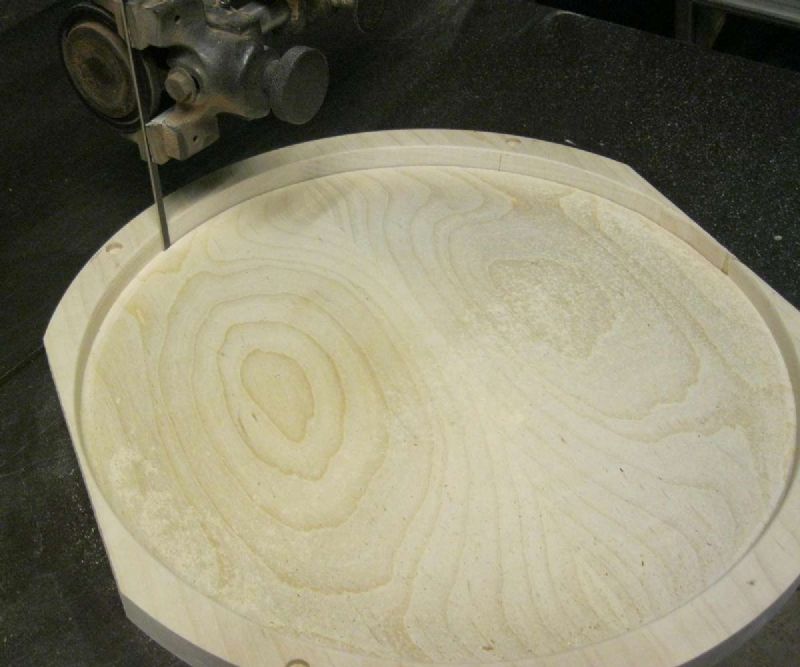
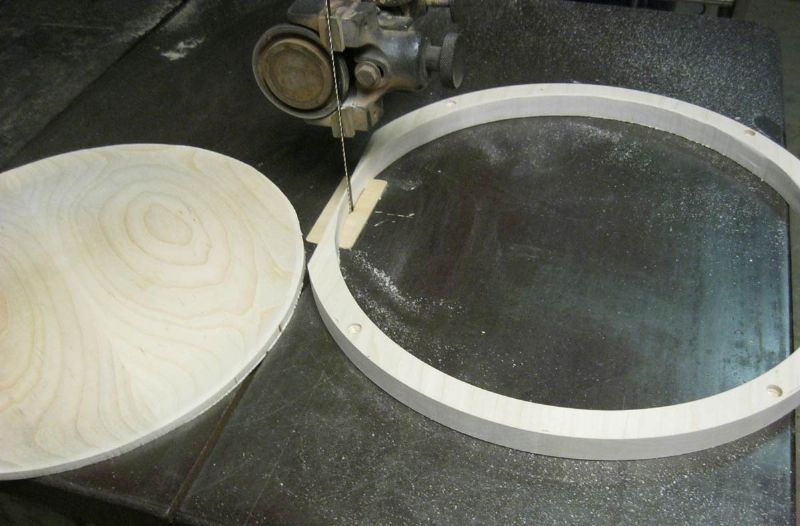
sunburst - Posted - 05/19/2013: 19:42:37
I cut away the edge wood with the bandsaw rather than parting it free on the lathe; it looked so much like a frizbee that I didn't want to see it flying across the shop from the spinning lathe!
 |  |
sunburst - Posted - 05/19/2013: 19:45:19
I've had this resonator rim for 20 years or more, and I'm finally using it. It wasn't exactly round, so I put this broken flange in it and clamped a bar clamp across it to force if round for the start of the gluing process. (I used hot hide glue for the center joint of the back and for this rim to back joint.)
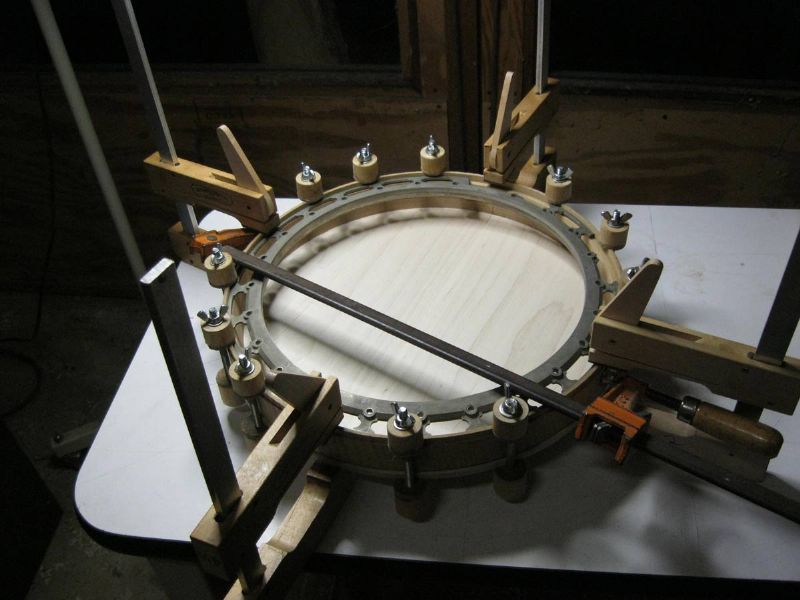 |
sunburst - Posted - 05/19/2013: 19:48:16
I applied spool clamps all the way around and removed the cam clamps and the bar clamp when they were no longer needed. (The cam clamps were to get the rim quickly clamped in place before the hide glue could start to cool, and once enough spool clamps were in place I replaced them with spool clamps for better portability.)
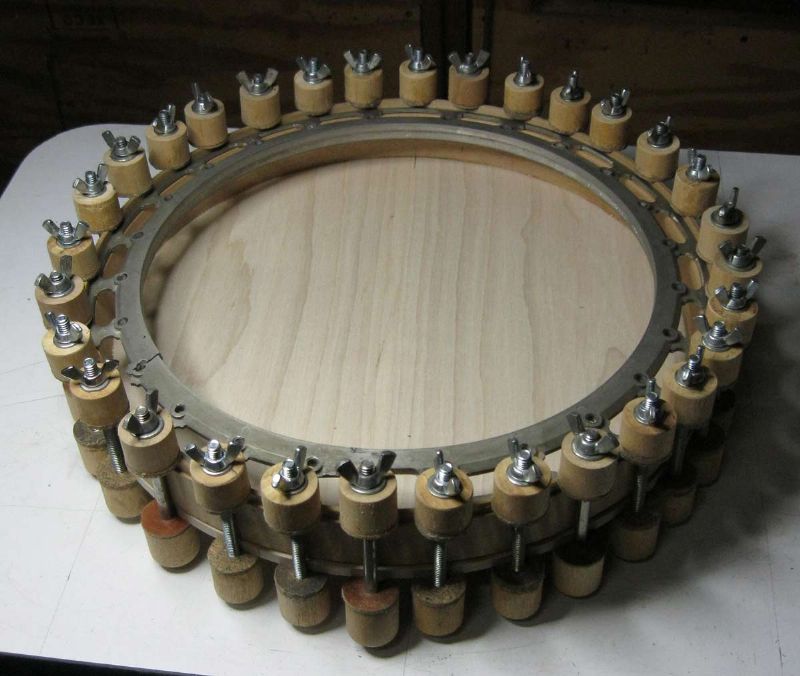 |
sunburst - Posted - 05/19/2013: 19:49:29
After the glue cures I'll remove the clams and continue work on the resonator. If there is any interest in the process I'll post more pictures of the process.
Dan Drabek - Posted - 05/19/2013: 21:16:12
I very much enjoy seeing this kind of work in progress. Every job brings with it a unique set of problems. It's always interesting to see how others solve them. So far I like the care you're taking to match the original.
DD
Ken LeVan - Posted - 05/20/2013: 05:55:50
Very nice! Thanks for sharing it.
The outer edge attachment is a great idea. It's nice to see different methods of doing things.
Was the original bottom a 2-piece solid?
How thick are you making the bottom part?
Ken
sunburst - Posted - 05/20/2013: 08:26:37
quote:
Originally posted by Ken LeVan
Very nice! Thanks for sharing it.
The outer edge attachment is a great idea. It's nice to see different methods of doing things.
Was the original bottom a 2-piece solid?
How thick are you making the bottom part?
Ken
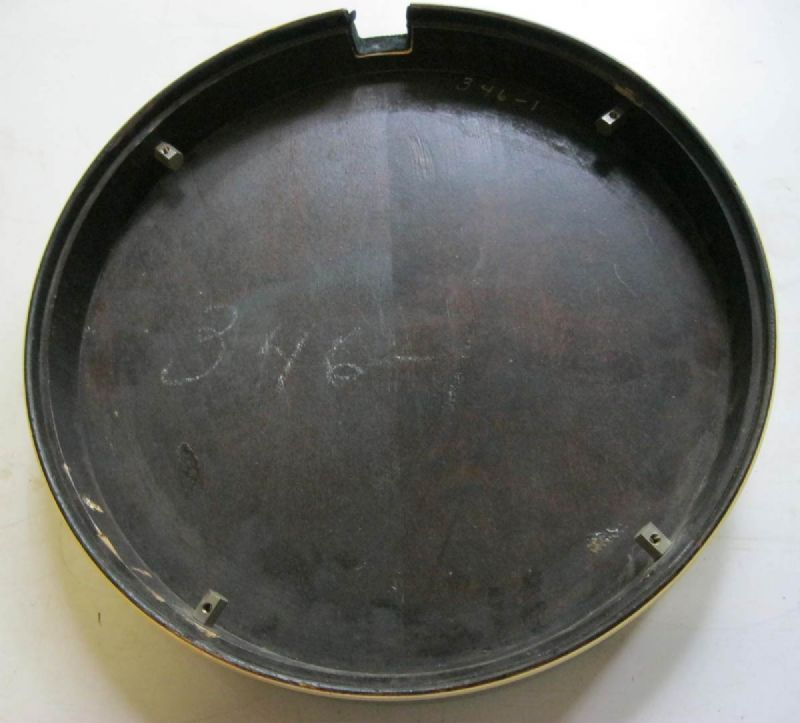
The original is two piece, the center seam should show up in the picture of the inside.
The original graduates from 20mm thick (a little over 3/4") to just under 5mm (about 3/16") at the thinnest part. My replica is very slightly over those measurements at about 20.2mm to just over 5mm.
By the way, if I had located the screw holes accurately enough (I didn't try to) I could have take the blank off of the MDF after turning the outside, flipped it over, screwed it back to the MDF and turned the inside also, but since I was making it with a flat inside the screw holes just needed to be outside the pattern.
Dave1climber - Posted - 05/20/2013: 09:20:15
Nice, yes i would like to see the rest of this project.
BNJOMAKR - Posted - 05/20/2013: 09:56:41
I use the same lathe mounting method to make my resonators, except I screw the wood onto the face plate from the back. It simplifies the mounting process!
 LB-156 |  LB-158 |  LB-159 |  LB-160 |
 LB-161 |  LB-162 |  LB-170 |  LB-172 |
 LB-173 |  LB-174 |  LB-175 |  LB-176 |
BNJOMAKR - Posted - 05/20/2013: 16:52:23
Smart idea using the flange to assure the fit during glue-up!
sunburst - Posted - 05/20/2013: 21:55:00
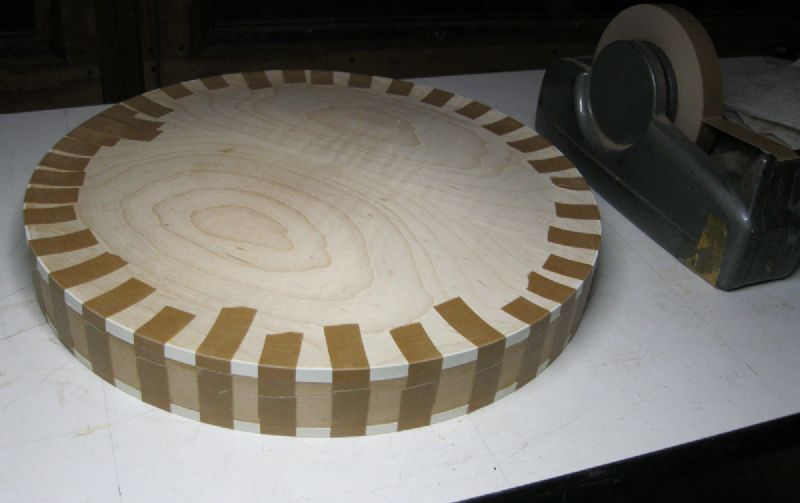
A little more progress; I cut slots for bindings and glued the white plastic bindings in place. It may be a while before I do much more to the resonator because I have to finish building the neck before I can stain and finish both parts.
 |  |
Terms of Use | Privacy Policy | Privacy Consent (EU/GDPR Only)
Copyright 2026 Banjo Hangout. All Rights Reserved.